Cetus3d 60mm blower fan Duct
myminifactory
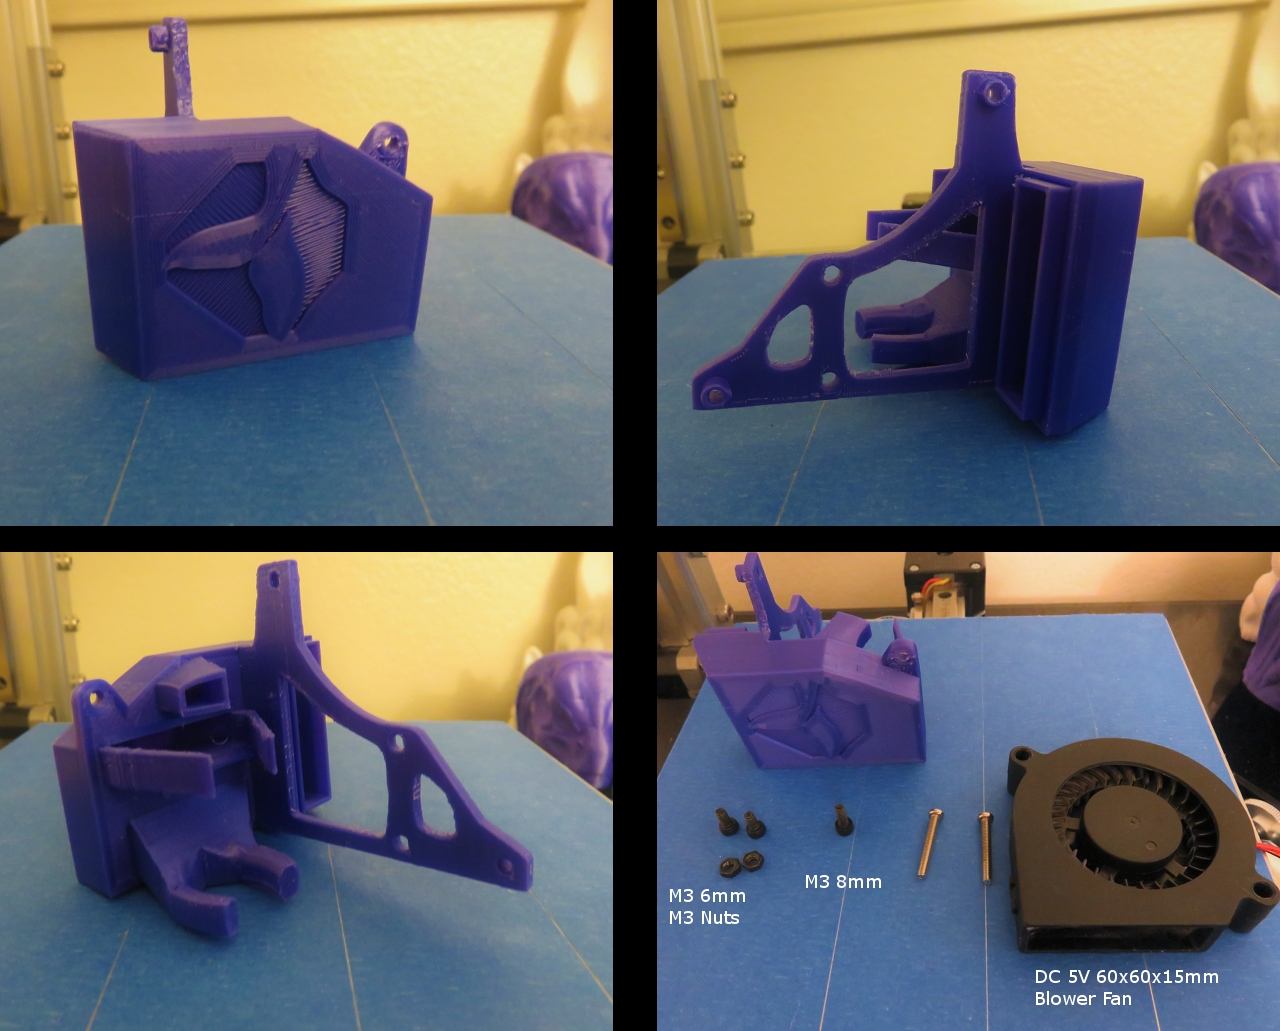
This is a high-performance cooling system designed specifically for Cetus3d printers, aiming to optimize cooling efficiency in both areas before the hot zone and beneath the nozzle. Based on available research, this solution works seamlessly with all nozzles provided by the Cetus3d printer, directing airflow precisely where it's needed. To get started: * A 60x60x15mm 5V DC blower fan is required. You can find one on Amazon at https://www.amazon.com/gp/product/B01DA1BB8K/ref=oh_aui_detailpage_o04_s00?ie=UTF8&psc=1 * Two M3 screws with nuts and one M3 screw are also needed. * Additionally, two scotchlok connectors will be required to connect the blower fan. Installation Steps: 1. Remove the existing 40mm fan and cooling duct, cleaning up any debris as necessary. 2. Either attach a new JST connector to the 60mm blower fan or repurpose the one from the 40mm fan using scotchlok connectors, ensuring you have enough wire length for the connection. 3. Slide the new cooling system into place as illustrated in the images above; removing the nozzle is not required for this step. 4. Secure the cooling duct with all three M3 screws. 5. Finally, attach the 60mm blower fan to the duct using the included screws.
With this file you will be able to print Cetus3d 60mm blower fan Duct with your 3D printer. Click on the button and save the file on your computer to work, edit or customize your design. You can also find more 3D designs for printers on Cetus3d 60mm blower fan Duct.