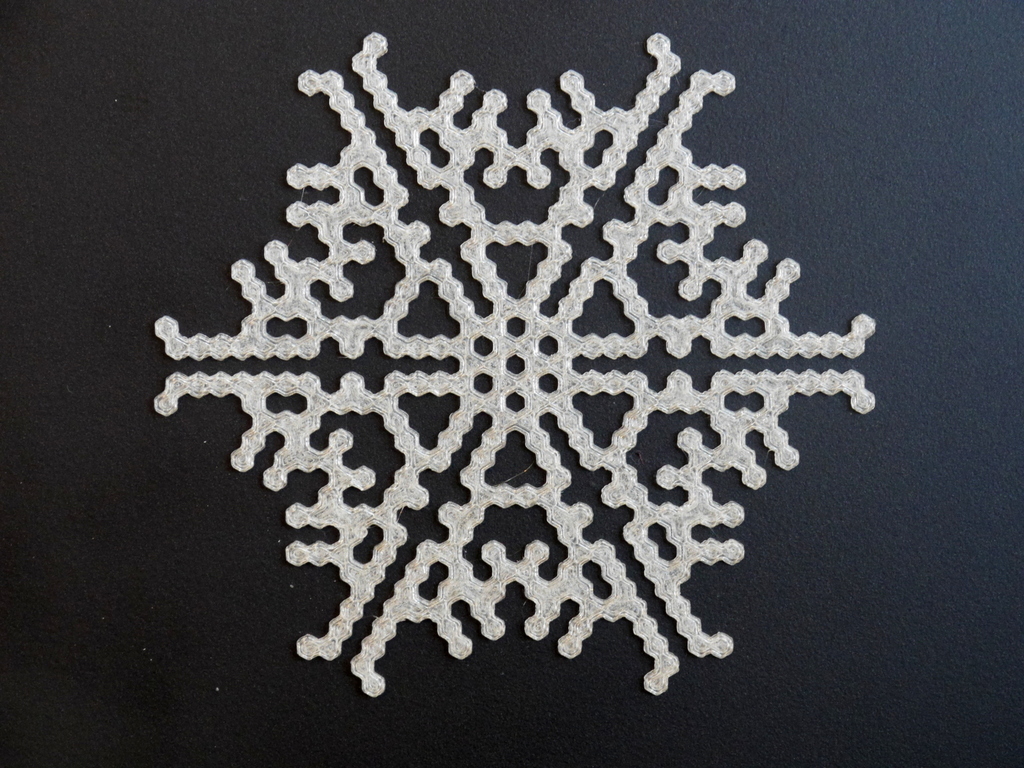
Cellular automaton BlocksCAD snowflake generator
thingiverse
This is a highly customizable and randomizable cellular automaton snowflake generator in BlocksCAD. It comes in two versions, a 20-level version (board radius up to 20) and a 40-level version that pushes the limits of BlocksCAD's abilities: it becomes sluggish but still works, and I recommend using Firefox instead of Chrome for better responsiveness. A more realistic simulation can be found [here](https://www.thingiverse.com/thing:2739465). The automaton starts by placing a live (colored) hex at the center of the board, then follows evolution rules like those in Conway's Game of Life. The default rule set is Stephen Wolfram's: a live cell survives forever, and a new cell generates when it has exactly one live neighbor. You can adjust the rule set by modifying how different numbers of live neighbors (0-6) affect survival or generation. You can also create indeterministic rules with probabilities between 0 and 1 for survival or generation in each case. In indeterministic cases, snowflake symmetry remains enforced through code. The light blue images were created using an indeterministic rule set where the only change was setting the probability of generation when there is one neighbor to 0.5, so the generation parameters are 0,0.5,0,0,0,0,0. These images appear more snowflake-like to me. Another interesting set of generation parameters is 0,0.5,0,0.1,0,0,1 (a 0.5 chance of generation with one neighbor; a 0.1 chance with three neighbors, certainty with six neighbors). You can share your favorite rule sets in the comments below. The default rule and its probabilistic variant are quite printable. Rules where all survival probabilities are 1 will produce completely connected snowflakes. If some survival probabilities are less than 1, there may be outliers. The OpenSCAD-based Customizer was generated by exporting OpenSCAD code from BlocksCAD and moving the variable definitions to the top of the file for compatibility with the Customizer. If you enable color shading (by setting different color1 and color2 settings), the color shading is based on the step during which a cell was generated. You can also turn on periodic banding for a unique color effect. Implementing a cellular automaton in BlocksCAD was challenging since it doesn't support arrays, and it's a functional language to boot. To speed up the code, the cellular automaton is only implemented on a 1/12 segment of the board, with the rest reconstructed by symmetry. The core of the code is a massive recursive `evolve` module that takes 421 arguments. The first argument counts iterations, while the remaining 420 store one cell of data each. If the iteration count reaches zero, `evolve` calls `draw(i,j,v)` for each cell by invoking it 420 times. The `evolve` module recursively calls itself with the iteration count decremented and each cell argument evolved. The evolution of the cells is done by adding up neighbor counts for each argument to see if the cell should be alive. There's a hard-coded call to a `cell` evolution function for every single one of the 420 arguments. There's also a `go` module that calls `evolve` with its 421 (radius 40 version) initial arguments: an iterations count, followed by a central 1, and then zeroes. Finally, the code linearly extrudes the output of the `go` module to make it three-dimensional. You might think I was crazy for dragging-and-dropping evolution code for every one of 420 cells in `evolve`. But I didn't – I wrote a quick-and-dirty python script (included as `blockscad.py` and `cell6.py`) that generates a subset of BlocksCAD xml code, which I used to automatically generate the giant `evolve` module that calls `cell` for each cell, and the big `go` module. The rest of the code was manually entered in BlocksCAD: the `go` module, some top-level code, the `cell` evolution function, and the `draw` module. Assembling all the code in BlocksCAD took a bit of work. Most of the manually entered code was saved to xml as a backup (included as the "hand code"). I then imported the xml file generated by python into BlocksCAD. Next, I added an extrusion wrapper around the `go` module. Finally, I made some optimizations. You can watch a video tutorial on how to use this generator [here](https://youtu.be/sJjrz4mL5aA).
With this file you will be able to print Cellular automaton BlocksCAD snowflake generator with your 3D printer. Click on the button and save the file on your computer to work, edit or customize your design. You can also find more 3D designs for printers on Cellular automaton BlocksCAD snowflake generator.
