Catan mold objects
prusaprinters
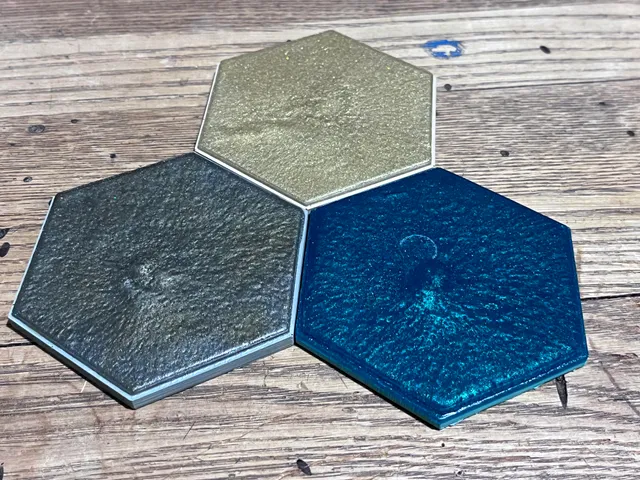
These are models used to create molds for casting Catan hexes. They are not printable hexes, nor are they printable molds. To use these models, you must print the models, create molds, then cast those molds.For the molds I used Smooth-On Mold Star (platinum-cure silicone rubber) and OOMOO (tin-cure silicone rubber). For the casts I used Smooth-On Smooth-Cast 300 and 325 (fast cure, low viscosity polyurethane). For color, I used Smooth-On SO-Strong colorants and colored mica powders.Mold Star and OOMOO perform great. OOMOO is a bit easier to work with, while Mold Star is more robust once cured, but that isn't terribly important for these molds. Smooth-Cast works great, though 300/325 cures pretty fast. 326 and 327 cure slower, but I got better results with 325.If you want a glossy finish on the top, I recommend creating an acrylic hex. I cut a hexagon out of 3mm acrylic, glued it to the top of the “Hex bottom” print, glued that to the bottom of “Mold box”, and made a mold. Alternatively, if you have access to a CNC mill, you could mill “Hex” out of ¼" acrylic. Or if you have the patience, you could print “Hex” and polish the top. I tried that but I'm not terribly patient and I never got results I was satisfied with.These models are designed to support embedding magnets in the hexes. The mold created from “Ring mold” has 12 slots (2 per side) for 1/10" diameter, 1/16" thick neodymium magnets. I recommend DH11 from K&J Magnetics. N35 magnets would probably work, but I recommend N42 or higher. A full set of hexes requires 37*12 = 444 magnets. Buy more because you'll probably lose some. The magnets must be inserted into the mold consistently, and in alternating polarity. Otherwise the hexes will not properly attach to each other. Looking at one edge of the ring mold, the left and right magnets should be inserted north-out and south-out or vice versa. The magnets must be inserted in the same orientations for every side of every hex.To create a non-magnetic hex:Mix up some resinColor it with dye and/or mica, or whateverPour it into the mold until it reaches the topTo create a magnetic hex:Place 12 magnets into the ring moldMix up (and color) some resin and pour it inWait 30 minutesDemold the ring, flip it upside-down, insert it into the hex mold, and press it down until it is resting against the ridgeWait 10 minutesMix up and pour more resin, being careful to make sure there are no bubbles under the ringThe ring has a small amount of resin, so it takes longer to cure. You can demold it earlier (after 10-15 minutes) but if you do so you should let it sit on a flat surface for 10-15 minutes until it hardens. The full hex cures much faster.If I recall correctly, the full hex is 35 or 40 ml and the ring is 10 ml. I split the second pour into two steps so I could create layers with different colors. When doing multiple pours on top of each other, you must wait 5-10 minutes in between. Too soon and the layers will mix. Too late and the layers will not adhere to each other.I like having a very flat bottom. To achieve this, I place a piece of acrylic and a small paperweight on top of the mold after the last pour. I cut channels in the walls of the mold to allow excess resin to escape. I had issues with the resin sticking to the acrylic so I started adding a layer of parchment or wax paper under the acrylic. I also used acrylic plus paper when casting the magnet rings.Smooth-Cast is sufficiently low-viscosity that it should not need to be degassed, and it cures fast enough to make that impractical. Humidity and temperature can be a problem. I had a lot of issues until I started storing the resin components on ice in an ice chest until right before mixing them.
With this file you will be able to print Catan mold objects with your 3D printer. Click on the button and save the file on your computer to work, edit or customize your design. You can also find more 3D designs for printers on Catan mold objects.
