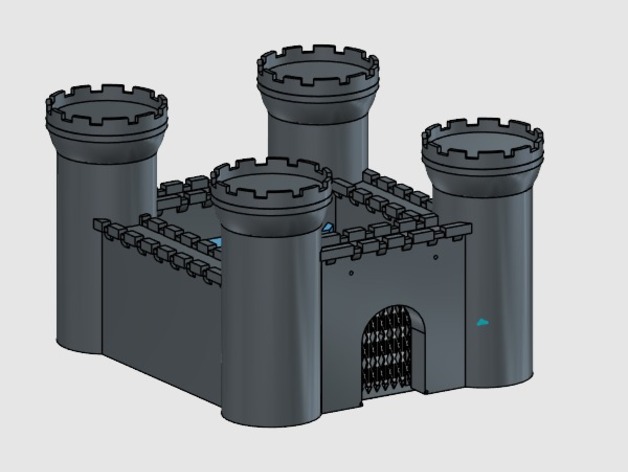
Castle w/ working drawbridge
thingiverse
Message from me Wow, I'm completely blown away that people have caught on so quickly! Right now, I'm working diligently on a file for the actual bridge itself. For now, let's hold off on printing until I can get this done! This is my first truly impressive 3D project, and I've been putting in long hours since yesterday despite being sick. The middle building on my laptop has taken forever to process so it may take longer than expected. As soon as I'm done with the current contest, you can expect regular updates from me! For now though, I want to address one thing that's giving me some pause – the hole size of the spool. If this ends up being an issue, let me know right away so I can take a break and fix it pronto! How-to instructions: The drawbridge will be mounted on top of the ironclad gate. As the bridge drops, this will open it right up. To assemble after print, just click the 'Instructions' tab below for a comprehensive guide Tasks: - Battlements - Ironclad Gate - place it inside a hollow cavity with tethered holes to attach drawbridge - Basic drawbridge - Inner Building - start from scratch! - Basic Structure - Ramparts - Door - Stone overlay - Brick Textures - Test print - Build spool for attaching chain/thread for spool mechanism - Create a Mount - Make nut/path for locking spool onto mount - Improve the locking mechanism - Optional cannons - Add cannons Instructions To assemble: Print the castle and drawbridge separately with moderate pressure on both. First time setup: - Follow all instructions below Everytime thereafter simply wind up the spool then activate the lock Close Bridge: Release lock to close - Push locking mechanism into spool - Fix spool onto fixture, followed by handle - Screw nut firmly into place (for mounting) - Pop drawbridge in position - Even halves together (to assemble) To wind spool clockwise is standard. Wire and attach wire: Lead thread through holes at far end of the bridge Even halves of the drawbridge roughly. Lead thread thru aperture on the front of castle (right side), from that you'll lead thread to upper portion, drawbridge (then top) Guide gently out with help of the curved ceiling Tie it up firmly! Spool Details: Slide spool into a fixture located on the left-hand battlements of the front wall Print the Spool Print the nut. Attach this part until securely firm Left half: Follow same steps, except tie off at the spool Method for rewinding to yet to be decided. If you have any suggestions I'd really appreciate it.
With this file you will be able to print Castle w/ working drawbridge with your 3D printer. Click on the button and save the file on your computer to work, edit or customize your design. You can also find more 3D designs for printers on Castle w/ working drawbridge.
