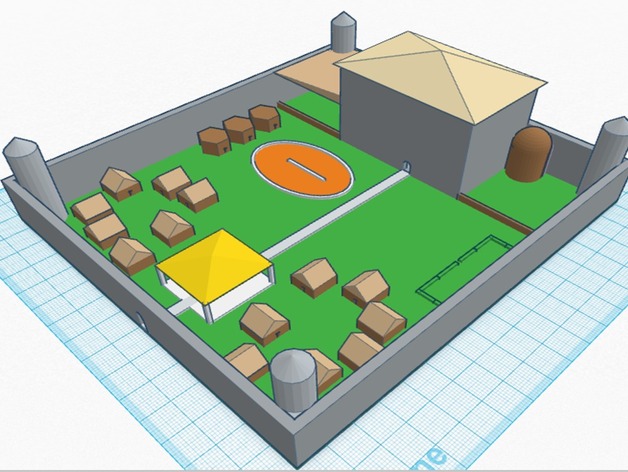
Castle Creation
thingiverse
This creation is a sample lesson in free creation. Students will have the challenge of creating a castle that will be imported into Minecraft. Note: 1mm = 1 block (1m^3). Make it large! Print Settings Printer: Minecraft Rafts: Doesn't Matter Supports: Doesn't Matter Resolution: 1mm = 1block Infill: nil Notes: Using Tinkercad to import this Thing into MCEdit into Minecraft. How I Designed This Ideas When my bosses first asked me what I would teach our elementary students, I wondered how to proceed. We decided that a more open-ended curriculum would be better for our students. Since every student plays Minecraft, I felt that a great way to teach the visualization of a 3D creation would be to use MCEdit and Minecraft to show concepts. Custom Section Project: Castle Creations Project: Castle Creations Overview & Background: This project is for elementary school students to begin understanding 3D Design. This summer, I was tasked with teaching kinder through sixth grade a basic understanding of computer and design. Students should have some classroom education prior to starting (We did 10 hours of Project Ignite/Tinkercad lessons first). Objectives: The objective of this project is for students to understand how to visualize 3D objects. Audiences: The intended audience for this project is elementary school students and above. This project assumes prior experience. We have already worked with our students for a minimum of 10 classroom hours prior to the start of this project. Subjects: While this project is centered around 3D Design learning, the concepts of history could be applied in terms of creating historical castles, and the concepts of engineering could be applied in terms of creating castles that suit the needs of a settlement (Students should be given minimum and maximum parameters for their creation). Skills Learned (Standards): The main skill to be taught is visualization. Students should have a prior understanding of the basic mechanics of how to create with Tinkercad. Duration: The duration of the project would be around 30 minutes in instruction, and 2-3 hours of creation time. I advise pausing in between to allow time for students to ponder and create ideas to use. We used five half-hour segments. After the creation of the castles, there should be time allotted to play Minecraft for students to see how what they made transfers into their world. Staff will need to create the server with Minecraft and post-edit the server with MCEdit. This will take around 3-5 minutes per student. Allow for that time. Lesson/Activity: Students will be given the following guidelines for creation of their castle: Castles must be a minimum of 100mm x 100mm with a maximum size of 250mm x 250mm. Castles must include an entry gate, a central castle, fortifications (rooks), and a military sector. Optional areas include but are not limited to a marketplace, a pasture, a garden, housing, fountains, material, and artisan fabrication. These sectors can be inside or outside the castle walls. Castles must be using the scale of 1mm = 1 Minecraft block (1m^3). Castles must be straight lines. Minecraft does not form curves well. Rubric & Assessment: Students should be graded on participation. Because this is an open-ended project, there is no grading scale. #MakerEdChallenge2 #MathProject #ArtProject #DesignProject #3DEducationProject
With this file you will be able to print Castle Creation with your 3D printer. Click on the button and save the file on your computer to work, edit or customize your design. You can also find more 3D designs for printers on Castle Creation.
