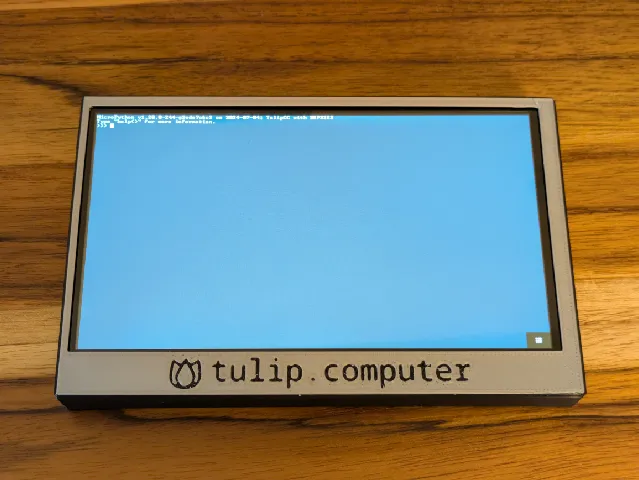
Case for Tulip Creative Computer
prusaprinters
A case for the Tulip Creative Computer - more information at https://tulip.computer.Please read the instructions below before printing/assembling!The top half is a snap fit, the bottom half screws into the base, but the acrylic panel must be removed. Space has been left for the recommended lithium ion battery pack plus some extra (because I used thick double sided tape). Single letter labels have been added above the USB and TRS ports. The reset and boot buttons are available through two flexible tabs. The top half has two versions, one with the name and logo, and one plain. The name version is well suited to a color change at 0.6mm.There are vents on the back over the ESP32 and the battery area, although I've never had mine get particularly warm, even when charging - and certainly hot enough to do anything to the PLA. Your mileage may vary.Note that the tolerances are fairly tight to ensure the top doesn't move around too much. DO NOT FORCE ANYTHING INTO PLACE! I am not responsible for any damage to your Tulip (and would be sad to hear of it happening).Printing / Assembly InstructionsThis has been designed to be printed at 0.2mm layer height, with small built-in supports where needed. It will probably not print correctly at any other layer height! This fits on the bed of a Prusa MINI (one half at a time).Print one top, one bottom of your choice, and one switch. Clean up any strings and blobs, especially under the overhang corners on the top half. Remove the tiny support tab from the bottom of the switch, and make sure the hole is not filled with strings or blobs. Remove the screw hole supports from the bottom half - I use a small screwdriver and press from the top on something soft (like a rug). On the “back” rim of the top piece, there are two tabs used to press the reset and boot buttons - gently push on them to make sure they move slightly back and forth, but don't snap them off!Put the switch piece onto the board's power switch, with the ridge facing up. The ridge should let it sit fairly flat. Set the top piece upside down with the overhang corners facing away from you, and gently slide the tulip screen side down into the top at a slight angle. Don't force it! If there is resistance, make sure there are no strings or bits of filament in the corners. Once the screen is slid in, press it down and past the little tabs on the close side of the top.If you haven't already, unscrew and remove the acrylic back, but keep the screws nearby. This would be a good time to connect a battery if you haven't already. If you do, you will need tape or something to keep it attached; this case will not keep it in place. The bottom of the case should set right onto the other half, and the mating tabs should keep everything aligned. Insert the screws in the four holes (that you have already removed the supports from), and done!There are four more little circles on the bottom; those can be removed to put on 6mm diameter rubber feet.Issues / TODOThere is a hole for the Grove/Mabee port, but no space allowed for unlatching the connector.There is still a little wiggle room in the close part of the top half, which may just be a printing issue.The top edge of the top bows out away from the screen slightly, which again may be a printing issue.The USB ports are inset slightly, although every cable I have tried fits fine.
With this file you will be able to print Case for Tulip Creative Computer with your 3D printer. Click on the button and save the file on your computer to work, edit or customize your design. You can also find more 3D designs for printers on Case for Tulip Creative Computer.
