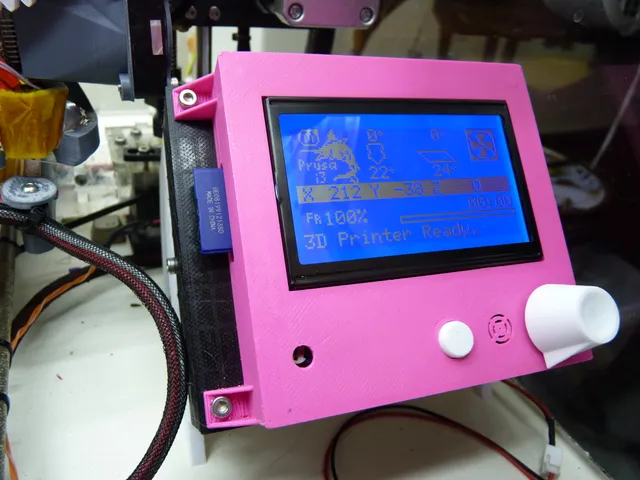
Case/enclosure for SKR and RRD 12864 Display
prusaprinters
This is a basic case/enclosure for BigTreeTech/BIQU LPC176x-based SKR controller board (v1.1 through v1.4, at least), with the ever-popular RepRap Discount Full-Graphic 12864 LCD mounted up front.It is basically a mash-up of three projects I found on Thingiverse:RepRapDiscount Full Graphic Smart Controller Case by mightynozzleSKR v1.1 and SKR V1.3 ENDER 3 CASE _ Ender 3 PRO by nicewikLCD 12864 Case and Holder for acrylic frame or other 6/8mm box frame by 3ed_deTo put it mildly, I put everything in a blender... no, not that kind, I mean the modeling program. :-)The reset button is the only object that's basically unchanged from the original (just did some basic "limited dissolve" to simplify its mesh, as with all the other parts).The enclosure uses an 80 mm fan for cooling, and has enough room inside to allow for really tall driver module heat sinks, such as those found on most TMC-series drivers.If you print over USB, you will likely want to use a cable or adapter with an "upwards" 90° angle on its type-B end, such as this Amazon listing, as that will protect the SKR's connector from excess bending force, and will point the cable towards the back of the enclosure (you could throw a zip tie through a couple of the vent holes to further secure the cable). "Left" angled cables/adapters will work, too.Vitamins:2 M3 x 8 mm screws12 M3 x 6-10 mm screws4 M3 x 10-11 mm screws6 M3 nuts4, 4 mm or longer "case fan" screws (those fat screws most commonly used to mount fans inside a PC case).Print instructionsInitial notes:PLA is not recommended for this model, as stuff may run too hot for that material, particularly if you'll be using this inside an enclosure. Use PETG for best results. Besides, it's glossier than PLA. :-)All parts are already oriented correctly for printing and none require support material.You can flip it front-face-up if you want, if your print surface would leave unsightly blemishes on the print, for example, but it'll require support material if you do.0.2 mm is sufficient for all parts, though you may want to print the knob at a much finer layer height, perhaps 0.1 mm or less (I went with 0.08 mm), for the sake of a nice-looking curve to its concave front surface.AssemblyUse your X-Acto knife or a suitable drill to clear out the bridging layer over the holes in the LCD frame's four mounting tabs.Press four M3 nuts into their traps in the back-inside of the case front, and press two more into their traps in the tabs on either side of the case back. I recommend adding a droplet of Krazy Glue to each, though you can get by without it.Add the U-shaped support object between the 12864 display's two circuit boards. There's a small cutout on one side, make sure it's to the left, facing forward.Place the button in its hole in the LCD frame, and use four M3 x 10-11 mm screws to mount the LCD assembly to the back-inside of the frame, making sure they pass through the holes in that U-shaped support object, then add the display's control knob. Be careful not to strip-out the mounting posts' threads.Set the LCD/frame assembly aside.Mark the LCD's cables at both ends to identify EXP1 and EXP2, and connect them to your SKR board.Pass the LCD cables through the big hole in the front side of the front case half, then use four M3 x 6-10 screws to mount the SKR board into the case front. Be careful not to strip-out the threads.Connect the LCD cables to the LCD, then use four M3 x 6-10 mm screws to fasten the LCD frame to the case front.Mount an 80 mm fan to the back-inside of the case back half. Make sure it's pointed properly, blowing into the case.Pass the cables/wires from your power supply, heaters, motors, switches, etc. through the round-ended hole in the case back, and connect them to the SKR as appropriate. Depending how stiff of thick they are, you may find it necessary to temporarily remove the SKR from the enclosure to get the power wires connected. Note in the photo below that I have "splitters" in place for my fans, sensor power, and Z motors, as needed by my setup.Connect the fan to the SKR, join the back case half with the front half (there are tabs and studs to align it properly), and fasten the two together with M3 x 8 mm screws.CreditsThe Blender work file contains a number of extras, used only for modeling purposes:The 12864 LCD module is from (https://www.thingiverse.com/thing:855134 with some details added by me)The 80 mm fan is from https://www.thingiverse.com/thing:3383928The TMC2208 driver from https://www.thingiverse.com/thing:3652117The model of the SKR board used in the .blend came from https://www.thingiverse.com/thing:3701191.Models have been colorized and modified by me, as needed (e.g. the LCD was lacking some detail, and the positions of the driver module headers were wrong on the SKR)
With this file you will be able to print Case/enclosure for SKR and RRD 12864 Display with your 3D printer. Click on the button and save the file on your computer to work, edit or customize your design. You can also find more 3D designs for printers on Case/enclosure for SKR and RRD 12864 Display.
