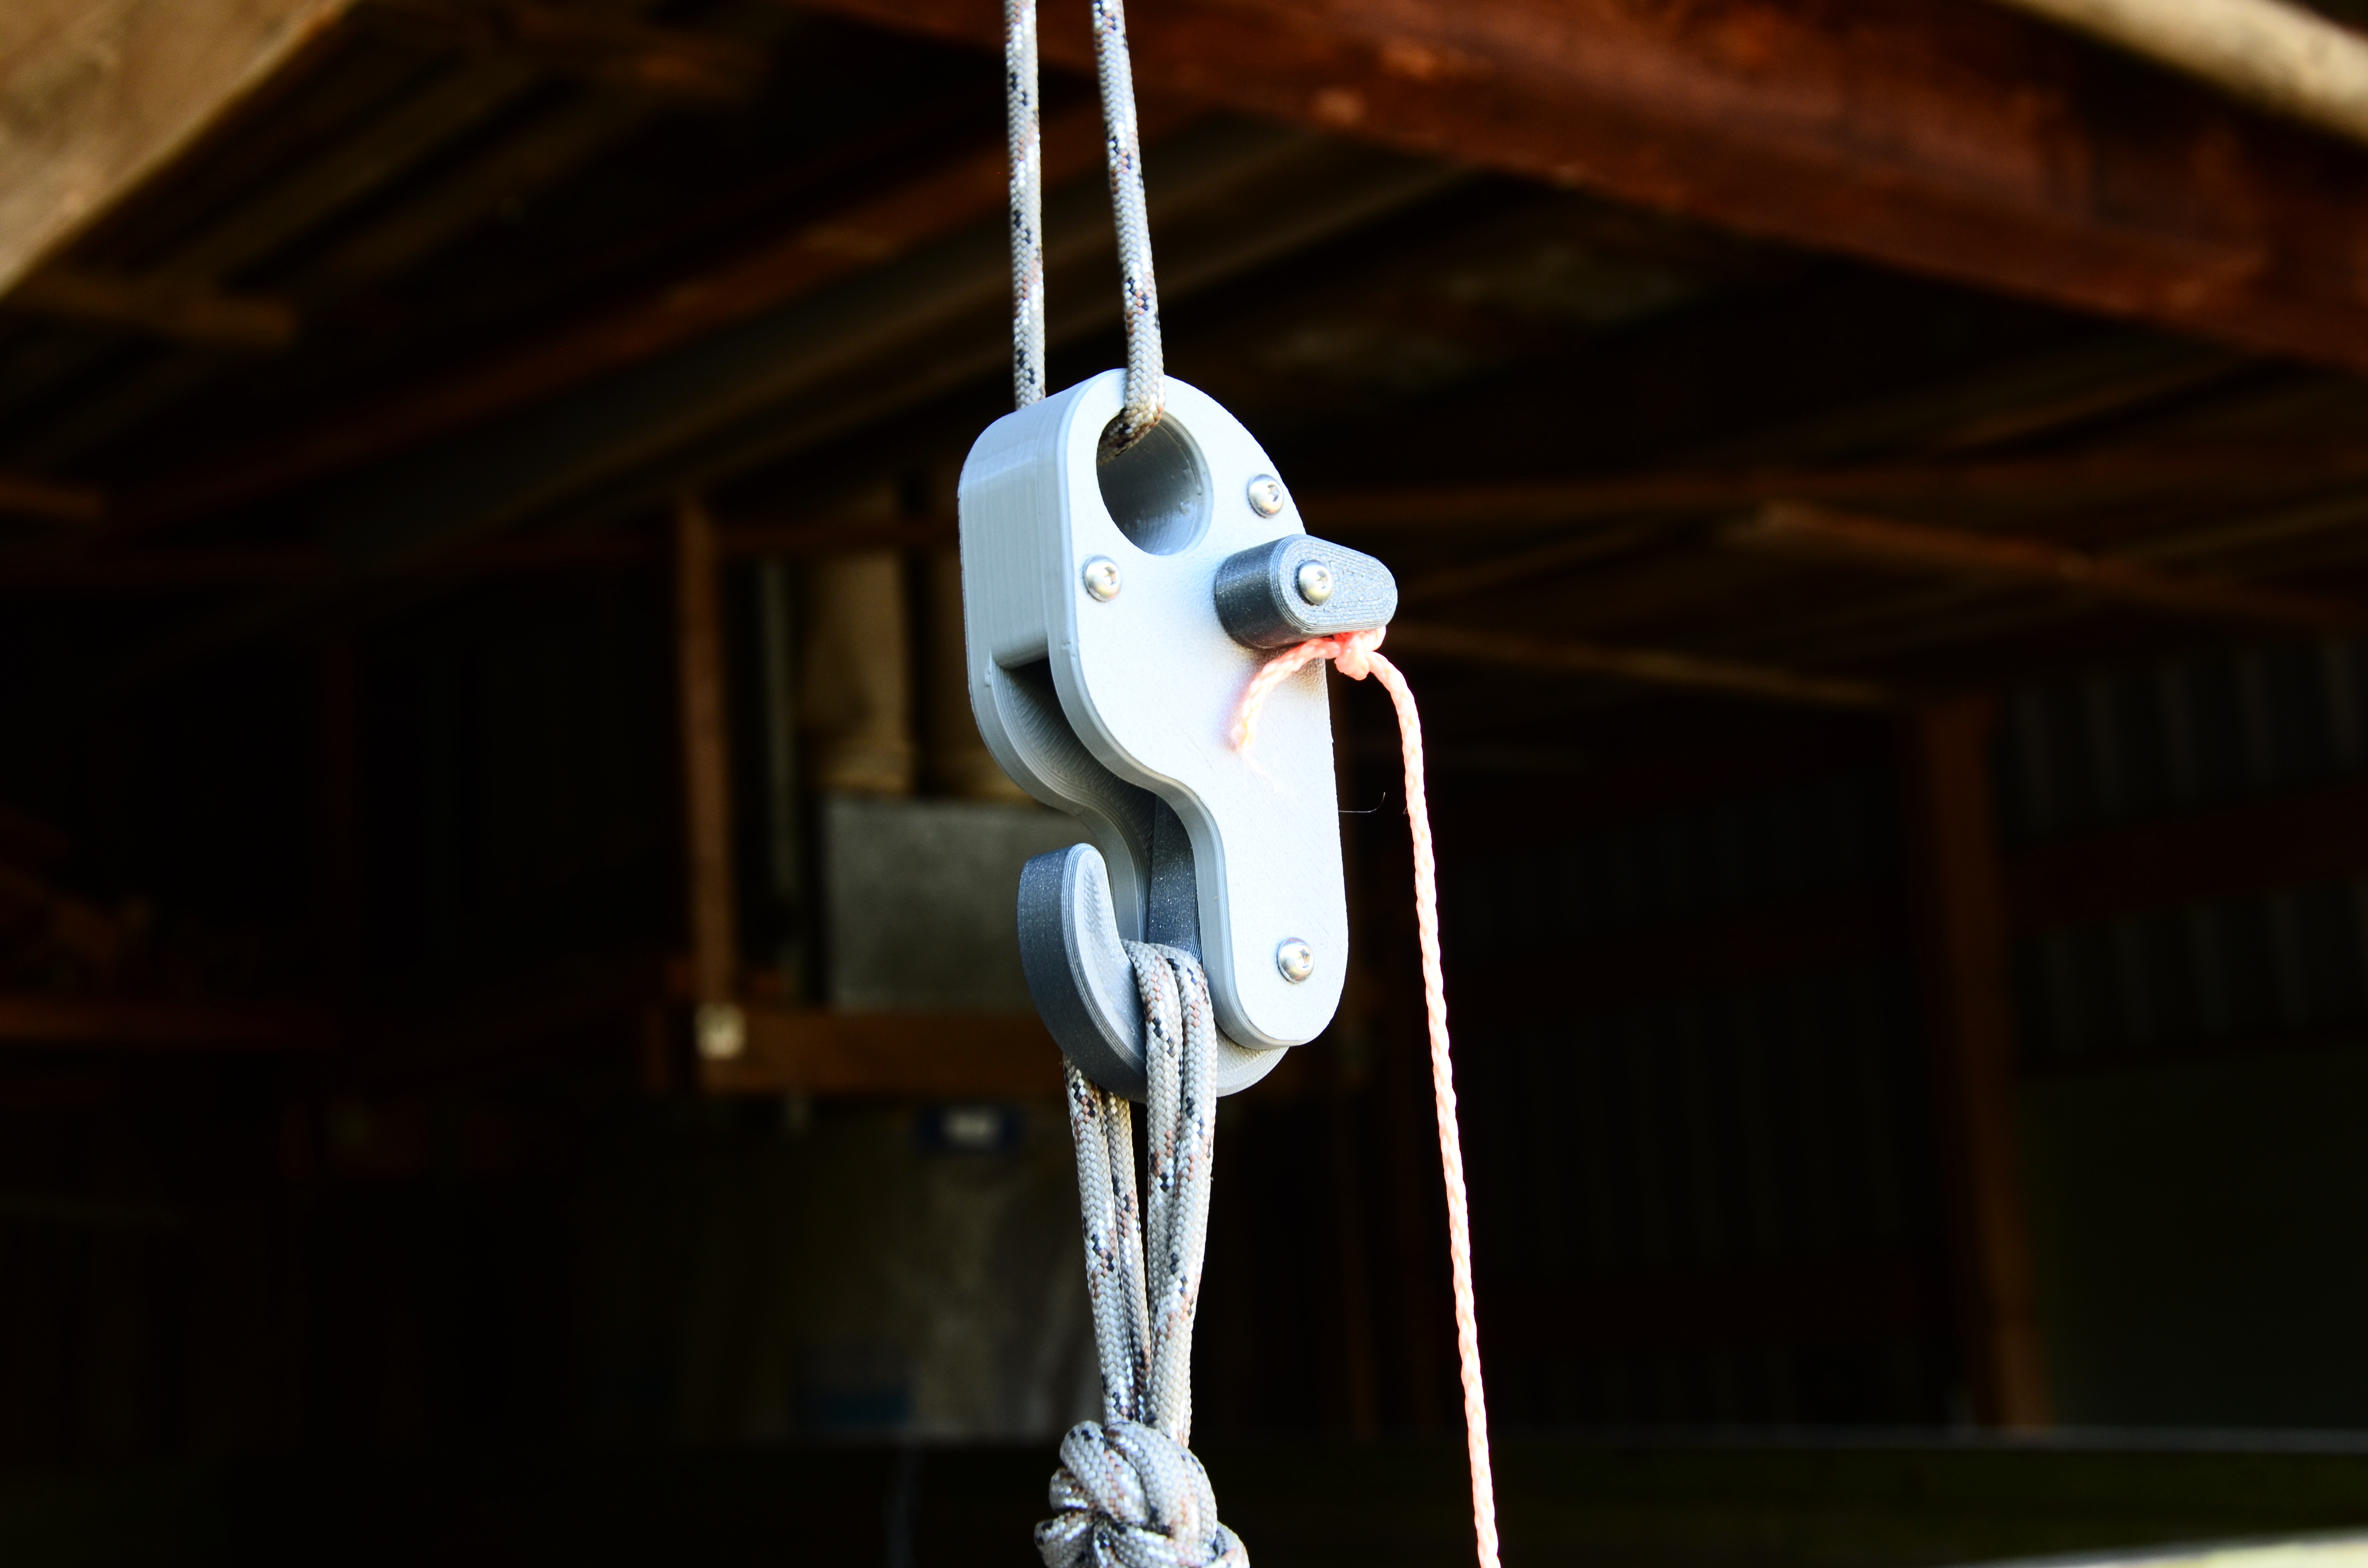
Cargo hook with quick release
prusaprinters
<p>This hook releases its load if you turn the little lever on the side. The force you need for this is independent from the load wight. If you attach a smaller rope to it, you can trigger it from a remote position or from the ground. Depending on your use case</p><p>It is designed for continous loading and releasing wights of 15kg</p><p>You can attach the lever in two ways. By this you can choose if the hook stays in place after releasing the load or if it has to come down with it.</p><p><strong>ASSEMBLY:</strong></p><p>You need glue or 4xM3 bolts for assembly. Choose a lenght from 15-18mm. If you have no screws at hand just ad some glue to the conecting faces. For this matter you´ll also find a version without screw holes for download. That one is intended to be assembled with glue only</p><p>1.Guide the Axle trough Body_A <br> </p><figure class="image image-style-align-center image_resized" style="width:69.73%;"><img src="https://media.printables.com/media/prints/295782/rich_content/59e8f817-8856-4bc5-a100-6ed63f509917/dsc_0001.jpg#%7B%22uuid%22%3A%2294d312d0-8ca7-49b2-bd25-b7302e7a1f81%22%2C%22w%22%3A4928%2C%22h%22%3A3264%7D"></figure><p>2. Fit the Hook on its pivot point on Body_A<br> </p><figure class="image image-style-align-center image_resized" style="width:70%;"><img src="https://media.printables.com/media/prints/295782/rich_content/e62bbfce-b719-4c71-86d9-18e3196f5600/dsc_0003.jpg#%7B%22uuid%22%3A%223a7be23c-15bb-4910-85c4-6fefccbb6ec6%22%2C%22w%22%3A4928%2C%22h%22%3A3264%7D"></figure><p>3. Turn Axle 90° anti clock wise (left)<br> </p><figure class="image image-style-align-center image_resized" style="width:68.64%;"><img src="https://media.printables.com/media/prints/295782/rich_content/9a6cb464-18fc-45c3-99d5-79e7be0de3eb/dsc_0004.jpg#%7B%22uuid%22%3A%2200ec85af-9289-4093-a9c0-2c430bb57836%22%2C%22w%22%3A4928%2C%22h%22%3A3264%7D"></figure><p>4. Cover Body_A with Body_B<br> </p><figure class="image image-style-align-center image_resized" style="width:68.1%;"><img src="https://media.printables.com/media/prints/295782/rich_content/9f375eb3-43c7-4a89-aa32-5d98974faa27/dsc_0007.jpg#%7B%22uuid%22%3A%22b61362ba-39de-4af2-83c4-d60b71848b56%22%2C%22w%22%3A4928%2C%22h%22%3A3264%7D"></figure><p>5. VARIANT A: If you want the hook to come with the load after releasing, fit the leaver facing towards mooring eye<br> </p><figure class="image image-style-align-center image_resized" style="width:67.28%;"><img src="https://media.printables.com/media/prints/295782/rich_content/65ab38c3-68c6-44c8-be40-9982b33271b8/dsc_0008.jpg#%7B%22uuid%22%3A%22b84e80fc-428b-47a4-b256-9fda07791b2e%22%2C%22w%22%3A4928%2C%22h%22%3A3264%7D"></figure><p>6. VARIANT B: If the hook has to stay where it is after releasing, fit the lever facing “away” from the hook.<br> </p><figure class="image image-style-align-center image_resized" style="width:68.1%;"><img src="https://media.printables.com/media/prints/295782/rich_content/6225d6a5-1726-4901-95b3-c62e5ea36bcb/dsc_0010.jpg#%7B%22uuid%22%3A%221c0dcd19-03d1-437c-9a39-083e941e2763%22%2C%22w%22%3A4928%2C%22h%22%3A3264%7D"></figure><p>7. Insert and tighten bolts. Begin with bolt troug lever and axle.</p><p><strong>NOTE: </strong></p><p>Did some testing, regarding the maximum load. I left it hanging wighted with some bricks. The bricks allone clocked in with around 50kg and after 15min hanging time, the hook showed no signs of fatique.</p><figure class="image"><img src="https://media.printables.com/media/prints/295782/rich_content/950460f2-7c83-4619-86b2-3df74b844aa9/dsc_0048.jpg#%7B%22uuid%22%3A%22e924a651-8c22-46a7-90cb-8734ee4f32f0%22%2C%22w%22%3A4928%2C%22h%22%3A3264%7D"></figure><p> </p><p>BUT after triggering, the violent release of tension cracked the hooks main body. </p><figure class="image"><img src="https://media.printables.com/media/prints/295782/rich_content/441e74af-e2c4-4502-831d-1e87caca11f5/dsc_0052.jpg#%7B%22uuid%22%3A%22c051e984-06f4-4232-836d-65f4d43679d1%22%2C%22w%22%3A4928%2C%22h%22%3A3264%7D"></figure><p>Amazingly the trigger mechanism and the hook where still in pristine condition. Like you can see, i didnt go crazy with infill and perimeters. Additionally it was printed just out of PLA. you might get even bigger strenght with more perimeters or other materials</p><figure class="image"><img src="https://media.printables.com/media/prints/295782/rich_content/5a3046cb-4248-421d-b28b-ae559c48d8f4/dsc_0001.jpg#%7B%22uuid%22%3A%22a505749a-998a-440e-bb35-d1fd82593ed2%22%2C%22w%22%3A4928%2C%22h%22%3A3264%7D"></figure><p> </p><p><strong>WARNING:</strong></p><p>This hook is designed with mooring and releasing some light wight gear in mind. DO NOT use it for climbing or in cases where human well beeing is in jeopardy if the hook is used (or any well beeing for that matter)</p><p> </p>
With this file you will be able to print Cargo hook with quick release with your 3D printer. Click on the button and save the file on your computer to work, edit or customize your design. You can also find more 3D designs for printers on Cargo hook with quick release.
