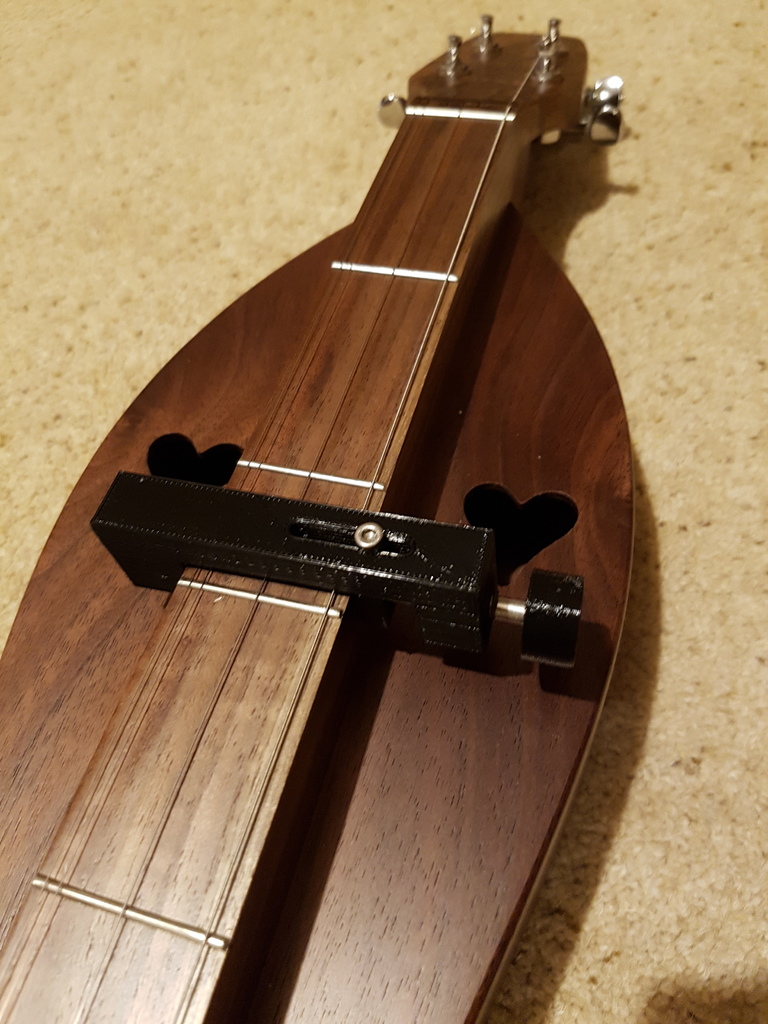
Capo and Noter for Appalachian Dulcimer
thingiverse
CAPO: The essential vitamins are a M5x35 bolt, an M3x15 bolt, and an M5 nut. The capo does not require printed supports. To attach the M5 Bolt to the turning knob, heat it with a heat gun until the PLA just melts, then push it onto the head of the bolt. If you're using a round-headed hex bolt like I did, cut some grooves into the head with a hacksaw so the plastic grips tightly. Assembly is straightforward as per the diagram. You might need to cover the parts that touch the dulcimer with thin, soft plastic. I used shrink wrap attached with 3M double-sided tape. When using, ensure the knob side is at the bass drone string side of the fretboard. Tighten the knob while pushing the capo down over the frets, then push it home when tight. Avoid having it too close to the fret - about 10mm behind is ideal. I've included 123DX files for editing dimensions or design if desired. Note: On a dulcimer, you cannot use the capo on all frets like a guitar; adjustments are necessary. NOTER: The noter requires printed supports. I chose to print mine in wood; feel free to do the same. The 123DX file is included for length or diameter modifications. An oblique face on the noter allows individual drone string noting - delete this feature if undesired and adjust the peg accordingly.
With this file you will be able to print Capo and Noter for Appalachian Dulcimer with your 3D printer. Click on the button and save the file on your computer to work, edit or customize your design. You can also find more 3D designs for printers on Capo and Noter for Appalachian Dulcimer.
