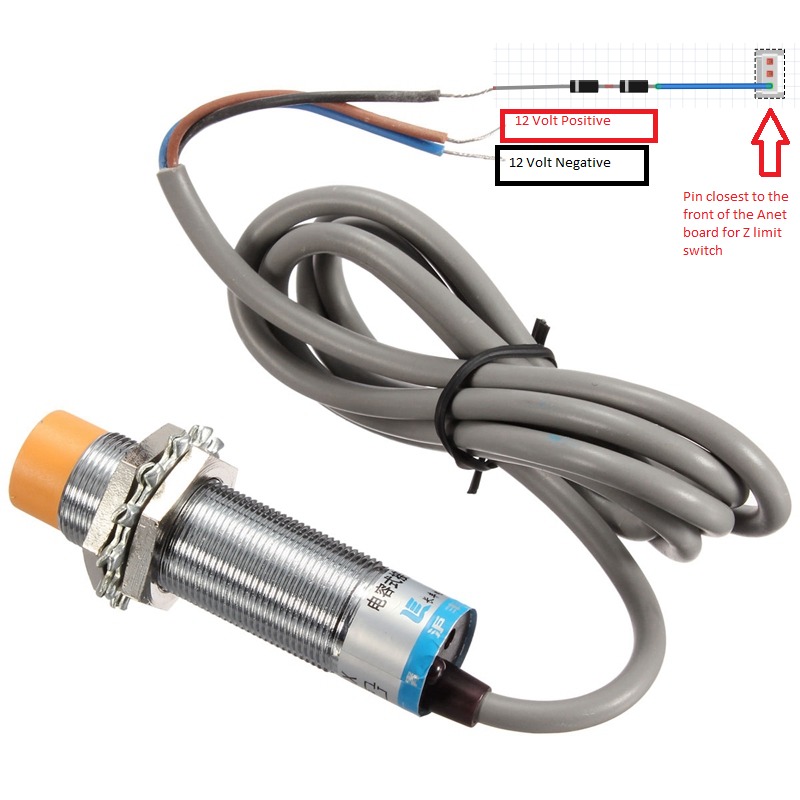
Capacitive Sensor Schematic for Anet A8
thingiverse
The Anet z limit switch is normally powered by 5 volts and triggers when the mechanical switch is pushed, grounding the sensing pin. The Capacitive Sensor works by going to ground when it senses a surface. Using two rectifier diodes, the Anet board is protected from higher voltages while allowing the 5v z limit switch pin to pull to ground. I've used this setup on two Anet A8 printers for over a year and they work great every time. The 12-volt supply to the sensor is essential, as 5 volts isn't high enough for a repeatable reading. The second diode provides a backup, protecting the controller's 5v limit switch circuit from the 12-volt sensor voltage. Parts needed: 1. Capacitive sensor (https://smile.amazon.com/gp/product/B00542U3M4): LJC18A3-H-Z/BX; NO; Wire Type: DC 3 Wire Type (Brown, Black, Blue) 2. Rectifier Diodes (https://smile.amazon.com/gp/product/B008LTJOX6): 1N4004 400V 1A Axial Lead Silicon Rectifier Diodes 3. 3Pin JST-EH Connector (https://smile.amazon.com/gp/product/B00TGSD6PI) The sensor is mounted in the Anet A8 Front Fan Sensor Mount 18 mm (stl included). Note that when setting up the sensor, start with the hot end a couple of millimeters off the bed and the bottom of the sensor about 5-6mm above the bottom of the hotend. Adjust the screw on top counter-clockwise until the light comes on for the sensor. Raise the hot end about 50-100 mm off the bed, then attempt to home and wave your hand over the sensor as it starts coming down for homing Z. Use this setup at your own risk; not responsible for damage to your printer.
With this file you will be able to print Capacitive Sensor Schematic for Anet A8 with your 3D printer. Click on the button and save the file on your computer to work, edit or customize your design. You can also find more 3D designs for printers on Capacitive Sensor Schematic for Anet A8.
