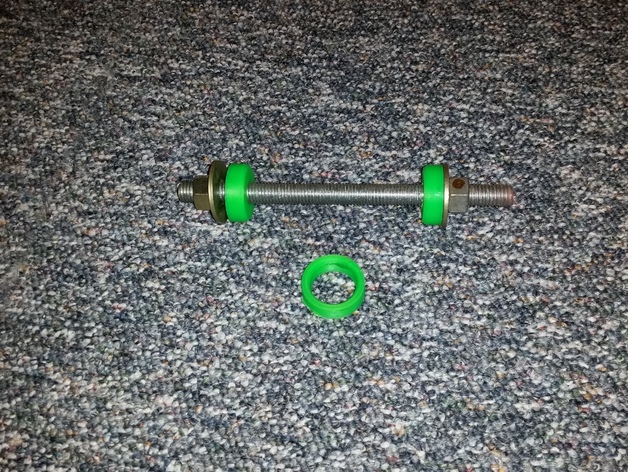
Cane Creek Forty Headset Installation Tool
thingiverse
You will need to install a Cane Creek 40 headset. To do this, you must create two essential tools: a Crown tool and two Bearing Cup tools. Additionally, gather the following items. Make sure to have PVC tubing with an inner diameter of 1.25 inches on hand. You'll also need threaded rods that are 5/8 inch long, sufficient to fit within your head tube. Secure these rods with two 5/8 nuts and pair them with two large washers for extra support. Don't forget a generous amount of grease. To begin the installation process, start by fitting the crown race onto your fork. Ensure that the designated area on the fork has been properly prepped beforehand, applying an abundance of grease to facilitate smooth movement. Utilize PVC tubing as the driving force. Next, focus on installing one bearing cup at a time. Apply generous amounts of grease to each cup before placing them in their respective positions. This approach is recommended for those who feel confident working with bike mechanics, and it serves as a more budget-friendly alternative to professional headset installation procedures. **Print Settings** - Printer Brand: RepRap - Printer: Prusa I3 Rework - Rafts: No - Supports: No - Infill: 100% - Notes: The design was created using Sketchup Make.
With this file you will be able to print Cane Creek Forty Headset Installation Tool with your 3D printer. Click on the button and save the file on your computer to work, edit or customize your design. You can also find more 3D designs for printers on Cane Creek Forty Headset Installation Tool.
