Candle heart mold V2
thingiverse
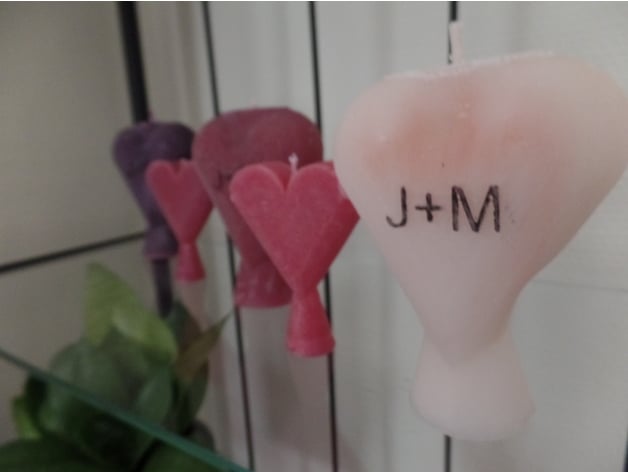
This is an upgraded design of my previous attempt at creating a candle heart mold. This model far surpasses the V1 (Small candle in the pictures). I have refined this model with insights gained from making the previous model and an abundance of prototypes. I designed this model for my girlfriend, so I also incorporated our initials into it. The wide flat spot at the top was added to prevent leakage and messes that could damage the letters. The version uploaded does not feature any letters. Here is the hardware list: Printer: K8200 Rafts: Not necessary Supports: Yes Resolution: 0.3mm or lower Infill: 20% or higher Notes: Increased infill will enhance rigidity and reduce deformation under heat, but 20% worked well for me with PLA. Instructions: Step 1: Print the mold. I strongly recommend using 4-6 solid top support layers to simplify removal of the support material from the screw holes. If the top is too weak, the bolt may pass through it, leaving behind a mess of plastic fragments that are difficult to remove. If the supports are strong enough, they will stay intact and fly out in one piece after hitting the screw with a hammer (See next step for more information). Step 2: Remove the support material. Removing the supports should be easy if printed as instructed. Use a flat head screwdriver to remove the top support, wedging it in place and turning the screwdriver. The supports in the holes will be easy to remove due to the hard and strong top layers (see previous step). Simply insert an M4 bolt and hammer it in slowly and gently until you feel resistance, then give it a firm blow with the hammer. Be sure to hit the bolt head directly, not from the sides. Step 3: Prepare the mold. I highly recommend using some kind of mold release, such as mold release or vaseline. Apply a thin and even layer to prevent issues. After treating the mold with mold release, insert your candle wick just like you would with a regular mold. Close and screw the mold together in an X pattern. Step 4: Pour wax. If printed with PLA, be aware that it begins to deform at around 50-60°C. This may cause the wax to deform the mold or leak through the screw holes. To avoid this, don't heat your wax too much. Instead, let it melt on a low temperature and allow it to cool until you can touch it with your finger without discomfort (approximately 40°C). If using ABS or another material that is more heat-resistant than PLA, I suggest printing with that material. Step 5: Remove the candle from the mold. After giving the candle sufficient time to cool, remove the mold by unscrewing it and trying to lift one side straight up. If this doesn't work, use a flat screwdriver to help. Once you have grip on the flat part at the bottom, try pushing or pulling the mold out. Avoid using a screwdriver between the candle and the mold, as this may damage the handle. If you encounter difficulties removing the candle, use more effective mold release next time. Hardware: 8x M4 x 40mm 8x M4 Nuts (you can use ones with caps) You can glue the nuts in place to make removal easier if they don't stay inside their slots. It's a good idea to get some spares, as wax can damage them if not handled carefully.
With this file you will be able to print Candle heart mold V2 with your 3D printer. Click on the button and save the file on your computer to work, edit or customize your design. You can also find more 3D designs for printers on Candle heart mold V2.