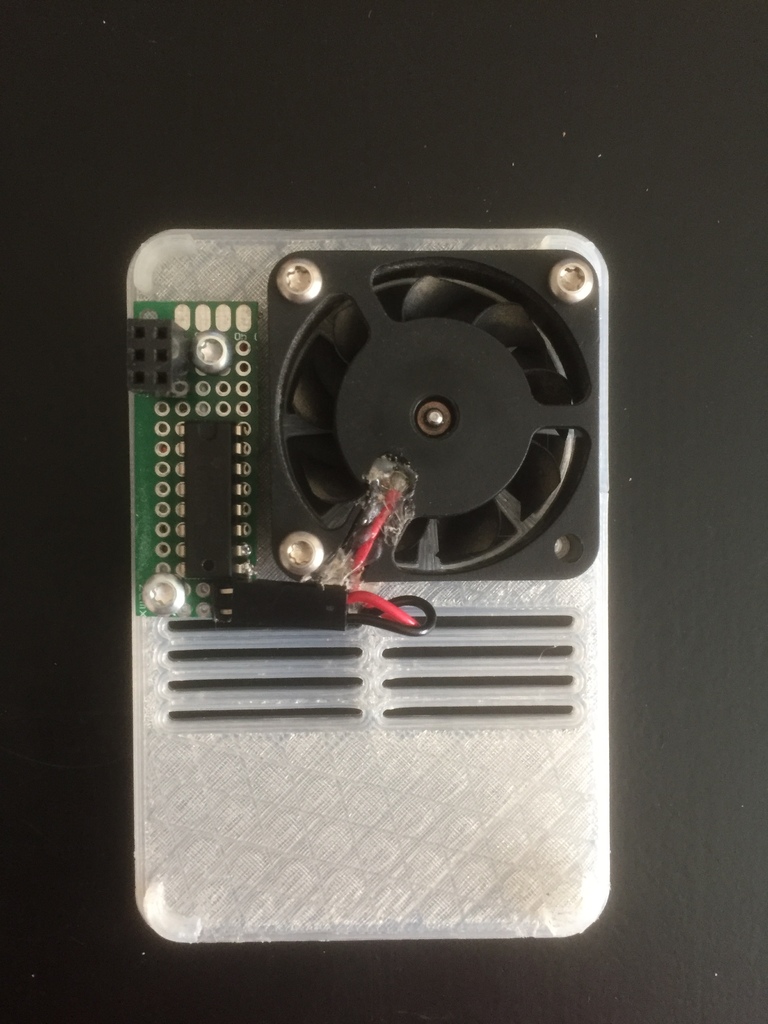
Canakit Raspberry Pi 3 Fan Cover
thingiverse
This fan cover plugs into the GPIO pins on the Raspberry Pi to control a 5V fan based on the Pi's core temperature. There are two ways to hook this up: one is direct attachment to the GND and 5V pins, which makes the fan run continually but is very simple. The other option is using a small motor driver circuit as shown in the images. I'm not an expert, but this circuit worked for me with components I had on hand. If you make this, I'd love to see your driver circuit. I used a small prototyping board and cut it down to 40x15mm. The board has a 2x3 header soldered to it that goes into the pins boxed in the schematic. A 2x2 header would also work. Note that if your header is a different height, you may need to adjust the board's mounting posts so the header reaches the GPIO pins. There's a small python script that controls fan speed through GPIO pin 3. The script linearly increases speed from 75% duty cycle at 55C to 100% duty cycle at 85C. The fan turns off once the Pi's temperature drops below 50C. You can manually start it or set it up to begin automatically when booting. To do this in Ubuntu Bionic, place the fan_ctrl.py file into /bin. Add a new cron job by entering 'sudo crontab -e'. Add '@reboot python /bin/fan_ctrl.py &' to the bottom of the file that opens. Reboot and it's done. There are vented and unvented versions for 40mm and 30mm fans, with no operational difference between them. It all comes down to looks. The 30mm model was made to work with the 'PiFan' but is currently untested. Let me know if you use that file and it works for you.
With this file you will be able to print Canakit Raspberry Pi 3 Fan Cover with your 3D printer. Click on the button and save the file on your computer to work, edit or customize your design. You can also find more 3D designs for printers on Canakit Raspberry Pi 3 Fan Cover.
