Camera Mount for Ender 3 Pro (V2) - no supports needed
prusaprinters
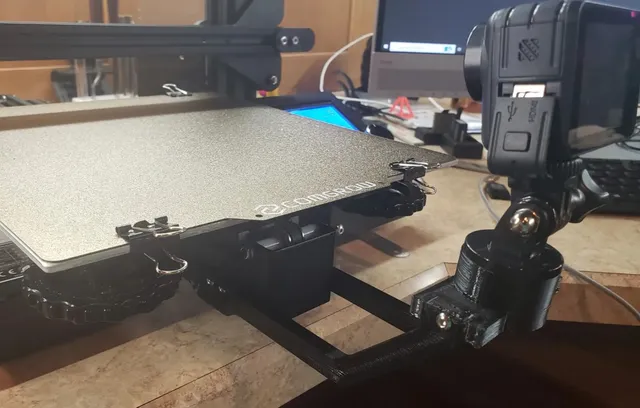
Camera mount for Ender 3 Pro 3D printer. It mounts to the Y Axis extrusion and works great for timelapses.Above timelapse was taken with this camera mount and an adapter to raise the camera a little higher for this print.Uses ¼-20 X 1" bolt in the cam base to attach to common camera mounting location. The cam base was re-designed to not require any supports for printing. You need a longer 1" bolt instead of the original ¾".Works with action cameras like GoPro, Akaso,etc. Will also work with most other smaller sized cameras with standard ¼-20 mounting hole.Items needed:2020 Extrusion T-Nuts:(4 needed to attach left and right arm to printer)Here is a link to the 2020 Extrusion Drop-in T-Nuts I published for various 3D printers:https://www.printables.com/model/221529-2020-aluminum-extrusion-drop-in-t-nutYou can also use these:https://www.amazon.com/gp/product/B07Z4YH6NP/ref=ppx_yo_dt_b_asin_title_o00_s01?ie=UTF8&psc=1M3 brass threaded inserts:(2 needed for cam base)You will need another 4 (total of 6) if you use the Drop in T-Nut that uses these inserts found here:Amazon link to the M3 brass threaded inserts I have:https://www.amazon.com/gp/product/B09TNK8GD6/ref=ppx_yo_dt_b_asin_title_o05_s00?ie=UTF8&psc=1M3 screws:(12mm long, 6 needed)Amazon link to the screw set I have:https://www.amazon.com/gp/product/B07KW2N9RD/ref=ppx_yo_dt_b_asin_title_o05_s00?ie=UTF8&psc=1¼-20 bolt X 1" long:1 needed. Bolt head type doesn't matter. I used a socket head cap screw, but a button head will work fine.The right and left arm can be printed without support laying on the side with the tabs facing up that go into the slots on the Y-Axis of the printer.The cam base can now be printed without supports but needs the longer 1" ¼-20 bolt now instead of the original ¾: long bolt.The Cam Base has two small holes on the sides for the M3 Brass Threaded inserts to be installed. I used a soldering iron with the base sitting with the hole facing up. It takes less than 10 seconds to install each one when the iron is up to temperature.If you use the Drop-in T-Nuts I published, the same M3 Brass Threaded Inserts work in them.I used a stainless steel rule to place them on when I installed the threaded inserts since the inserts touch the surface the T-Nut sits on when fully inserted. This keeps me from damaging the surface with the hot insert.
With this file you will be able to print Camera Mount for Ender 3 Pro (V2) - no supports needed with your 3D printer. Click on the button and save the file on your computer to work, edit or customize your design. You can also find more 3D designs for printers on Camera Mount for Ender 3 Pro (V2) - no supports needed.