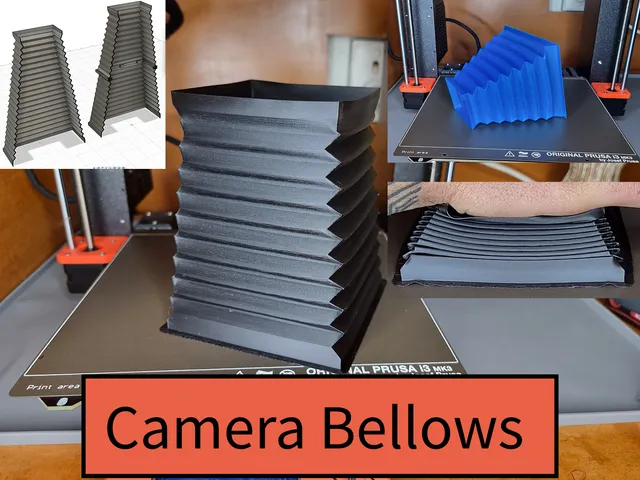
Camera Bellows - Collapsible & Customizable - TPU Vase Mode - F3d Files included
prusaprinters
Update 30/07/22;I have Uploaded V3.4, This generates a Single Custom Bellows without throwing any errors.V3.4 also includes an automatic two stage bellows generator. You can now print the bellows in two parts allowing for longer bellows than a single one would allow on the build height of your printer.Now the model is generated with 0.8 mm Thick walls. You can print in Vase mode with a 0.8 mm Nozzle, 0.6mm, 0.5 mm or even 0.4 mm if needed OR print Normally with a 0.4 mm Nozzle extruding two perimeters with the Model having 0.6 mm thickness to allow for extrusion Overlap of 25%.All the Sketches / Planes etc.. are clearly labeled for you to see how it's made. Here is a perfect example of an end use case, I have added The Multi Part Version to Kaishou's Vega 4x5 View Camera Find it here on Printables!I have Performed a light lest by printing the Light test model in Black TPU and 0.8 mm, it has the same thickness as the Bellows. I can Confirm no light leak in the test model (at least to the eye), have a try for yourself.I have also test printed all the connections with the test print models and they have a good tight fit.If your Bellows are too Stiff (Depends on the hardness of the TPU you have) at 0.8 mm thickness, try printing the Light test model in Vase mode (0.8 mm Nozzle, 0.6mm, 0.5 mm or even 0.4 mm if needed) with Black TPU. From my testing all model tolerances should allow it as the 0.8 mm version is nice and tight.I printed mine with a TPU Shore hardness of 95aPrints in Vase Mode with the big side on the bed and a 0.1 mm layer height when using a 0.4 mm Nozzle and 0.4 mm layer width. Scale up the settings from there for bigger nozzle sizes. I also recommend printing with a brim(outer and inner).This Printable really benefits from the PrusaSlicer 2.5 release, due to the vast improvements in generating perimeters. Picture Source Reference. Showcase and Durability Test;I must say I am amazed with the layer adhesion of TPU! How To Customize and Edit My F3d File V3.4If anything else the .f3d Fusion 360 file will show you how I did it and you could model up your own.Clearly Labeled Sketches etc. Parameters included.You'll need to adjust the model using Fusion 360 to fit your camera size specification, Vase Mode Overhang Printing Tips by Maker's Muse;I used this to learn how to print this model.
With this file you will be able to print Camera Bellows - Collapsible & Customizable - TPU Vase Mode - F3d Files included with your 3D printer. Click on the button and save the file on your computer to work, edit or customize your design. You can also find more 3D designs for printers on Camera Bellows - Collapsible & Customizable - TPU Vase Mode - F3d Files included.
