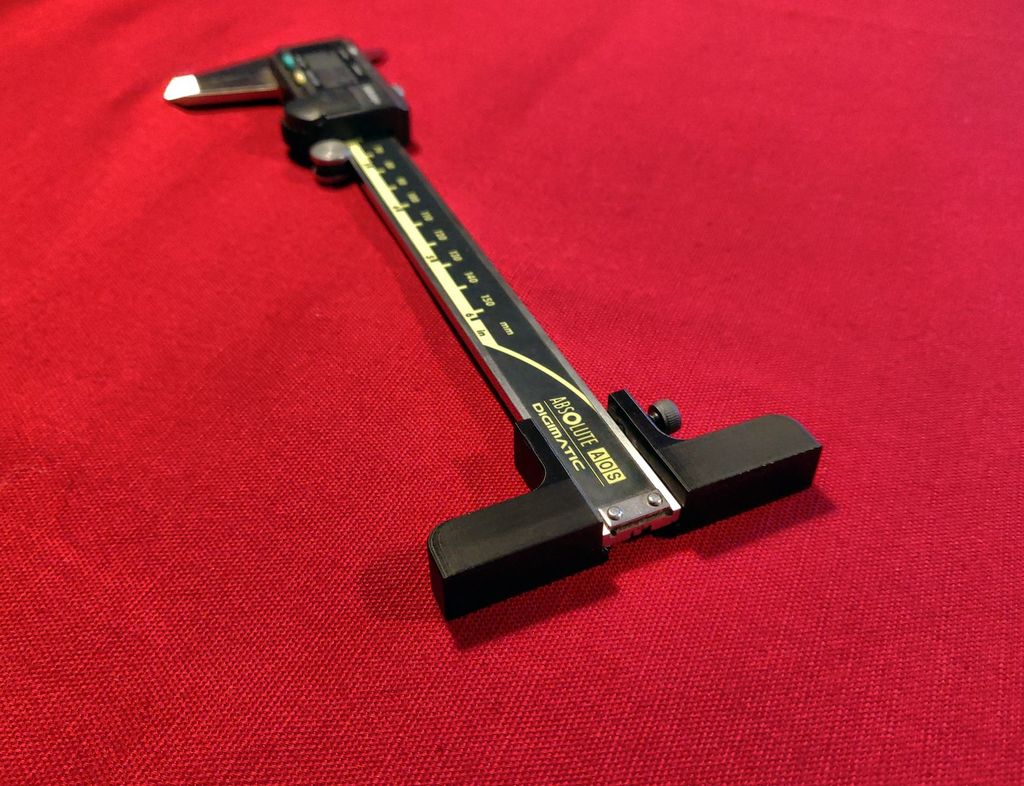
Caliper Depth Base / Depth Measuring Bridge for 6" / 150mm Mitutoyo Caliper (and others)
prusaprinters
<p>I needed a Depth Measuring Bridge for my Mitutoyo Digimatic Absolute AOS Caliper. (You can read my - german - Review of this Caliper <a href="https://smile.amazon.de/gp/customer-reviews/R1U1GXX4T4B0UO/ref=cm_cr_dp_d_rvw_ttl?ie=UTF8&ASIN=B00IG46NL2&tag=tv-auto-20">here</a>).<br/> Because I needed it<strong>today</strong> (when else?), I "desingned" one from scratch. OK. The price was another argument for doing it instead of buying an original Part. :-/</p> <p>I have also found that the measuring foot can also be used for other calipers, for example from Tesa, Blankenhorn or even these so-called $ 1.50 Things from aliexpress, ebay or Amazon. The caliper must not be wider than 16mm.</p> <p>So, here ist is, printed with my AnyCubic i3 MEGA, with Filament from Goedis: <a href="https://shop.goedis.de/PLA-Schwarz-175mm">Black PLA</a>.</p> <p>I suggest<strong>20% infill</strong>, 0.15 mm Height of Layer, 1,06% Flow, 215° Nozzle, 60° Heatbed and 60% Cooling. (I use an Titan Extruder and Sunon Fans, you'll try it with your Standard PLA Settings). Also, I refer to add supports for the recess. See Screenshots.</p> <p>You'll need a M4x8mm Screw to counter the Caliper in the Measuring Bridge. But do this with<strong>feeling and very carefully</strong>, because the part could bend and then the measurement accuracy is no longer given. In the worst case, you can also damage the flanks of your calliper!</p> <p>I suggest also to print the measuring foot upright, that is, the measuring surface printed on the printing bed. This is most likely to give a good surface at the crucial points and a right angle. It should be clear that this part is only as good as your printer is calibrated. For serious purposes, I recommend buying the original.</p> <p>But for sensitive parts for example, that thing is just right.</p> <p>I recommend following sets of screws, so you have enough of them for the rest of the Week ;-) : 460 Countersunk Screws and 1080 Cylinder Head Screws.</p> <p>If you need a left-handed version, just mirror it. But you will know that yourself. ;-)</p> <p>31.05.:</p> <ul> <li>Added Version with Threads on both Sides, so you can use the thing as left- or right handed</li> <li><p>Added a 10mm higher Version with two more screw holes. So the caliper sits bombproof.<br/> 03.06.:</p> </li> <li><p>Outer edges, except for the receptacle, provided with radius.<br/> Some of the links are Affiliate. If you buy something, I get a small commission. The price you pay is the same. Thank you.</p> </li> </ul> <h3>Print instructions</h3><h3>Category: Machine Tools Summary</h3> <p>I needed a Depth Measuring Bridge for my Mitutoyo Digimatic Absolute AOS Caliper. (You can read my - german - Review of this Caliper <a href="https://smile.amazon.de/gp/customer-reviews/R1U1GXX4T4B0UO/ref=cm_cr_dp_d_rvw_ttl?ie=UTF8&ASIN=B00IG46NL2&tag=tv-auto-20">here</a>).<br/> Because I needed it<strong>today</strong> (when else?), I "desingned" one from scratch. OK. The price was another argument for doing it instead of buying an original Part. :-/</p> <p>I have also found that the measuring foot can also be used for other calipers, for example from Tesa, Blankenhorn or even these so-called $ 1.50 Things from aliexpress, ebay or Amazon. The caliper must not be wider than 16mm.</p> <p>So, here ist is, printed with my AnyCubic i3 MEGA, with Filament from Goedis: <a href="https://shop.goedis.de/PLA-Schwarz-175mm">Black PLA</a>.</p> <p>I suggest<strong>20% infill</strong>, 0.15 mm Height of Layer, 1,06% Flow, 215° Nozzle, 60° Heatbed and 60% Cooling. (I use an Titan Extruder and Sunon Fans, you'll try it with your Standard PLA Settings). Also, I refer to add supports for the recess. See Screenshots.</p> <p>You'll need a M4x8mm Screw to counter the Caliper in the Measuring Bridge. But do this with<strong>feeling and very carefully</strong>, because the part could bend and then the measurement accuracy is no longer given. In the worst case, you can also damage the flanks of your calliper!</p> <p>I suggest also to print the measuring foot upright, that is, the measuring surface printed on the printing bed. This is most likely to give a good surface at the crucial points and a right angle. It should be clear that this part is only as good as your printer is calibrated. For serious purposes, I recommend buying the original.</p> <p>But for sensitive parts for example, that thing is just right.</p> <p>I recommend following sets of screws, so you have enough of them for the rest of the Week ;-) : 460 Countersunk Screws and 1080 Cylinder Head Screws.</p> <p>If you need a left-handed version, just mirror it. But you will know that yourself. ;-)</p> <p>31.05.:</p> <ul> <li>Added Version with Threads on both Sides, so you can use the thing as left- or right handed</li> <li><p>Added a 10mm higher Version with two more screw holes. So the caliper sits bombproof.<br/> 03.06.:</p> </li> <li><p>Outer edges, except for the receptacle, provided with radius.<br/> Some of the links are Affiliate. If you buy something, I get a small commission. The price you pay is the same. Thank you.</p> <h3>Print Settings</h3> </li> </ul> <p><strong>Printer Brand:</strong> Anycubic</p> <p><strong>Printer:</strong> All-metal Mega</p> <p><strong>Rafts:</strong> No</p> <p><strong>Supports:</strong> Yes</p> <p><strong>Resolution:</strong> 0.1</p> <p><strong>Infill:</strong> 20%</p> <p><strong>Filament:</strong> Goedis PLA Black<br/> <strong>Notes:</strong></p> <p>As described.</p>
With this file you will be able to print Caliper Depth Base / Depth Measuring Bridge for 6" / 150mm Mitutoyo Caliper (and others) with your 3D printer. Click on the button and save the file on your computer to work, edit or customize your design. You can also find more 3D designs for printers on Caliper Depth Base / Depth Measuring Bridge for 6" / 150mm Mitutoyo Caliper (and others).
