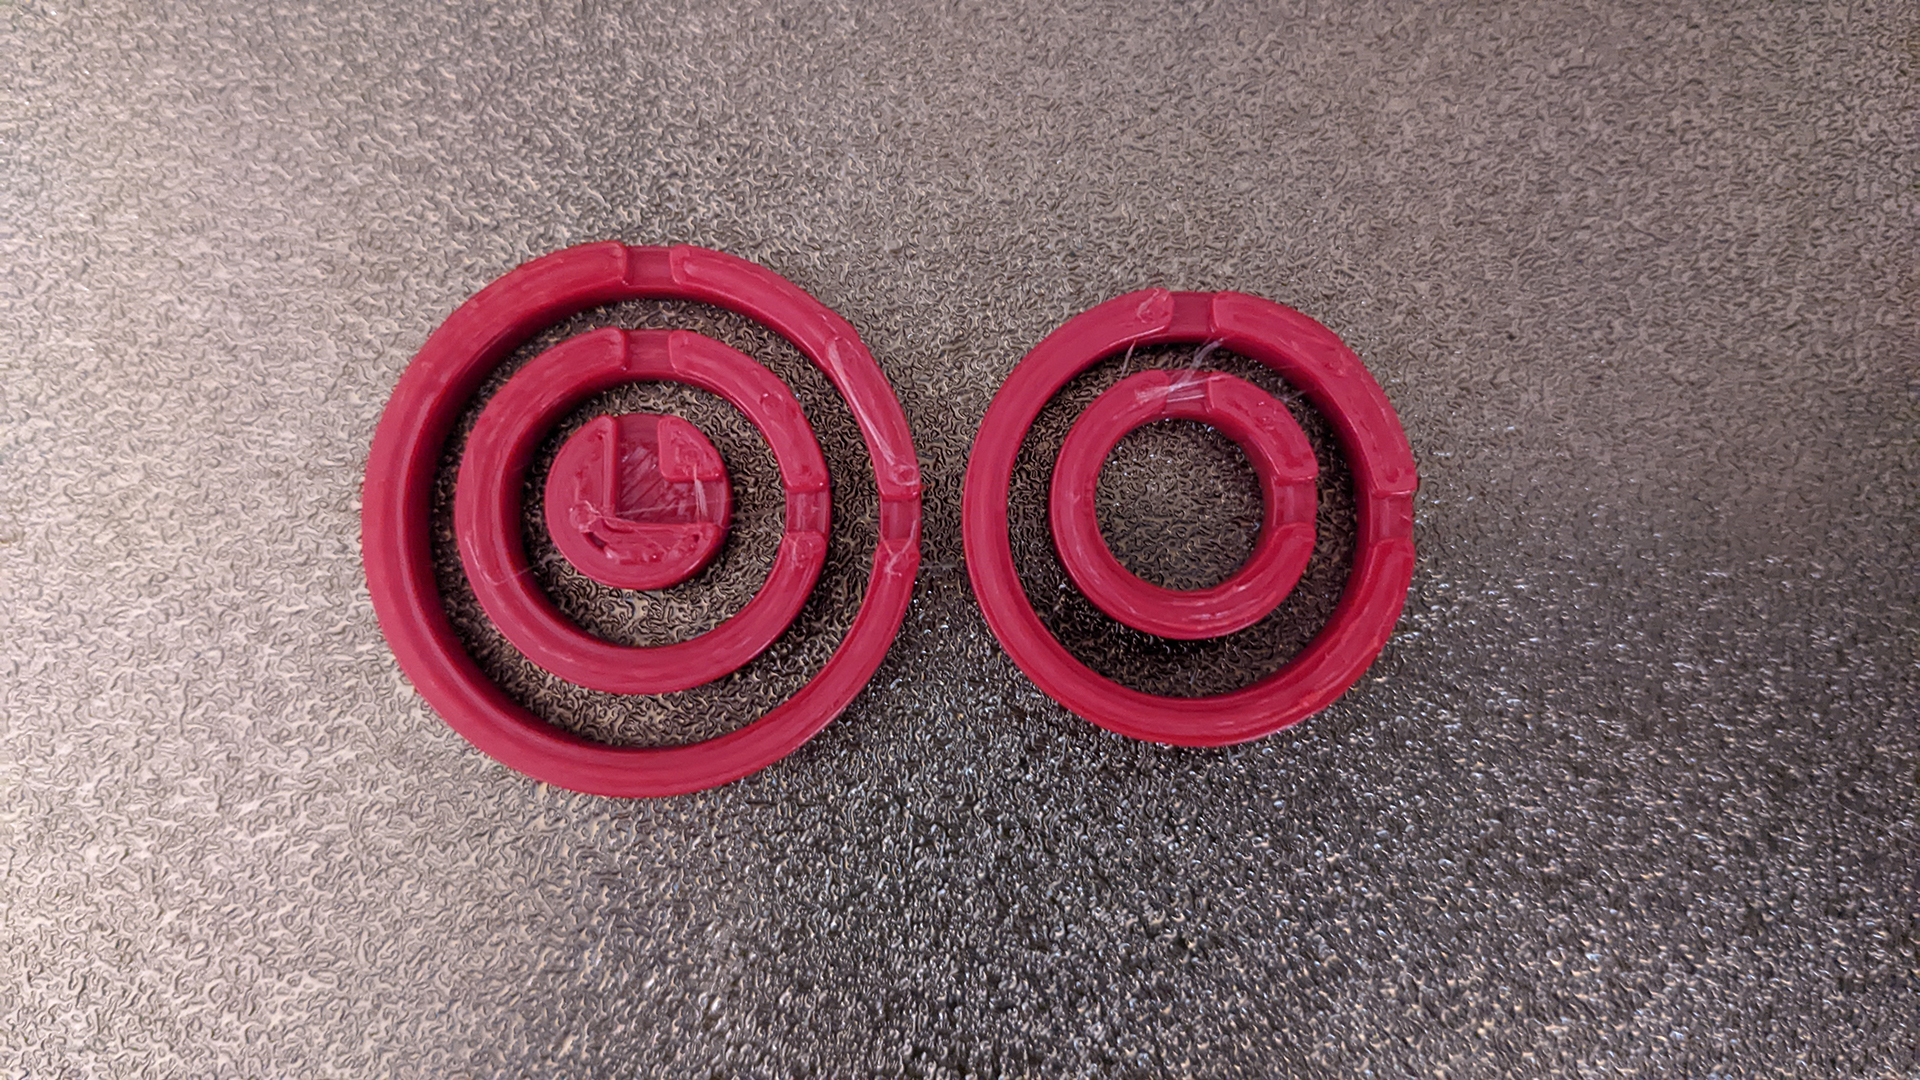
Calibration rings
prusaprinters
<p>These calibration rings are a fast, simple, and easy way to calibrate your printer for dimensional accuracy. It even includes an Excel spreadsheet to help you quickly calculate the corrections to make in your slicer.</p><p>The test consists of a set of 5 concentric rings that fit perfectly within each other with no clearances. You can print all five in as little as 6 minutes.</p><p>Before performing this calibration, confirm that your extruder steps have been calibrated and that the flow rate / extrusion multiplier has been calibrated using the many great calibration tools out there, such as the website from <a href="https://teachingtechyt.github.io/calibration.html">Teaching Tech</a>.</p><figure class="image"><img src="https://media.printables.com/media/prints/284718/rich_content/55d00a79-2de5-4887-8473-5bcbaeac8537/calibration-rings-sliced.png#%7B%22uuid%22%3A%224d7b5beb-598e-44b9-9176-0ad376d920bc%22%2C%22w%22%3A1290%2C%22h%22%3A787%7D"></figure><p>Print all five rings with your typical slicer settings. No supports, bed adhesion, or other printing assistance should be needed, but you can include them if you wish. The prints should work fine with typical layer heights and line widths for 0.4mm or 0.6mm nozzles. For the fastest printing, I suggest you nest alternating rings within each other: 0-5, 10-15, and 25-30 in one set, 5-10 and 20-25 in another.</p><p><img src="https://media.printables.com/media/prints/284718/rich_content/147faf4c-e2c9-4259-ad57-f7e28ebdc582/measure-ring-internal.jpg#%7B%22uuid%22%3A%229117ef9d-e77a-4388-b06d-10a5780e5c0b%22%2C%22w%22%3A1920%2C%22h%22%3A1080%7D"><img src="https://media.printables.com/media/prints/284718/rich_content/7c4ced0a-cfe8-4515-a140-617dc7f85a97/measure-ring-external.jpg#%7B%22uuid%22%3A%22e190f7bc-1812-4ed1-9c62-fe4e00ca84ca%22%2C%22w%22%3A1920%2C%22h%22%3A1080%7D">Measure the internal and external diameter of each ring using a caliper. Enter the measurements into the spreadsheet and it will calculate how much the print has been scaled from the original size and how over- or under-extruded the rings are. You can then enter your existing printer and slicer settings and it will compute new settings that should correct for the scale and extrusion.</p><p>Scale can be corrected either by scaling the parts within the slicer or by adjusting the stepper settings in your printer. For Klipper firmware, this would be the rotation distance. For Marlin and similar firmware, this would be the steps/mm. Scaling them in the slicer is preferable to not interfere with other settings, but it may be more convenient to change the settings for the steppers to ensure it is always applied.</p><p>Over/under-extrusion can be corrected using the horizontal expansion setting within your slicer. Ensure your extruder steps and extrusion multiplier have been calibrated first!</p><p><img src="https://media.printables.com/media/prints/284718/rich_content/ca412cb1-4fdd-42f4-8421-9962f17e95e6/calibration-rings-nested.jpg#%7B%22uuid%22%3A%229399fe22-ef24-45ac-b483-979b5fee6509%22%2C%22w%22%3A1920%2C%22h%22%3A1080%7D">You can verify the extrusion width by fitting the rings within each other. Since there are no clearances, it should be a tight fit, but it should be possible to nest them within each other. If they do not fit, you have over-extrusion. If they fit loosely and don't stay together, you have under-extrusion. This can be a more precise test than measuring with a caliper and gives a demonstrative test of how tabs, posts, and slots in your prints will fit in practice.</p><p>Since the test is so fast to print and uses so little filament, you can easily print several iterations until you get your print dialed in just right.</p><p>Like other calibration tests, it's a good idea to repeat this calibration every time you change your filament. Different rolls of filaments - even of the same brand and type - can have different properties, which can change the shrinkage and extrusion width.</p>
With this file you will be able to print Calibration rings with your 3D printer. Click on the button and save the file on your computer to work, edit or customize your design. You can also find more 3D designs for printers on Calibration rings.
