Calibration Jig
prusaprinters
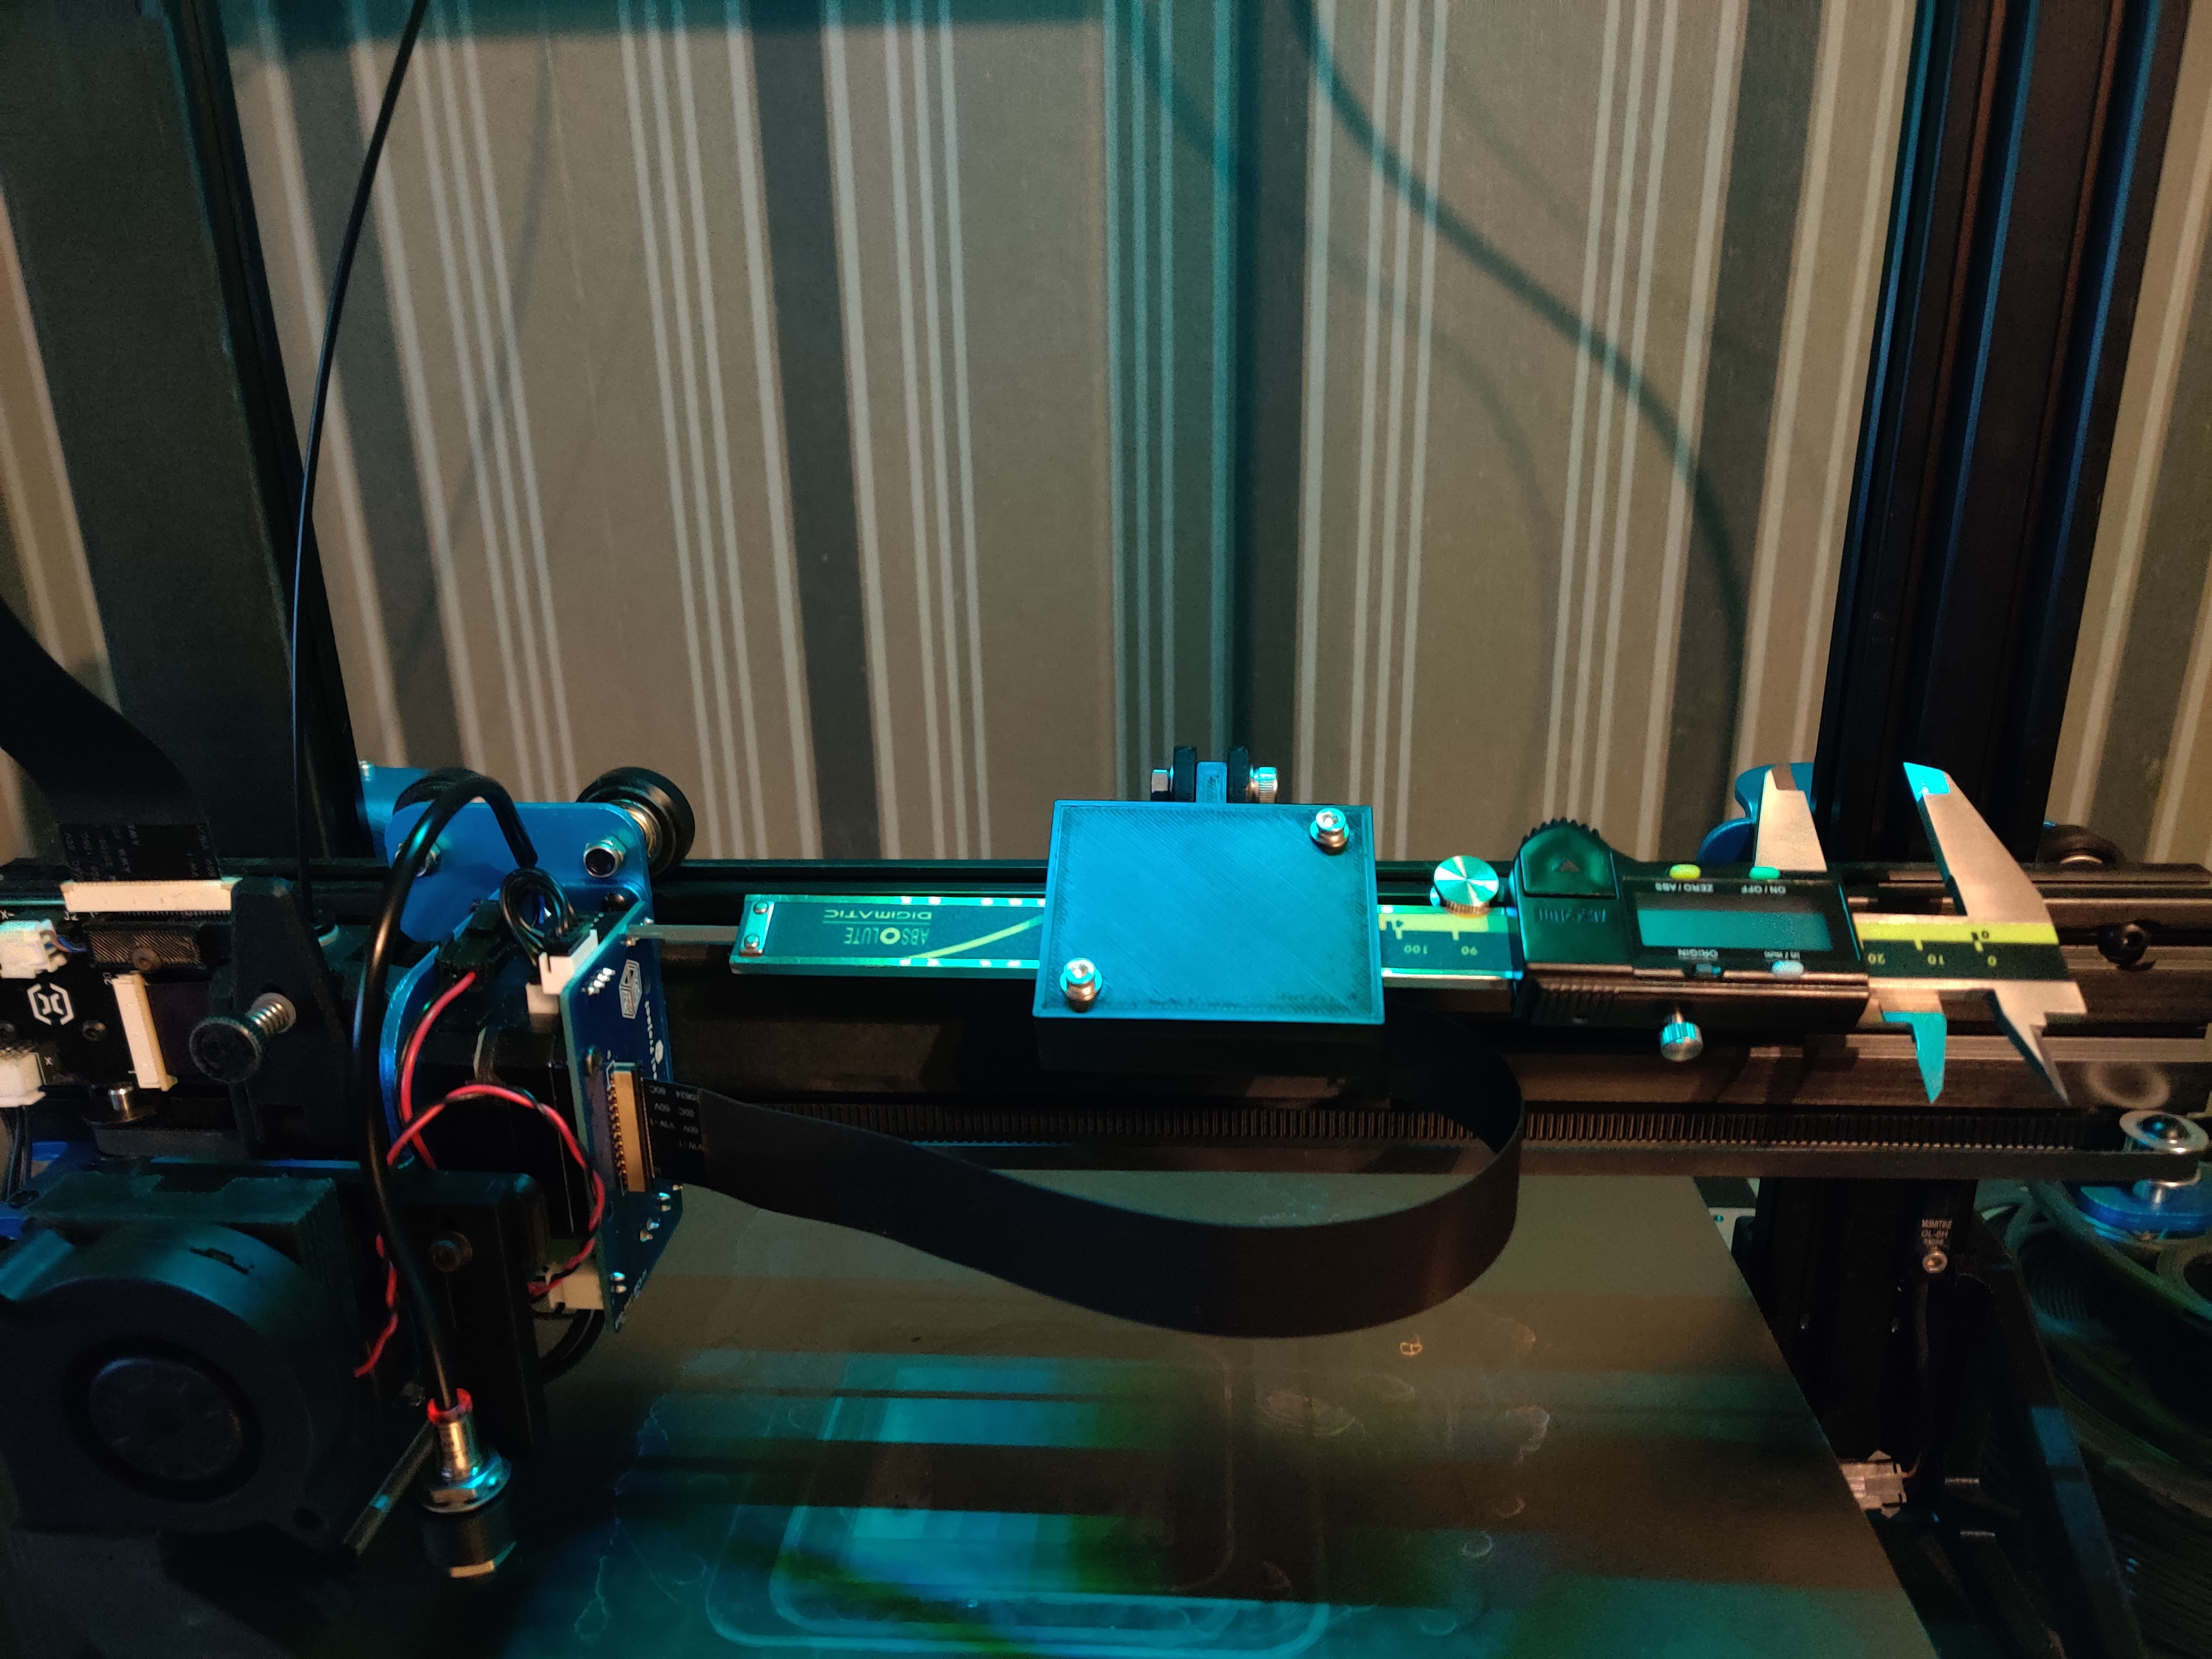
<p>A simple Holder to attach an Digital Caliper to your Printer, using T-Nuts</p><p><strong>Printing Parameters:</strong><br>Material: doesnt matter, used ABS+</p><p>Nozzle: 0.4</p><p>Layerheight: 0.2</p><p>Infil: 20%</p><p> </p><p><strong>BOM:</strong><br>1x M5x20 Screw</p><p>2x M5 Washers</p><p>1x M5 Nut</p><p>2x M3x10 Screw</p><p>2x M3x12 Screw</p><p>2x T-Nut M3</p><p>2x M3x5,7 Heated insert</p><p> </p><p><strong>Assembly:</strong></p><ol><li>Insert the Heated inserts into the 2 holes on the part Caliper-Mount</li><li>Insert Caliper-Mount Hinge into Base Hinge</li><li>Add 1 Washer on the M5 Screw, insert it into the hinge, add 2nd Washer and the Nut</li><li>Insert Caliper into the Caliper-Mount (see picture) make sure to allow the longest possible movement for the Caliper</li><li>Insert 2x M3x12 Screw into the 2 Holes in part Base, add T nut from the other Side</li><li>Add Caliper-Mount-Top ontop the caliper and insert the 2x M3x10 Screws and tighten them, this will Sandwitch the Caliper into the mount.</li></ol>
With this file you will be able to print Calibration Jig with your 3D printer. Click on the button and save the file on your computer to work, edit or customize your design. You can also find more 3D designs for printers on Calibration Jig.