Calibration help for Peopoly MOAI
thingiverse
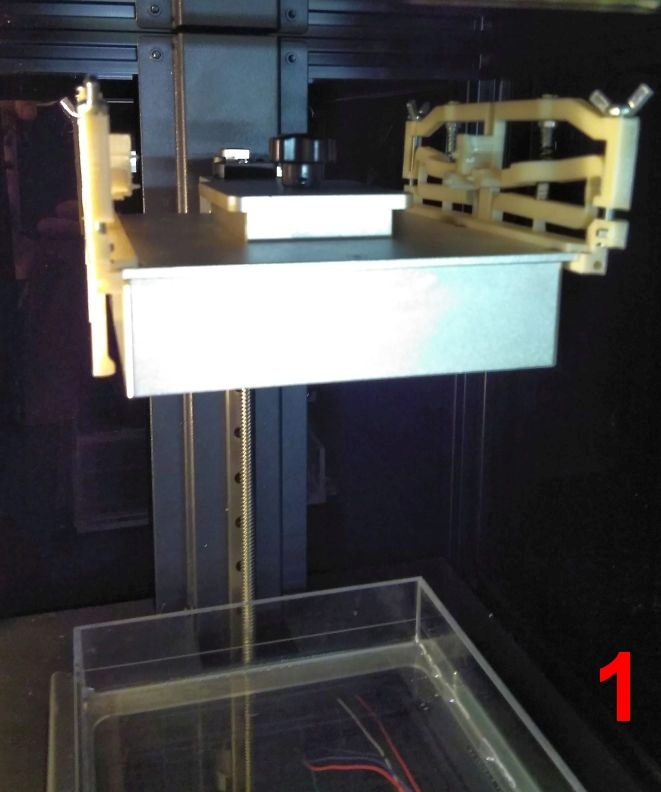
Calibration Help for Peopoly MOAI 3D Printer I utilize different resins in my printing process and maintain a separate vat for each resin on the MOAI printer. The challenge lies in minor variations between vats, making calibration difficult. To address this issue, I designed a calibration aid that can be securely fastened to the building plate. Please refer to Picture 1. This calibration aid can be easily 3D printed and assembled using M3 screws and four ballpoint springs within a short timeframe. Prior to calibrating the vat, I remove two screws from the left side of the printer for effortless access to the nuts controlling the vat's position. The entire process now takes merely a few minutes. To utilize this MOAI calibration aid effectively: 1. Clamp the helper on both sides of the building platform. 2. Place a sheet of paper with a folded thickness of approximately 0.2mm (though I'm uncertain if this is the optimal distance, it works for my setup). 3. Position the paper on an exceptionally flat surface, such as glass. 4. Place the build plate with the clamped helpers over the paper, ensuring that the four feet rest directly on the surface rather than on the paper itself. 5. Press down firmly on the build plate and turn the wingnuts until the calibration points align at the same height. 6. Refer to Picture 2 for visual guidance. After completing these steps, reattach the build plate with the clamped helpers back into the printer (see Picture 1). Navigate to "Setup" > "Advanced," then adjust the Z-axis by setting the "Z Reset Position" to 188 (you might need to initially set it to 187 and later change it to 188 before proceeding). The build plate will automatically move towards its designated position within the vat. Next, remove the side panel of the printer to access the nuts controlling the vat's calibration. If necessary, turn these nuts until the points align in a straight line (the upper arm should be horizontal) as depicted in Picture 3. A minor movement of the vat along the Z-axis results in a noticeable displacement of the indicator arm; therefore, turning the calibration nuts allows for clear visualization of any adjustments made. I printed this calibration aid on my Ultimaker2 using ABS filament from Innofil ABS Fusion+, without requiring support or platform adhesion. The print adhered well to the clean glass surface due to its properties. To safely remove the printed calibration aid from the glass, I applied 96% alcohol; most parts detached successfully. This solution has worked effectively for me, and I hope it proves beneficial to you as well.
With this file you will be able to print Calibration help for Peopoly MOAI with your 3D printer. Click on the button and save the file on your computer to work, edit or customize your design. You can also find more 3D designs for printers on Calibration help for Peopoly MOAI .