Calculus project 3: Create a caste
thingiverse
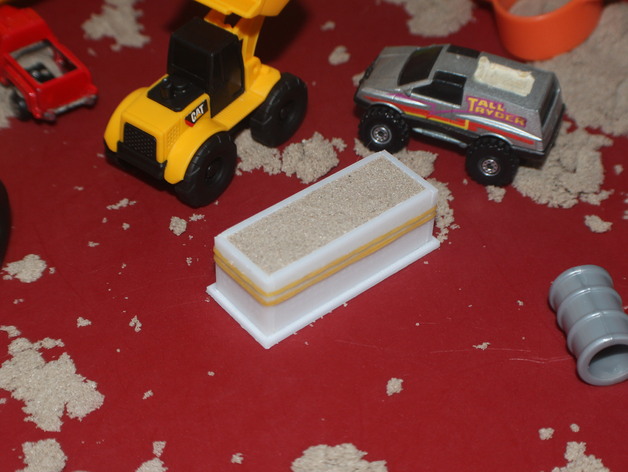
This is the third part of a series of projects designed for first-year calculus students. In this series, students learn how to use various mathematical equations to assess the properties of solids and containers. In this part, we will be using our molds created in part two to create permanent castings that can be used later on in the project. To do this, we will learn how to make our very own cheap silicone casting substrate. Print Settings Printer: CraftBot Supports: No Resolution: Optimum Infill: 30% square Notes: I optimized this thing to be printed in ABS with maximum settings. I would recommend a skirt with an offset of 0mm (otherwise known as a brim) with 2-5 loops for ABS. As can be seen from the photo, increased infill may be helpful as well. How I Designed This For this project, I used a free program from Autodesk called TinkerCAD. I have long been a user of AutoCAD, which is a desktop drafting program from the same company. I used TinkerCAD to make it easier for educators and learners to replicate what I did. TinkerCAD is awesome because it's not only free but also easy to use. It also runs in your browser and has built-in instructional lessons. www.tinkercad.com For part 3 of this project, I started with our product from the part two. If you remember, we used X=20mm which gave us a base of 60x20mm, two flaps with dimensions of 60x20mm, and two flaps with dimensions of 20x20mm. We then made this into a mold by adding a channel around the base and extending the flaps. Project: Create Cast Objective By the end of this part of the project, students will have a permanent mold of the volume that they will be using equations to find. This will not only serve as a visual aid but also help them check the accuracy of their work. Audience Even though the overall project is designed for calculus students, this part of the project can be used for algebra or even art students as well. Preparation Teachers will need to get all supplies ahead of time: 100% Silicone Caulking Cost: $3-$5 Caulking is available in all types and brands. Buy whatever is on sale. The white kind is better than clear, as it's easier to tell when it's thoroughly mixed. This forms the bulk of your mold. Plastic Cups, Silverware, and Straws Cost: $3-$5 The silicone won't stick to the cup after it's cured, and you can throw it away when you're done. The straws are helpful if you don't have any pipettes or eyedroppers. Corn Starch Cost: $2-$4 The cornstarch is essential to this project. It will absorb the moisture in the mix and allow it to dry throughout. Step 1: Add Ingredients Your ratio determines how long your cure time is. A ratio of 1:1 should give you about 5-10 minutes cure time. This should be about right for this project. You want your mixture to be about the consistency of cake frosting when it's all mixed together. Step 2: Mix It's essential that you mix it thoroughly. If you don't, the cast will not dry evenly and in extreme cases can cause it to crack. Step 3: Pour Use whatever item (silverware, pipettes, etc.) you have to spoon/pour your material out with. Make sure it is even with the top of the mold. You can use a flat object (such as the back of a knife) to run along the top of the mold and wick away excess. Step 4: Let Dry Parts this small should be dry in 1-2 hours. This cast was made using kinetic sand. Results The students will now have a cheap, hands-on way of making a cast of the volume they will be using equations to find. This will give them a visual and tactile way of understanding what they are doing. This will also give them a way to check their work, shown in the next part of this project.
With this file you will be able to print Calculus project 3: Create a caste with your 3D printer. Click on the button and save the file on your computer to work, edit or customize your design. You can also find more 3D designs for printers on Calculus project 3: Create a caste.
