Cactus Pots project by Mayku
cults3d
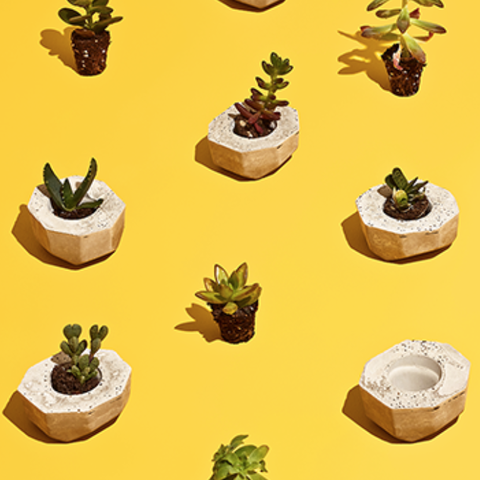
Prepare your template for the cactus pot by using a potato. You can also make the shape out of clay or soft wood if you prefer. Cut the potato in half to create two identical halves. Ensure one half has a flat edge that will serve as the base of the cactus pot. Place the potato on its large flat side and carve facets into the edges, taking care not to create any undercuts and using draft angles for stability. Remove your cactus from its original pot and set it aside safely until later use. Plug the hole in the cactus pot by applying a small piece of tape to the bottom of the pot. Peel off the protective film from a Mayku Cast Sheet, which can be recycled through household recycling programs. Place the sheet into the FormBox and start heating the plastic material. Position the potato template on the center of the FormBox bed, with its large flat side facing downwards. As the plastic reaches its melting point, observe ripples at the edges of the sheet and a droop in the middle. Form the mold using the Mayku Cast Sheet by allowing it to cool slightly before removing the potato template. Allow the mold to cool completely before carefully popping out the potato shape from inside the mold. To create your planter pot, mix concrete powder with water according to the manufacturer's instructions. Place the potato mold you created earlier into a mug to keep it stable and level. Pour concrete into the mold until it reaches two-thirds of its capacity. Use gentle shaking motions to remove any air bubbles that rise to the surface. Insert a small planter pot at the center of the concrete mixture, creating a hole for your cactus to sit in once the planter is complete. Secure the pot in place with tape around its edges. Allow the planter to set for 48 hours in a cool and dry environment, free from any direct sunlight or moisture. After 48 hours have passed, carefully remove the tape holding the planter pot in place. Twist and pull the pot gently to release it from the concrete mixture. Pop the planter out of its mold by applying firm pressure to the top surface. For a smooth finish on the top face, rub the planter against a sheet of coarse sandpaper placed on a flat surface. Once complete, carefully position your cactus into the newly formed planter and admire your handiwork! Consider adding a personal touch by painting the top side with your favorite colors using vibrant hues that complement your home decor.
With this file you will be able to print Cactus Pots project by Mayku with your 3D printer. Click on the button and save the file on your computer to work, edit or customize your design. You can also find more 3D designs for printers on Cactus Pots project by Mayku.