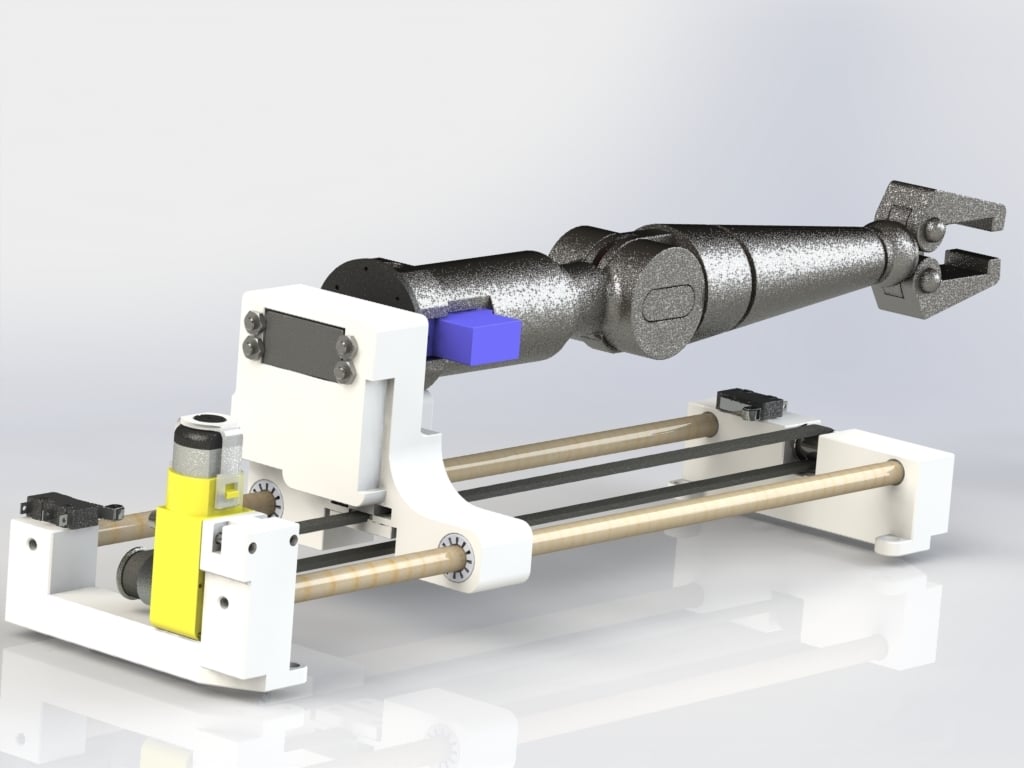
C1-10P Head Arm Mechanism
thingiverse
Read First! Big thanks to TinyP for his C1-10P dome design which this design is based around. This is a head arm mechanism design for C1-10P droids, Chopper from Star Wars Rebels. Some of the parts like the link will need 100% infill due to its miniature size, and others can be decided on when you print, some other components like fasteners will need to be sourced to assemble. I have about 40-50 hours of design and build work put into this to get it to a stage of version 1 ready for release. This design enables wrist posing, pincer posing, elbow rotation 90° and shoulder rotation 180°. Two Servos are needed for the wrist and shoulder. The small servo link is made with 1.6mm diameter steel rod. Print the pincers, forearm and wrist joint with 3-4 shell layers and 10% infill to keep the weight down. The three first stage components should be about 50% infill or more for strength, but light enough to keep the weight down for the main servo life and sag/ hanging reduction on the system. Hardware (not an exhaustive list) this is a DIY: nuts and bolts, M4, M3, etc, screws various for screwing into timber dowel. Servo horn round to suit large servo HS 225 or similar. One off Servo HS 225 MG (various sources) https://www.servocity.com/hs-225mg. One off 9gram servo (get a metal gear if you like) https://www.banggood.com/3PcsPack-KittenBot-23x12_2x29mm-SG90-9g-Mini-Servo-with-25cm-Wire-for-Smart-Robot-Car-p-1347733.html?rmmds=search&cur_warehouse=CN. One 1.6mm wire, something strong for the servo forearm linkage. (Hobby shop rc plane linkages). Two off x 8mm Timber dowel x 320mm long (hardware store, can be 8mm aluminium rod). Five or six millimeter dowel for the idler pulley, can be a cut off bolt or anything the correct diameter. Six millimeter wide three D printer belt https://www.banggood.com/5M-2GT-6mm-Rubber-Opening-Belt-S2M-GT2-Belt-For-3D-Printer-p-959254.html?rmmds=search&cur_warehouse=CN. Gt two Belt toothed pulley to attach to DC motor, choose pulley ID to suit motor shaft https://www.banggood.com/162030T-GT2-Aluminum-Timing-Drive-Pulley-For-DIY-3D-Printer-p-1001266.html?rmmds=search&ID=516464&cur_warehouse=CN. One off DC motor (Note: I've tried the motor at six V power and it is fine, can be boosted to nine ten V for faster motion) https://www.banggood.com/DC-3V-6V-DC-1120-Gear-Motor-TT-Motor-for-Arduino-Smart-Car-Robot-DIY-p-1260117.html?rmmds=search&cur_warehouse=CN. Limit switches two off for end stops (two each arm if you are making two arms) https://www.banggood.com/10Pcs-Micro-Limit-Switch-Roller-Lever-5A-125V-Open-Close-Switch-p-945733.html?rmmds=cart_middle_products&cur_warehouse=CN. Servo horn connectors for the forearm linkage https://www.banggood.com/1_3mm-1_8mm-2_1mm-Adjustable-Pushrod-Connectors-Linkage-Stoppers-For-RC-Airplane-p-1118874.html?rmmds=search&ID=517040&cur_warehouse=CN. This design may change if I find any major issues with it during its usage, at this point in time, November 2018, it hasn't been fully road tested with long term use in a droid. The DC motor has not been tested as I haven't purchased one yet, this would only effect one printed component though, the Motor Mount. So if it is amended later I will up revision the model and the recommended motor that I use. Hope it helps those wanting to add hands and movement to their C1-10P droid. Happy Building!
With this file you will be able to print C1-10P Head Arm Mechanism with your 3D printer. Click on the button and save the file on your computer to work, edit or customize your design. You can also find more 3D designs for printers on C1-10P Head Arm Mechanism.
