Button Gauge
prusaprinters
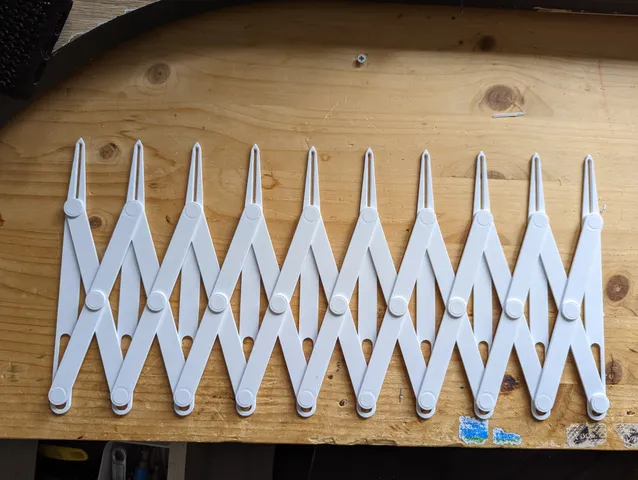
This is a button gauge (or sewing gauge) inspired by off the shelf ones but it is easy enough to avoid the trip to the shop and if you print it you can make exact number of links you need and expand later if needed.Minimum distance from one link to the other is 14mm and maximum is 102mm.BOMfor every "link" you will need:1 gauge1 spacer2 bar3 axel3 pinand for finishing the ends you will need extra:1 gauge4 spacers2 axel2 pin Example:I made a 9 link (10 points) button gauge and for it I needed:1*9+1= 10 gauge1*9+4= 13 spacers2*9= 18 bar3*9+2= 29 axel3*9+2= 29 pin I would not go much bigger than 10 points, maybe maximum 15 points if you are really careful using it as the plastic gives and the spacing will start to deviate too much for my liking. PrintingI added the orientations and settings I used to the 3mf file “Button Gauge” but in short PLA 0.2mm layers and 4 perimeters will work fine. I would avoid sticky materials like PETG for this assembly. AssemblyI made a demo of a 3 link assembly with different color bits so it would be easier to follow.Gauge-blueSpacer-redBar-white Axel-yellowPin-greenBefore we start, important notesStrongly chamfered (top) sides of parts will go on the outside and smooth sides (on bildplate) go to inside so that axles and pins sit flush with the surfaces and the smoother sides of parts are made to slide against each other. when printing with textured build plate there might have to be some trial and error and the top sides might be the smoother ones that should go togetherPins and axles need to be pushed together strongly so that the ends will be flush with other parts The pins and axles hold really strongly once pushed together so take care to orient the parts correctly the first time, getting them opened again might damage surrounding parts. Start by making a cross with the barsFlip one bar so the smooth (on build plate) sides are against each other and insert the axel from below Add a spacer and push the pin through the assembly to fix it togetherMake as many subassemblies as many you need Join the bar subassemblies together with the gauge partsMake sure the chamfered edges on the gauge face away from you and insert the axles from the bottom so the lip on the axle matches the chamfers on the gaugeAdd the bar subassemblies as shown with the lower barAnd then the higher bar to the axles Add the pins to fix the parts togetherThe bottom side should look like thisMake sure all the connections are flat to the surfaces if not something might be in the wrong orientation or you havent pushed on the pins hard enoughRepeat the process as many times as needed When you have enough links joined together finish the ends Again make sure the axles lip fits in the chamfer of the gauge when inserting it from the far sideJoin the lower of the bars directly on the axel and add the spacer on the other axelNow join the upper bar on top of the spacer and add a spacer on top of the lower barNow secure everything by pushing the pins into the axlesFollow the same procedure with the other endIn the end you should have the finished button gauge, check that everything moves nicely and that all the joints are flush with other parts
With this file you will be able to print Button Gauge with your 3D printer. Click on the button and save the file on your computer to work, edit or customize your design. You can also find more 3D designs for printers on Button Gauge.
