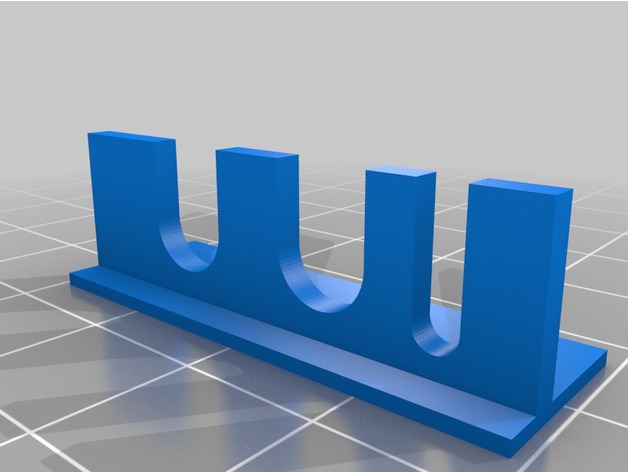
Button and led holder for Mini NES Pi 3 Case
thingiverse
Button and LED holder for Raspberry Pi 3 I made this button and led holder for the Mini NES Pi 3 Case By LKM, http://www.thingiverse.com/thing:1887826 I didn't really spend much time on the button holder, just made it so it should work for me, included the 3D file if anyone feel the need to edit the thing. The button holder works with all orientations of the Mini NES Pi 3 Case. What you need: 2x Momentary push button 1x 3mm red LED 1x 150 Ω resistor (higher value is fine if you want a less bright led, but lower value then 68 Ω might break the LED Diode) Soldering iron & solder wire 6x normal wires or 3x Female To Female jumper wire that you cut in half to get 6x cables with female jumper in one end and a striped wire to solder in the other end. Heat shrink tubing or electrical tape to insulate the wires. Superglue Hot glue gun 2x Male pin header connector or you can solder the cable directly without the pin header connectors. To get it working i did the following: 1. Reset button: Most Raspberry Pi models have a build in force reboot function, you only need to solder 2 pins to the 2 holes marked "RUN" and the other ends to the Momentary push button. (No programing or further configurations needed) 2. LED light: Simply plugged in 1 female cable to the ground and 1 female cable to the 3.3V pin then solder a 150 Ω resistor to the end of the 3.3V(+) cable and the end of the resistor to the Anode(+) on the LED (the long leg) and soldered the GND(-) cable to the Cathode(-) on the LED (the short leg). I used a normal 3mm red LED with some hot glue to hold it in place and electrical tape to isolate the metal surface of the legs, but you can also use shrink tube but make sure to isolate each leg separate so you don't short the circuit. (The 3.3V GPIO PIN are always High (active) when the Raspberry Pi have power connected so the LED will always be active when the Raspberry Pi have power, much like the standby LED on a TV, so you don't need any scripts running in order for it to work) 3. Connect the wiringPi library: I used this tutorial: https://www.element14.com/community/docs/DOC-78055/l/adding-a-shutdown-button-to-the-raspberry-pi-b 3.2 Connecting the power button: I used this tutorial: https://www.element14.com/community/docs/DOC-78055/l/adding-a-shutdown-button-to-the-raspberry-pi-b 4. Assemble: I used superglue to get the button/led holder to stick to the case and hot glue to secure the LED in place. Side note: I included a breadboard view of how I wired everything. Be careful, I don't take any responsibility if your raspberry pi go up in a puff of smoke or if you hurt yourself or others. If you are unfamiliar with GPIO/Electronics/Raspberry Pi be careful and read up on it first. Print Settings Printer Brand: Deltaprintr Printer: Deltaprintr Kit Rafts: No Supports: No Resolution: 100nm Infill: 100%
With this file you will be able to print Button and led holder for Mini NES Pi 3 Case with your 3D printer. Click on the button and save the file on your computer to work, edit or customize your design. You can also find more 3D designs for printers on Button and led holder for Mini NES Pi 3 Case.
