Business Card Stamping/Embossing/Debossing Kit
prusaprinters
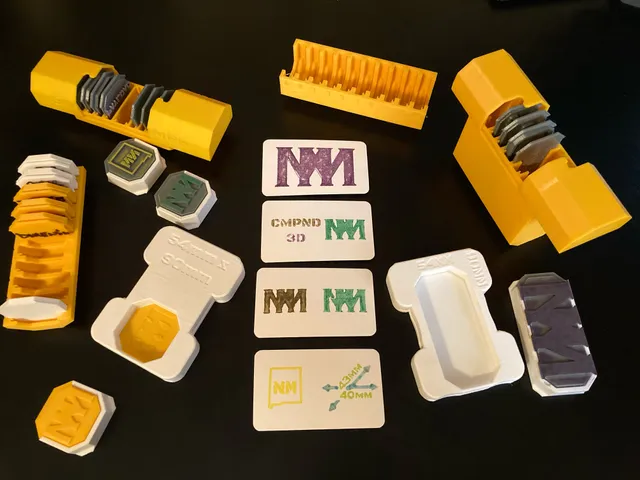
Snug Fitment – Print at .2mm layer height using PLA (if using Prusa/dialed in printer) OR .3mm layer height using PETG (if printer is not dialed in or to shorten print time, due to PETG shrinkage)I am not an expert in stamping, embossing, or debossing; Everything is based on rudimentary research and trial and error. All stamped cards in photos are actually embossed using pigment inks and embossing powder.Business Card Stamping/Embossing/Debossing Kit This kit is for customizing standard sized business cards, 54mm x 90mmOnce the big components are printed, which will take some time as they are meant to last, you only need to print the stamps and dies, which are quite small.StampingStamps are to be printed in flexible filamentStamp designs are to be extruded 2mm out from the blank; 5mm total stamp height“Lopsided” stamp designs should have a “border-stilt” opposing the design, for level stamping (see close-up of stamps)Stamp designs can be extended to the perimeter of the press block if printed using supports (see close-up of stamps)Once printed, stamps will likely require a bit of careful “cleanup” with an x-acto bladeStamp face should be carefully sanded to achieve a uniform stamp face, HOWEVERSometimes the nozzle-paths create an appealing design, so, sanding is not always requiredIf you have a Prusa, turning on ‘ironing’ will reduce the cleanup required (the large logo pictured was ironed with 1% flow, and light cleanup along the edges, no sanding)Ensure business card is fully and evenly seatedStamping pressure seems to depend on the quality of the stamp, ink being used, and saturation of the stampRemove freshly stamped cards carefully; Placing index and middle fingers on corners of card and pressing UP, while placing thumb in center of card and pressing DOWN, while pulling out, aids in clean removalDie Embossing/DebossingDies can be printed in any filamentMale dies are to be extruded 1mm out from the blank; 4mm total die heightFemale dies are to be extruded .6mm into the blank (fitment into the die stand is based on a depth of .6mm; depth is based on the thickness of the business card, ~.5mm)Male and female die designs should be offset .5mm; Offset is based on thickness of the business card, ~.5mmEnsure business card is fully and evenly seatedBodyweight should be used to press diesDies should be pressed, then entire frame should be rotated 90 degrees then pressed again, then repeated 3-4 times to aid in even design transferDesigns on female dies should not breach the border; This can lead to creasingStamp EmbossingTo emboss using stamps, pigment ink, embossing powder, and a heat gun are required
With this file you will be able to print Business Card Stamping/Embossing/Debossing Kit with your 3D printer. Click on the button and save the file on your computer to work, edit or customize your design. You can also find more 3D designs for printers on Business Card Stamping/Embossing/Debossing Kit.
