BullPAC 3
thingiverse
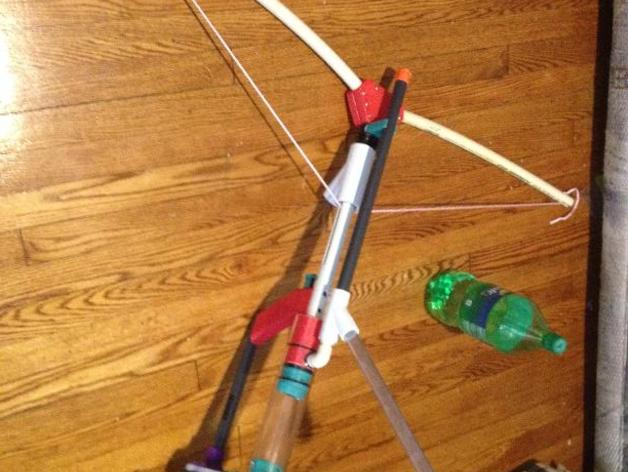
It seems like you've got a comprehensive guide to building a Nerf blaster, specifically a BullPAC! I'll break down the steps and highlight any particularly important or technical aspects. ### 8a: Plunger Tube Junction + Catch Rod - **Lubricate all moving parts.** - Insert the catch rod into the plunger tube junction, making sure it’s properly seated. ### 8b: Frame Tube + Handle 1. Push the handle into the frame tube so that the catch enters the catch slot. 2. Secure with two 3/4" screws through the frame tube into the handle. ### 8c: Integration of Parts (A+B) 1. Rotate the plunger rod to ensure the catch notch faces down. 2. Slide the 3/4" PVC frame tube over the plunger rod, holding the trigger to prevent the catch from moving back up into its original position and blocking the path of the plunger. ### 8d: Bow Arms, Plumbing, & General Setup 1. Insert a knot at both ends of a string through the slots in the frame tube through the hole in the plunger rod. 2. Guide one end of the string to one of the bow arms, bend them until they reach where you want and add a knot on that end about an inch short from being snug (depending how tightly you like it). 3. Pop in the plumbing assembly, ensuring all parts are correctly seated. ### 8e: Stock Assembly 1. Insert a paper towel into the plunger tube for easy cleanup later. 2. Mount the stock assembly into the plunger tube by screwing from each side with appropriate-length screws (~1/2"). Add ventilation holes on the top and bottom for optimal performance (min of 1/4", but prefer ~3/8"). ### General Tips - Be cautious not to over-tighten bow arms, as this can lead to a permanent bend that will weaken their tension capabilities. - If planning multiple firing settings with different knots, you may need to readjust the existing strings (those without your new knot setting). - When bending the bow arms for added tension or simply repositioning the knot further up towards your preferred setpoint: - Be cautious of over-tightening which could break either side, though in an actual event I found both broken with only about a full ounce difference. - Do not do this at temperatures below ~40°F if your springs and all parts don't fit correctly when cold. In terms of "more lubricant is probably good," make sure to lube anything with significant friction before proceeding. For Bow arms especially; use as little lube so it won’t fall off onto strings/ components during usage. I personally recommend starting on the handle rod itself because even at zero pull and using my recommended settings - this one would occasionally bind on plunger.
With this file you will be able to print BullPAC 3 with your 3D printer. Click on the button and save the file on your computer to work, edit or customize your design. You can also find more 3D designs for printers on BullPAC 3.