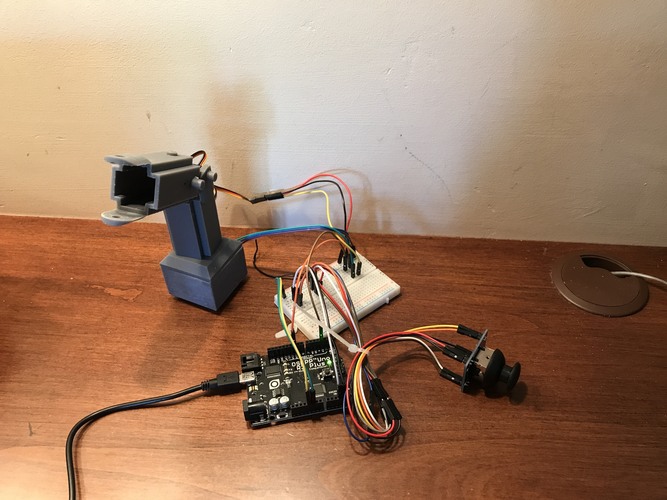
Building Block Robotic Arm Kit
pinshape
This Robotic Arm Kit is designed for students to build and learn about electronics. It uses servos, 3D printed pieces, and simple electronic boards to teach the basics of electronics. The kit features a structure similar to popular building block toys, making it easy for students to assemble. The goal of this project is to inspire students to pursue careers in STEAM (Science, Technology, Engineering, Arts, and Math). By creating an interactive robotic arm, students will be encouraged to get involved with 3D printing and other STEAM fields. Build Materials: * Formlabs resin * Any 3D printer and material * Arduino Uno * F/M pin connector wires * M/M pin connector wires * 2-Axis Joystick * Servo Motor * Solderless Breadboard Code: ``` #include <Servo.h> const int servo1 = 3; const int servo2 = 10; const int joyH = A0; // L/R Parallax Thumbstick const int joyV = A1; // U/D Parallax Thumbstick int servoVal; Servo myservo1; Servo myservo2; void setup() { Serial.begin(9600); } void loop(){ outputJoystick(); servoVal = analogRead(joyH); servoVal = map(servoVal, 0, 1023, 0, 180); myservo2.write(servoVal); servoVal = analogRead(joyV); servoVal = map(servoVal, 0, 1023, 70, 180); myservo1.write(servoVal); delay(15); } void outputJoystick(){ Serial.print(analogRead(joyH)); Serial.print ("---"); Serial.print(analogRead(joyV)); Serial.println ("----------------"); } ``` Lesson Plan PDF and Assembly Guide are available in the downloadable files.
With this file you will be able to print Building Block Robotic Arm Kit with your 3D printer. Click on the button and save the file on your computer to work, edit or customize your design. You can also find more 3D designs for printers on Building Block Robotic Arm Kit.
