Bug Bot
thingiverse
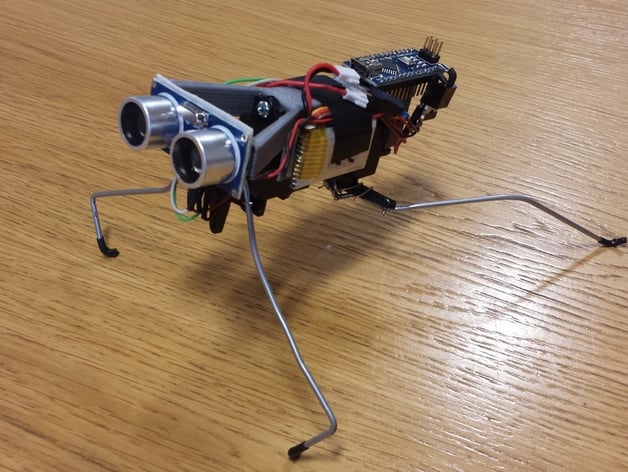
Bug Bot is an Arduino Nano controlled robot bug, inspired by a Make: project that wanders autonomously around your home. As he moves forward, Bug Bot can detect objects and promptly change direction to avoid them. This reaction allows him to seamlessly resume his wandering pattern. Bug Bot makes an excellent starting point for anyone eager to explore the world of Arduino, servo control, and robotics. With easily accessible code on file pages, you're free to modify his behavior to your liking, tailoring Bug Bot's actions to fit your unique interests. This engaging project has a total build cost of approximately £25. Watch as Bug Bot demonstrates his capabilities in action here: http://youtu.be/oGso3zAnqsA Sincerely, Andy Instructions Build Requirements 1 x Printed Body 1 x Arduino Nano 1 x 7805 5V Regulator 1 x HC-SR04 Ultrasonic Sensor (or modify the code to accommodate a Ping Sensor) 2 x HS85 Type Servo (18G) 2 x LiPoly 300mAH Lithium Battery 1 x Wire Coat Hanger (for the legs) 3 x No.4 10mm Self Tapping Screws 50mm Double Sided Foam Tape 200mm Thin Wire (for attaching legs to servo horns) Notably, a 7805 5V regulator was utilized to address excessive current drawn by servos on my clone Nano. By directly soldering +Ve and -Ve pins onto the Nano and employing a connector for 5V output powering the servos and HC-SR04 sensor, a stable power supply was ensured. To ensure efficient operation, I bypassed incorporating a switch due to the exposed battery connector allowing for easy disconnection of power. The two batteries are connected in series, resulting in a 7.2V supply connected directly to Vin. Used Pins: 11 - Front Servo 10 - Rear Servo 9 - Trigger Pin 8 - Echo Pin Vin - 7.2V Supply Gnd - 0V Supply Securing the legs with wire through holes in servo horns, as depicted in images provided, proved a bit tricky to execute perfectly at first but yields pleasing results upon persistence and fine-tuning adjustments until achieving ideal movement patterns for your Bug Bot. Hot glue is an acceptable alternative. Correct orientation of servos ensures seamless operation - position front servo with the horn nearest the floor while securing the rear one with the horn directed towards its posterior section, allowing harmonious joint movement. For a hassle-free assembly process, adhere closely to instructions and available images. If clarification on any component is required, kindly refrain from private messaging in favor of engaging via public comment sections, avoiding repetitive response requests for me.
With this file you will be able to print Bug Bot with your 3D printer. Click on the button and save the file on your computer to work, edit or customize your design. You can also find more 3D designs for printers on Bug Bot.
