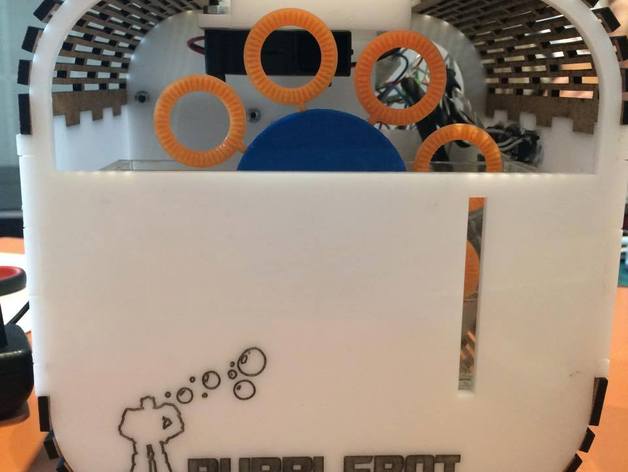
Bubble Alarm Clock - Bubblebot
thingiverse
Tired of a lackluster morning start? Autobots Unite brings you Bubblebot - your new best friend alarm clock. As part of our Mechatronics Course at DTU, we designed and created an innovative alarm clock project. To learn more about the project, watch this video or visit our blog for project updates, design challenges, and behind-the-scenes stories! Instructions: Let's Build It! Ready to create your own alarm clock? Here are the necessary materials: Materials 2 x 600x450x4 mm Acrylic Sheets 1 x 3mm transparent Acrylic Sheet 1 x 350x190x3 mm MDF sheet Several soap bubble blowers 8 Ø4x15 mm Screws Strong Glue Hardware Arduino Mega 2560 DC motor (5v, runs at approximately 15 RPM) Blowing Fan 6 Buttons LCD Display Switch (On/Off) RTC Ø10 x 115 Metal Shaft Power Supply (12V, 2A) Relay Piezo Element Diodes Breadboard Resistors Multiple Wires Software Download this Arduino Code for your alarm clock. To connect the hardware correctly, please use this circuit diagram. Assemble Your Alarm Clock Let's start building! To begin: Open attached PDF files to lasercut the required components. Cut living hinges on the MDF sheet and rest of the housing parts on the Acrylic sheets. Use the thin transparent sheet for the basin and the 4mm sheets for the rest. Check your laser cutter settings before cutting each material. Precise settings can affect the final results. Open Boblearm.STL file and print TWO components using your 3D printer. Optimize layer thickness, medium-infill recommended. Once printed: Assemble acrylic parts (except back and top) by applying glue to all surfaces except the bottom part. Apply acetone inside the basin for a secure seal. Install living hinges after the glue is dry. Now, add electronics components: Mount the DC motor using screws to the interior wall. Secure the motor shaft with screws on the motor. Add the Arduino board and screw it to the interior wall. Attach breadboard by securing double-sided adhesive to the back. Add buttons and LCD display, we suggest gluing them for a secure fit. Screw on the switch to complete setup. Connect the fan using the lasercut mount. Refer to the circuit diagram for precise wiring instructions. Upload your Arduino code and voila! Your alarm clock is ready! Finally, secure your bubble clock with magnets on the back of the cabinet.
With this file you will be able to print Bubble Alarm Clock - Bubblebot with your 3D printer. Click on the button and save the file on your computer to work, edit or customize your design. You can also find more 3D designs for printers on Bubble Alarm Clock - Bubblebot.
