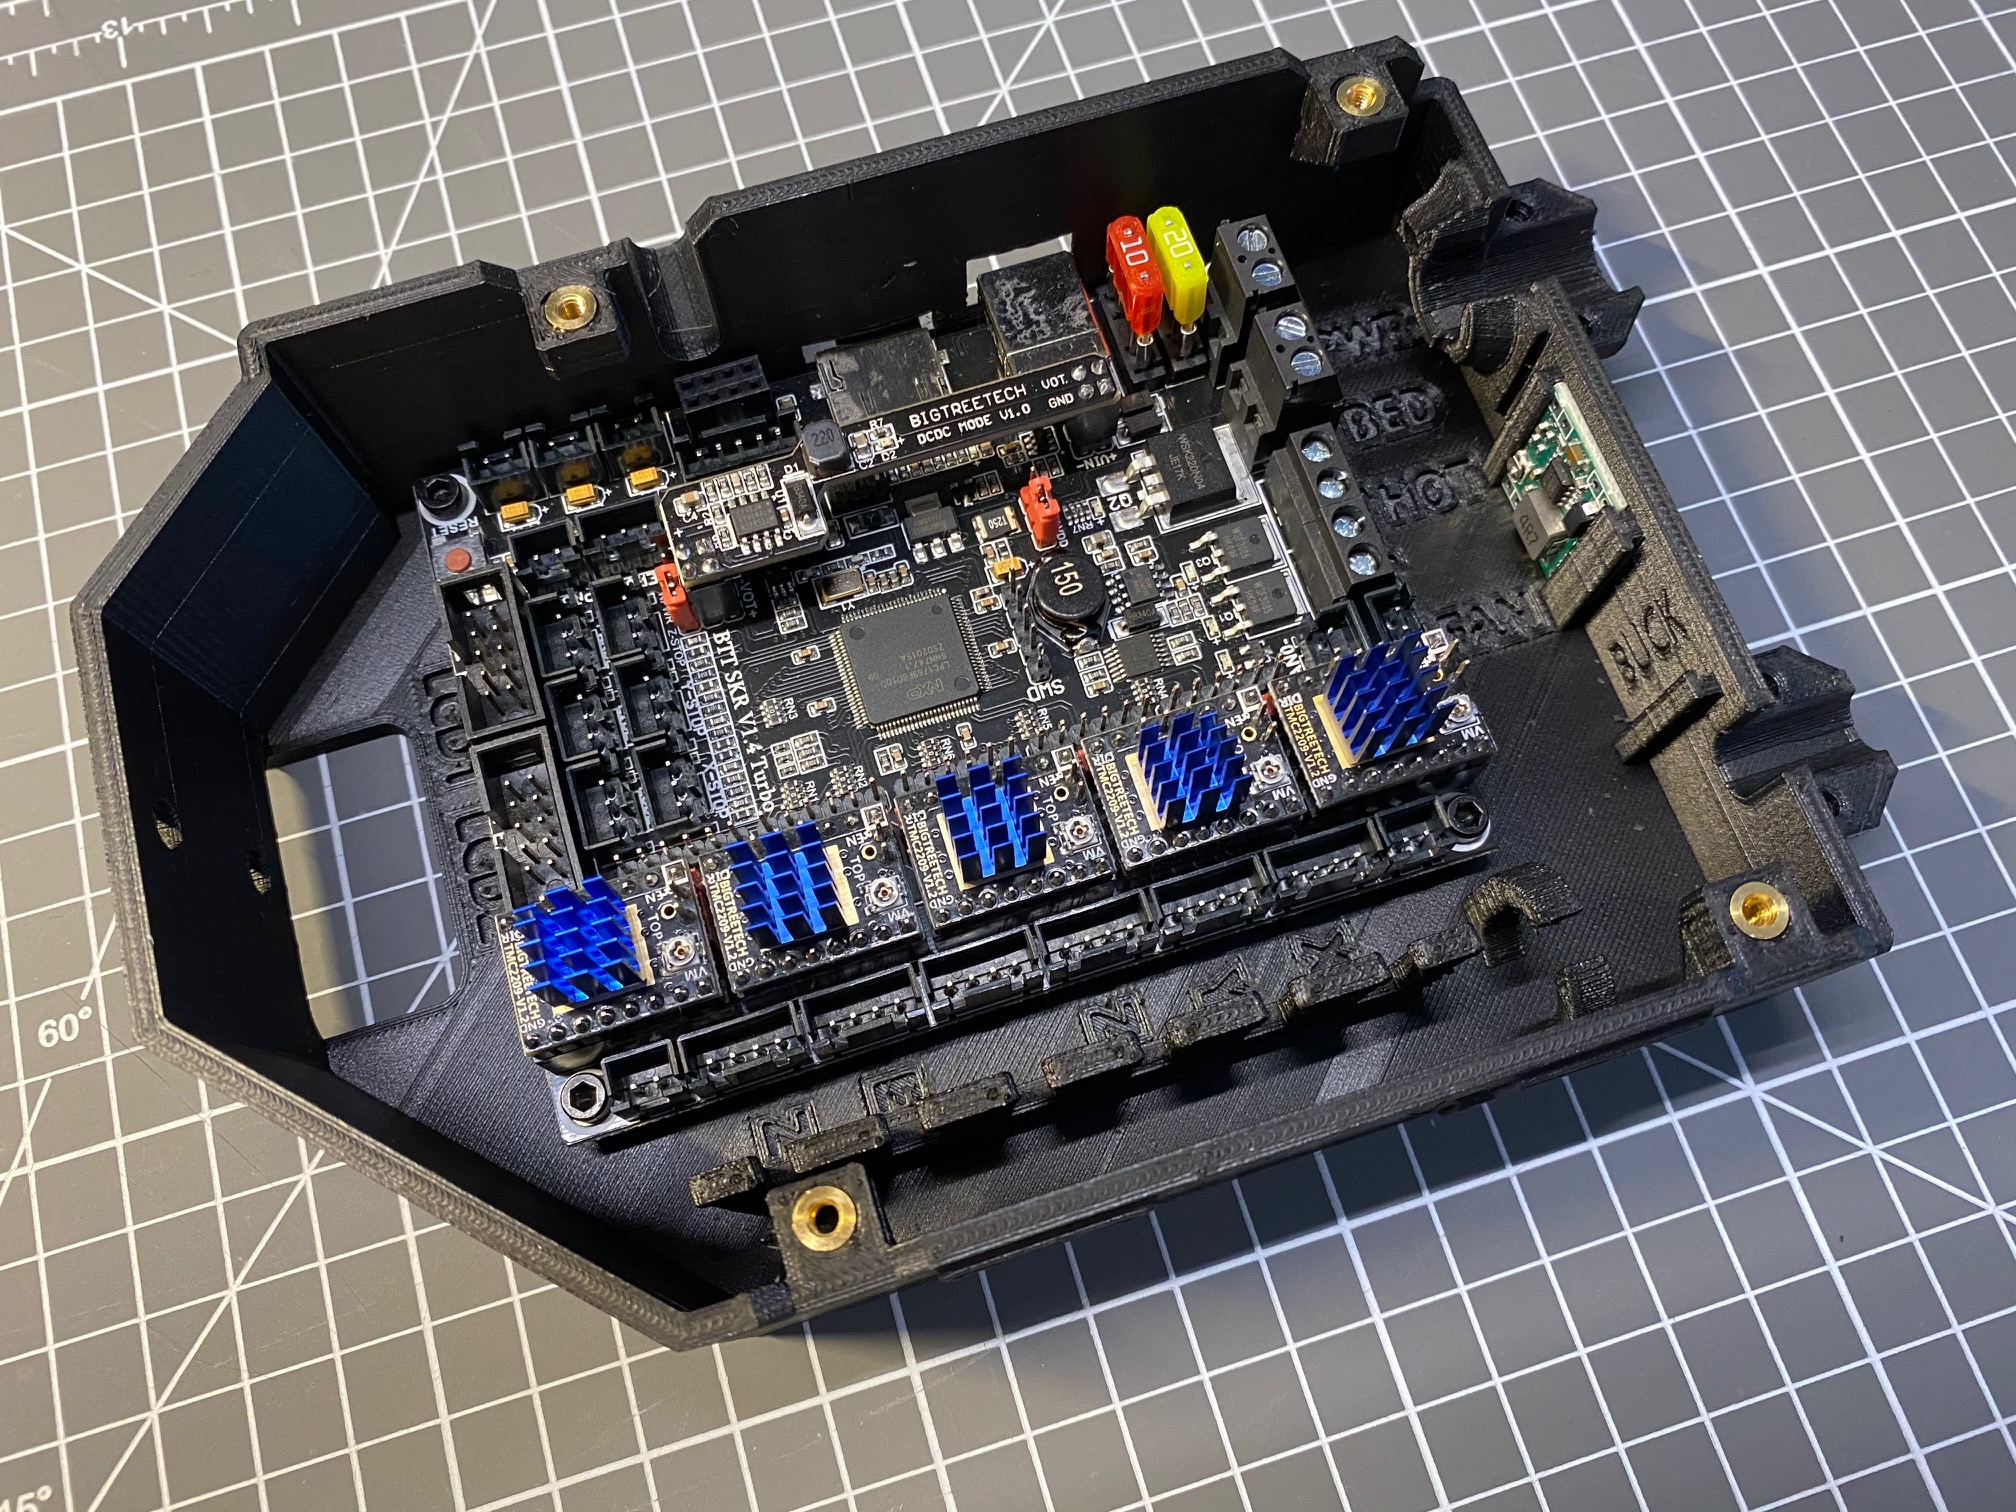
BTT SKR v1.3/1.4/1.4Turbo Mainboard Case for Bear Frame
prusaprinters
<p><strong>Important Notes: </strong></p><ol><li><strong>Looks like I got the labelling wrong (as did Jerlo :) who I copied w/o checking).</strong><br><strong>Until I can fix it, please use the wiring guide here: </strong><a href="https://www.biqu.equipment/products/btt-skr-v1-4-skr-v1-4-pro?variant=31220354187362"><strong>https://www.biqu.equipment/products/btt-skr-v1-4-skr-v1-4-pro?variant=31220354187362</strong></a></li><li><strong>Dont copy the orientation of the 5v DCDC board per my photos - its the wrong way round and unsurprisingly will blow the 10A fuse if you power up like that ;) luckily no magic smoke…</strong><br><strong>(Wiring picture shows correct orientation)</strong></li></ol><p>Here is my remixed case for using an Bigtreetech SKR 1.4 with the Bear frame. Tested with 1.4 Turbo and Bear 2.1.</p><p>It is based on the excellent Bear SKR case from RC-CnC, and I have also mixed in elements from another super bear SKR case from Jerlo.</p><p>Here is a list of the changes:</p><p>Use of heat-set M3 threaded inserts instead of captive nuts for PCB mount and securing the case lid.<br>See image for the type of inserts to use.</p><p>Remixed lid to include a 80mm fan, which is the optimal balance between noise vs airflow vs size (it fits with the X motor).<br>Note that RC-CnCs original lids will work fine too if you dont want a 80mm fan</p><p>Adopted the cable management solution from Jerlo's design - this works great! Plus I added a couple of slots for cable ties if needed</p><p>Adopted the idea for port labelling from Jerlo's design (re-implemented not direct remix). It saves a bit of thinking when hooking up the cables <strong>- see note above</strong></p><p>Adopted the extruder aperture from MK3s rambo case to include capture hole for 3mm nylon filament for extruder loom support</p><p>Bevelled apertures for SD card and USB port to increase access and address I hope a comment on the original</p><p>Added mount slots for (optional) common 22mm x 17mm DC-DC buck converters - this is to allow flexible use of fans with different voltage than the PSU/mainboard (e.g. 12v fans with 24v PSU). Example product from Amazon UK: <a href="https://smile.amazon.co.uk/DollaTek-MP1584EN-Step-Down-Adjustable-Converter/dp/B07DJ5HZ7G">https://smile.amazon.co.uk/DollaTek-MP1584EN-Step-Down-Adjustable-Converter/dp/B07DJ5HZ7G</a><br>Also see image for the correct buck converter</p><p>Removed some of the bottom (print bed facing) vents to prevent airflow from the cooling fan to print area. This is a precaution to to prevent warping of prints. Additional vents added to lid. Airflow from the cooling fan will exit the case primarily from the lid or from the hole at base</p><p>Filleted corners for aesthetics</p><p>Included mouse ear brims for easier printing - align these with the case/lid on the slicer build plate</p><p>Cable tie tag added to lid for cooling fan cable management</p><h3>Print instructions</h3><p>Print with 0.2mm to 0.3mm layer height. I printed at 0.24mm.<br>3 perimeters<br>4 top/bottom layers<br>20% infill<br>No brim (if using the mouse ear brims model)<br>No supports</p><p>This Youtube video gives a good process to install threaded inserts: <a href="https://youtu.be/KqSmCHr4fdA?t=43">https://youtu.be/KqSmCHr4fdA?t=43</a><br>I dont have one of the special soldering iron tips. My normal medium sized tip works just fine.</p><p>Please print the cable restraints from RC-CnC's original design</p>
With this file you will be able to print BTT SKR v1.3/1.4/1.4Turbo Mainboard Case for Bear Frame with your 3D printer. Click on the button and save the file on your computer to work, edit or customize your design. You can also find more 3D designs for printers on BTT SKR v1.3/1.4/1.4Turbo Mainboard Case for Bear Frame.
