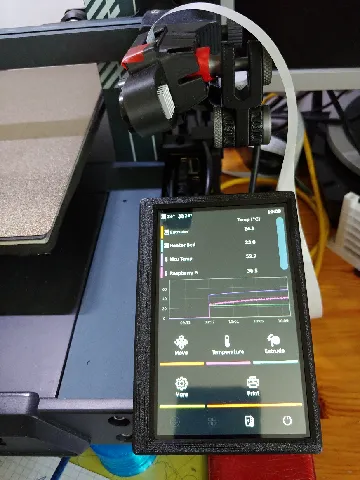
BTT HDMI5 V1.2 case for Elegoo Neptune (3/4) and others
prusaprinters
Case for BigTreeTech HDMI5 display V1.2 with outlets to the back. Different mounting options.The backplate has different mounting options for landscape or portrait in different positions. Just chose the screw holes for your needs. You need the mounting adapter HDMI5_MOUNT_V2_PORTRAIT.stl from the original design (portrait version for all mounting options) https://www.printables.com/de/model/472777-bigtreetech-hdmi5-mount-for-elegoo-neptune-3-propl/files to connect it to your printer.The case has three holes with little pins at its side to use the displays buttons (brightness and screen flip). You can chose to print the tricky pins or just let them out an use a bit of filament for pressing the buttons.The case is designed to snap onto the display so that no threaded inserts for the case are needed. Printing instructions:I used a 0.6 mm nozzle for all parts. Just ensure that your slicer can print “thin walls” or line width thinner, e.g. 0.4 mm. For the button pins a 0.4 mm nozzle would be better.a) Backplate:0.3 mm layer height30 % grid infillno supportb) Top/Case:0.2 mm layer height30 % grid infillno supportc) Button pins (3 pieces):0.1 mm layer height100 % concentric infillno supportsmall brimvery, very slow printing speed (15 mm/s)play with retraction distance and retraction speedhigher bed plate temperature than normalallow cooling each layer by printing 3 pieces at a time spread over the print bedI had to print mine several times for a satisfying resultd) Mounting adapter https://www.printables.com/de/model/472777-bigtreetech-hdmi5-mount-for-elegoo-neptune-3-propl/files:0.3 mm layer height30 % cubic subdivision infillno supportIf the parts are to tight to your display, you can change the parameter “margin” in the attached Fusion360 file. Additional Parts:2 threaded inserts M32 screws M3 x 12 or M3 x 164 screws M3 x 12 or M3 x 103 screws from original Elegoo mount Assembling instructions:Press the threaded inserts into the mounting adapterScrew the Backplate to the mounting adapter; chose the mounting option you likeUse a tweezer or tong to put the three button pins into the holes of the casePut the display into the case and slip it over the two noses at the sides; the display is now fixed in the casePut the display case onto the backplate and use the 4 screws to fix itScrew the mount to your printer Instructions for klipper screen (rotation):Use detailed instructions from https://klipperscreen.readthedocs.io/en/latest/ and for rotation from https://klipperscreen.readthedocs.io/en/latest/Troubleshooting/Rotation/1. Raspberry Pi using kernel cmdlineAdding video=HDMI-A-2:800x480M@60,rotate=90 to my /boot/cmdline.txt did the console rotation. You have to figure out your hdmi port.2. Universal xorg configurationJust as described in this section. Note that for my Raspberry Pi the hdmi port in 90-monitor.conf differed from cmdline.txt.3. And I had to rotate the input matrix of the touch screen by adding the lineOption "TransformationMatrix" "0 -1 1 1 0 0 0 0 1"to the touch screen section of /usr/share/X11/xorg.conf.d/40-libinput.conf
With this file you will be able to print BTT HDMI5 V1.2 case for Elegoo Neptune (3/4) and others with your 3D printer. Click on the button and save the file on your computer to work, edit or customize your design. You can also find more 3D designs for printers on BTT HDMI5 V1.2 case for Elegoo Neptune (3/4) and others.
