Bruder LowLoader Conversion Parts
thingiverse
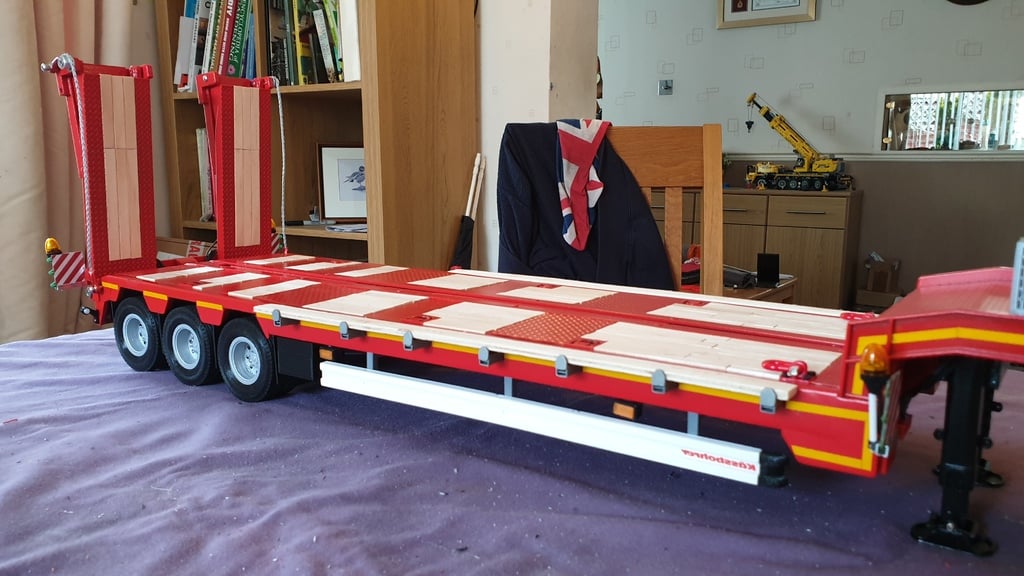
Here is the rewritten text: I'm excited to share that most of the components I used in converting a Bruder lowloader to look more scale were sourced from HTTP://www.piggytaylor.com/. The metal ramps and extension strengthening metal work all fit perfectly with the trailer's length after fitting these upgrades. The trailer head is now about 300mm, and the deck is approximately 600mm long. I used original designs by maxzol78 found on HTTP://www.thingiverse.com/thing:4058058 for the trailer legs, which are great, aside from that, various thicknesses of plasticard were employed. Electronics Box: This electronics box was printed in white PLA with a 30% infill and 0.2 layer height, requiring no supports. I used hinges from model aircraft stores as they were the perfect size. The battery holder can accommodate a Turnigy Nano Tech 3s 2.5amp battery and fits over the support bars on the bottom of the box. Trailer Under runners and boxes: The runners boards are made of white PLA with a 50% infill to minimize see-through effects, printed at 0.2 layer height without supports or rafts. The boxes were printed in black as I couldn't be bothered painting them; they have a 30% infill and 0.2 layer height with no supports or rafts. The box supports help keep the boxes level with the trailer, while the runner supports are glued to allow for adjustable height settings. The runner ends were printed in XYD Black Flex at 0.2 layer height without supports. Wheels and tires: I designed these wheels as I wasn't pleased with the plastic originals and wanted double hubs on each side. They were originally printed in white PLA but looked terrible, so I reprinted them using Polymaker PolyMax black PLA with a 60% infill and 0.16 layer height, along with supports. To create a flat surface between the wheels when assembled, I printed the inner hub face down and the outer hub face up. The wheels sit on 4mm rod with M2 grub screws to secure them in place, and the wheel halves are fastened together with 12mm M2 dome head machine screws and nuts in the back of the inner hub. Tyres were printed with XYD Black Flex at 0.2 layer height and 30% infill with supports; I printed them on their side to keep one side clean. Wheel hubs were painted with Rust-Oleum Metallic Chrome Spray Paint. Trailer Marker Lights: These marker lights were designed to work with https://modellightingsolutions.co.uk/product/114-scale-3d-printed-trailer-marker-lights-orange-inc-leds/, the ones with shorter support are for the trailer head, and I used a piece of brass rod between them and the trailer secured with superglue. Spare Wheel Holder: This spare wheel holder was printed at 30% infill and 0.2 layer height in any PLA without supports; the wheel base fastens to the trailer head. Trailer Articulated support legs: As mentioned, this design is from maxzol78 found on HTTP://www.thingiverse.com/thing:4058058; I'm grateful for their work. I used Polymaker PolyMax black PLA with a 0.16 layer height and 60% infill to print the articulated support legs, along with supports for the upper leg, which were printed horizontally. Bulk Head and leg holder: These components were also printed in Polymaker PolyMax PLA black at 0.2 layer height and 60% infill; I managed to angle the bulk head so it printed without support. The bulk head is designed to fit with minimal trimming to the trailer. Wide Marker parts: I printed these wide marker parts to fit the wide load markers (https://www.rc3d.dk/shop/for-bred-last-3148p.html), which come as just the PCB board with LEDs on and stickers for hazard marking. I used aluminium square tube about 4mm x 4mm for the bar in the picture, which slides into the holder. The beacon is a normal 15mm x 9mm rotating beacon made using plasticard tubing and brass rod to create the pole. Trailer Head sides: The rallonge ridelle and ridelle are extended side boards for the head, replacing the original plastic components; any PLA was used with 30% infill and 0.2 layer height without supports. I hope this helps anyone looking to use these upgrades! I'm grateful to everyone who made or designed parts I used; if you have any questions, please don't hesitate to ask – I'm still learning CAD design.
With this file you will be able to print Bruder LowLoader Conversion Parts with your 3D printer. Click on the button and save the file on your computer to work, edit or customize your design. You can also find more 3D designs for printers on Bruder LowLoader Conversion Parts.