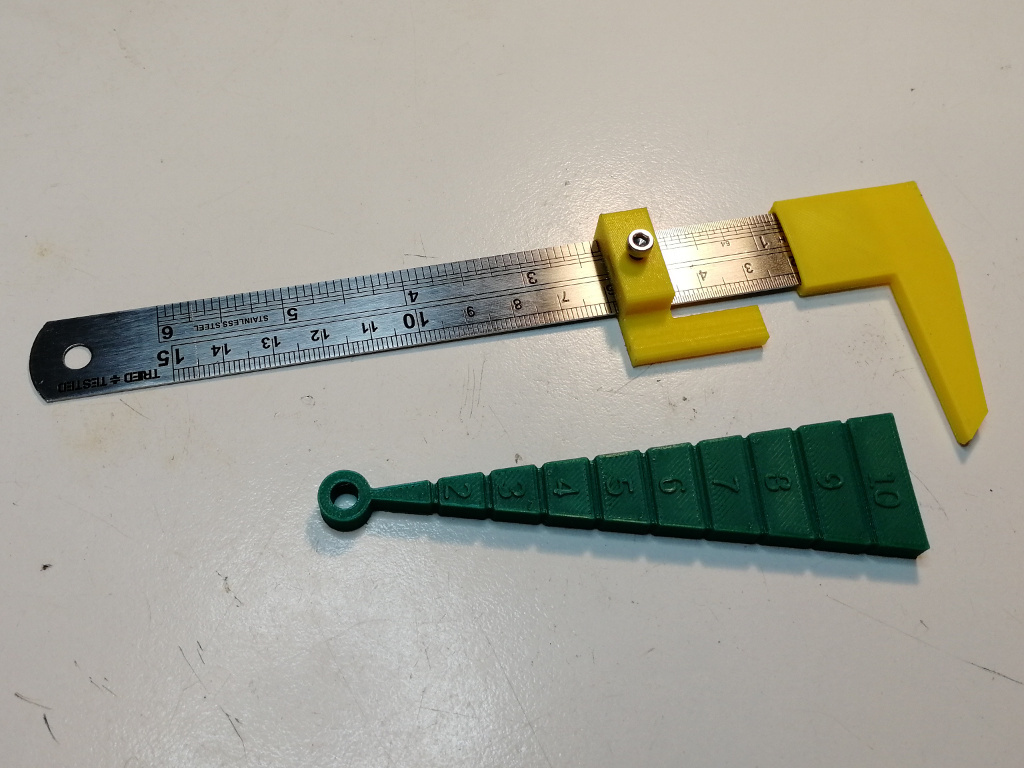
Breadboard Wire Bending Jig & Measuring Tool
thingiverse
I wanted a quick way to cut multiple pieces of wire the same length for making short breadboard jumpers. I make my jumpers by first taking a length of 1/0.6 solid wire, stripping about an inch off the end with pliers in hand, and then using my thumbnail to remove the insulation from the full length all at once. Next, I use a power drill to tension the now uninsulated wire. This saves the tricky task of trying to strip the ends of very small pieces of wire. The desired length of insulation and wire can then be set by moving the slide away from the end stop and tightening an M3 machine screw. Feed the wire or insulation through the slide until it reaches the end stop, cut with a pair of micro-cutters (I get mine on eBay), rinse and repeat. I make my wire 10mm longer than the insulation to give me a 5mm leg either side. Slide the correctly sized piece of insulation back over the wire and center it. Use the bending jig to form the legs. The bending jig is customizable - you can set the pitch, length of the first slot, quantity of slots (these increment by the pitch each time), overall height, and space between each slot. The supplied STL has a pitch of 2.54mm, goes from 2 to 10, has an overall height of 6mm, and a spacing of 10mm. A steel rule is also needed - I use a 6" precision rule, which I got on Toolstation. Additionally, you'll need an M3 nut and machine screw - I've used an M3x10mm but anything longer than 8mm will work.
With this file you will be able to print Breadboard Wire Bending Jig & Measuring Tool with your 3D printer. Click on the button and save the file on your computer to work, edit or customize your design. You can also find more 3D designs for printers on Breadboard Wire Bending Jig & Measuring Tool.
