Brainwave
thingiverse
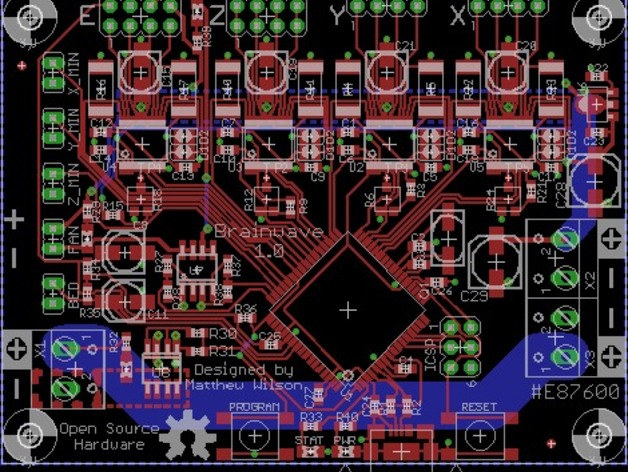
The Brainwave is a low-cost controller for Reprap 3D printers, derived from the widely recognized Sanguinololu. Its main goal was cost reduction while providing only essential components for a single extruder printer. It can drive both Cartesian and delta style printers. The board has a compact size of 60mm x 79mm, features a 12V power input, micro USB connector, and all connectors are located at the edge of the board to accommodate vertical or right-angle connectors. Equipped with an Atmel AT90USB646 microcontroller featuring a USB bootloader, Brainwave offers microstepping options of 1x, 2x, 16x, or 32x at up to 800mA. It also has dual Z-axis connectors and supports optional per-channel current attenuation. For heated bed use, it provides separate power input (up to 24V at 15A) and an integrated heater/thermistor/stepper connector for the E channel. Additionally, fan control is included in its features. To use Brainwave, you can build, buy from Metrix (http://metrix.net), or borrow one. After that, install Arduino 1.0.2 and the brainwave Arduino hardware bundle from github.com/unrepentantgeek/brainwave-arduino into the Arduino hardware directory. Next, get Marlin, which is maintained in a separate branch at http://github.com/unrepentantgeek/Marlin/tree/brainwave for Brainwave compatibility. Hardware configuration involves setting micro-stepping selector jumpers and stepper current reference voltages. In software configuration, open Arduino, select 'Brainwave' from the Board menu, and modify DEFAULT_AXIS_STEPS_PER_UNIT in Configuration.h according to your printer. Power on the Brainwave with a 12V supply and USB cable connected, hold down the PROGRAM button while pressing RESET, then upload the firmware using Arduino's Upload button. Afterward, the board will appear as a CDC ACM serial device (e.g., /dev/ttyACM[0-9] on Linux) and be ready for commands. Brandon Bowman created an excellent guide for setting up Brainwave under Windows and MacOS, while a wiring diagram is also provided by him. However, some known issues include needing to reset the firmware a few times after flashing and ensuring that a thermistor or similar 100k resistance component is present across the bed and extruder thermistor inputs to prevent Marlin from entering a deathloop. Primary development for Brainwave continues at github.com/unrepentantgeek/Brainwave. Special thanks go to Julie Atwood, Matt Westervelt, Frederik Hubinette, Silas Snider, Johann Rocholl, JP Sugarbroad, Austin Appleby, Richard DeLeon, Plamena Milusheva, Mark Ganter, Brandon Bowman, and others who contributed to the board's development.
With this file you will be able to print Brainwave with your 3D printer. Click on the button and save the file on your computer to work, edit or customize your design. You can also find more 3D designs for printers on Brainwave.
