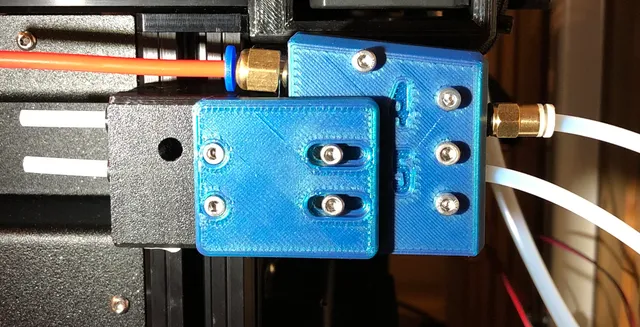
Bowden Y-splitter for XL
prusaprinters
A Y split for #4 on the right side of the XL.It makes it easier to print TPU since it can bypass the sensor and thus reduce friction. I found this to be an easier solution than fiddling with the sensor. You can, in FW 6.0, disable the sensor. If you use an older firmware, pop a piece of filament trough the sensor to trigger it.The Bowden for #5 is a pass-thru to the sensor, while the Bowden for #4 is attached to the back of this splitter.Two pieces of ø4mm Bowden tube, where one of them is cut to an angle, and all other ends are chamfered inwards. I'm unsure if these are necessary, but I think it will reduce the holder's friction and wear as well as guide the filament through the channels.You can also use a longer piece of Bowden tube for the top hole. The pieces are held together with screws and square nuts.I use the top Press Fit connection for connecting a bowden tube directly to my filament dryer when printing TPU.It is a bit fiddly to change filaments, but totally workable.Hardware:Bolts:4X M3x12mm2X M3x14mm2X M3x16mmNuts:8X M3 square nutsBowden tube2X Ø4x30mmPush Fit connection2X M6 type. (You need at least one, the other is nice to have if you want to attach a length of Bowden to the splitter)Assembly:Press square nuts into the backside.Place the angle-cut piece of Bowden into the top path of the backside piece.Place the other piece of Bowden into the #4 sensor opening.Make sure it fits into the middle-top path.Place the Bowden tube from #5 into the middle path.Bolt the two halves together with the right- and top screws (M3x12mm).Bolt the sensor block and Y-split together and make sure they are tight (M3x14mm to the sensor block, M3x16mm to the Y-split). Screw in the Push Fit connections. Attach Bowden #4.Note:In picture #7 I used a piece of tape to keep the piece of Bowden tube in place when I took the picture. You do not need any tape for the assembly. You do need to pre-bend it so it more or less keeps it shapeDesclaimerThis solution works for me. I've used it for several months with no problems. Sometimes it is a bit fiddly to insert the TPU, but that is the nature of the soft beast, especially if you use a Bowden tube all the way from the dryer.I mainly use #4 for TPU and keeps it loaded at all times, and this solution makes it relatively easy to change to other filament in #4 if needed. #5 is not affected at all, so use it as normal.Is it perfect? No. Do I take any responsibility if it does not work for you? No.Good luck, and good printing.
With this file you will be able to print Bowden Y-splitter for XL with your 3D printer. Click on the button and save the file on your computer to work, edit or customize your design. You can also find more 3D designs for printers on Bowden Y-splitter for XL.
