Bowden X-Carriage Mount for E3D V6
thingiverse
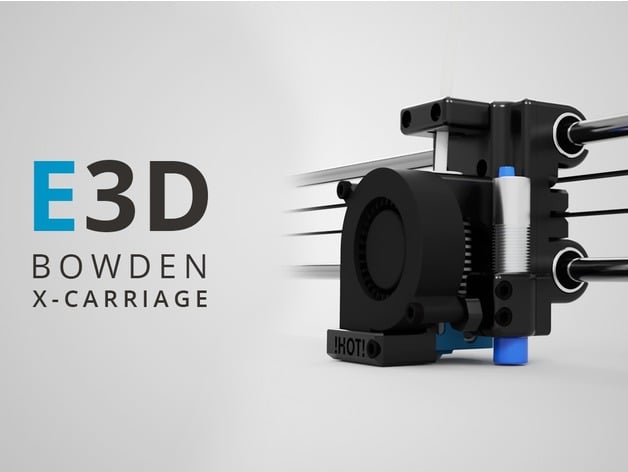
Consider supporting me by sending a tip on Thingiverse or PayPal. paypal.me/jackawaterfall Make sure to post a make if you print one! Updates: July 31, 2017 - New sensor mounts and support for the SN04-N sensor were added. The design now includes a cable clamp that clamps cables to the top of the mount for better cable management. Improved fan duct placement and design. February 17, 2017 - A BlTouch sensor variant was added. January 13, 2017 - An 18mm sensor variant was added. January 8, 2017 - The first release was made. What Is It? If you are upgrading your Prusa i3 hotend to the E3D V6 or a V6 clone hot-end with the standard groove mount, you'll need some way of mounting it to your x-carriage. This mount attaches to the x-carriage using the same four hole mounting system that is used on the Prusa I3 rework 1.5 kit, so you will need to print off a compatible x-carriage. My Prusa I3 X-Carriage: https://www.thingiverse.com/thing:2514659 This design uses a clamp so your hotend stays firmly in place and won't wobble around. More features are on the way including cable chain support and dual extrusion options. Please comment on anything you want me to implement and let me know of any problems that you're having with my design. Notes: Thanks to Josef Prusa. I took inspiration from the Prusa MK2s. Post-Printing Parts Required: 4 x M3 25mm screws 4 x M3 16mm screws 3 x M3 20mm screws 10 x M3 nuts E3D Hot end (or clone) 30mm fan 50mm radial fan 12mm inductive sensor (or optional 18mm sensor) Post Processing parts: I designed the parts so that they shouldn't need any cleanup. So just print the parts and you're ready to assemble it. Assembly 1) Use 4 x M3*25mm screws and 4x M3 nuts to secure the main body of the mount onto your x-carriage. 2) Use 2 x M3*16mm screws and 2 x M3 nuts to clamp the hot end onto the main mount using the printed clamp part. 3) Use 2 x M3*20mm screws and 2 x M3 nuts to attach the 50mm radial fan onto the printed clamp part. 4) Use 2 x M3*16mm screws to attach the 30mm fan to the left-hand side of the hot end. 5) Use an M3*20mm screw and an M3 nut to attach the fan duct to the printed camp part just below the radial fan. Firmware 18mm Sensor #define X_PROBE_OFFSET_FROM_EXTRUDER 32.5 #define Y_PROBE_OFFSET_FROM_EXTRUDER 5 #define Z_PROBE_OFFSET_FROM_EXTRUDER 0
With this file you will be able to print Bowden X-Carriage Mount for E3D V6 with your 3D printer. Click on the button and save the file on your computer to work, edit or customize your design. You can also find more 3D designs for printers on Bowden X-Carriage Mount for E3D V6.