Bottom Reinforcement - 2 holes 80 mm
prusaprinters
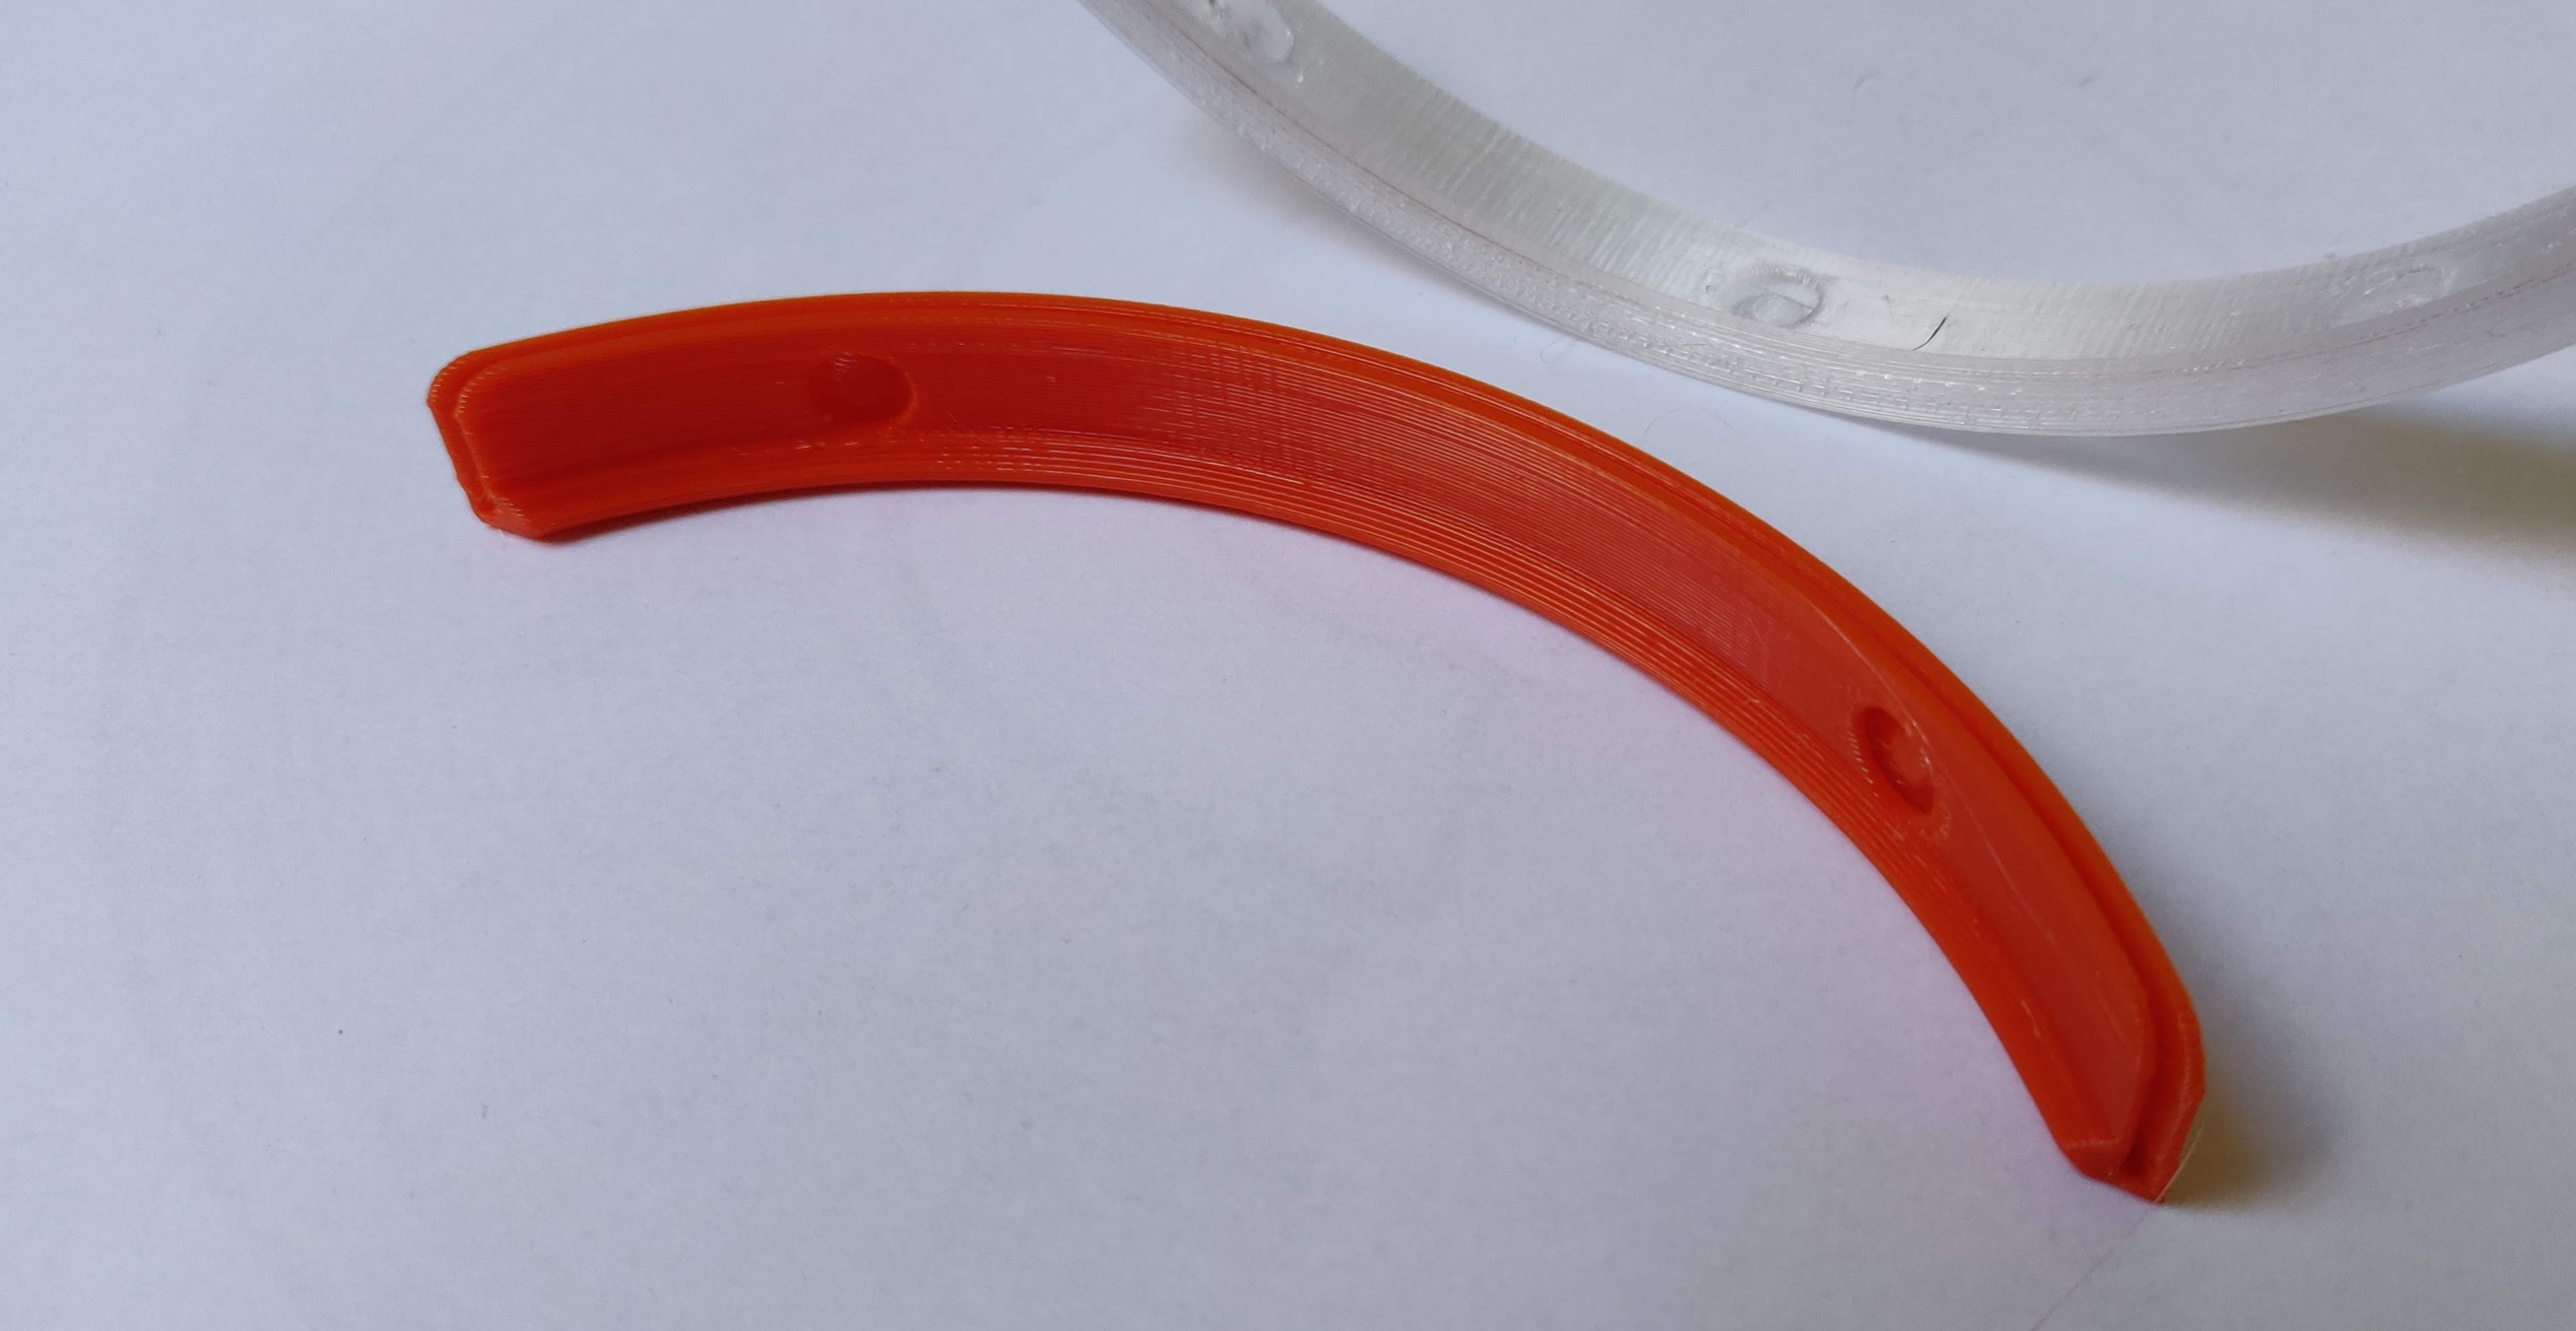
<p>This is my humble contribution to the Prusa Face Shield (TM) production.<br/> The Bottom Reinforcement, which is easier to print and assembly with 2 holes 80 mm apart. Why? Because the standard Hole Punch makes holes 80 mm apart.<br/> Currently, the upper holes are easy to make with the hole punch, while the bottom 3 holes are not that easy.<br/> Here is what you do:<br/> Cut your transparent plastic 6 mm longer than needed. Punch the holes. Cut away the 6 mm strip from the bottom edge of the transparent plastic. Voila!<br/> (Well, alternatively you can insert a 6 mm wide 'something' into your hole punch, so the bottom holes are punched exactly 6 mm from the edge, instead of the standard 12)<br/> Included is STL file and the Fusion 360 project.<br/> You can try, for instance, to move the holes 6 mm up - farther from the bottom line and save on cutting the bottom edge of clear plastic.</p> <h3>Print instructions</h3><p>1) Load your favorite Prusa Face Shield project to your slicer.<br/> 2) Remove previous bottom_reinforcement instance(s)<br/> 3) Add this STL to your slicer<br/> 4) multiply the instance and layout as necessary<br/> 5) slice<br/> 6) export gcode<br/> 7) print<br/> 8) enjoy</p>
With this file you will be able to print Bottom Reinforcement - 2 holes 80 mm with your 3D printer. Click on the button and save the file on your computer to work, edit or customize your design. You can also find more 3D designs for printers on Bottom Reinforcement - 2 holes 80 mm.