Bosch Professional 'GKT 18V-52 GC' plunge saw french cleat mount
thingiverse
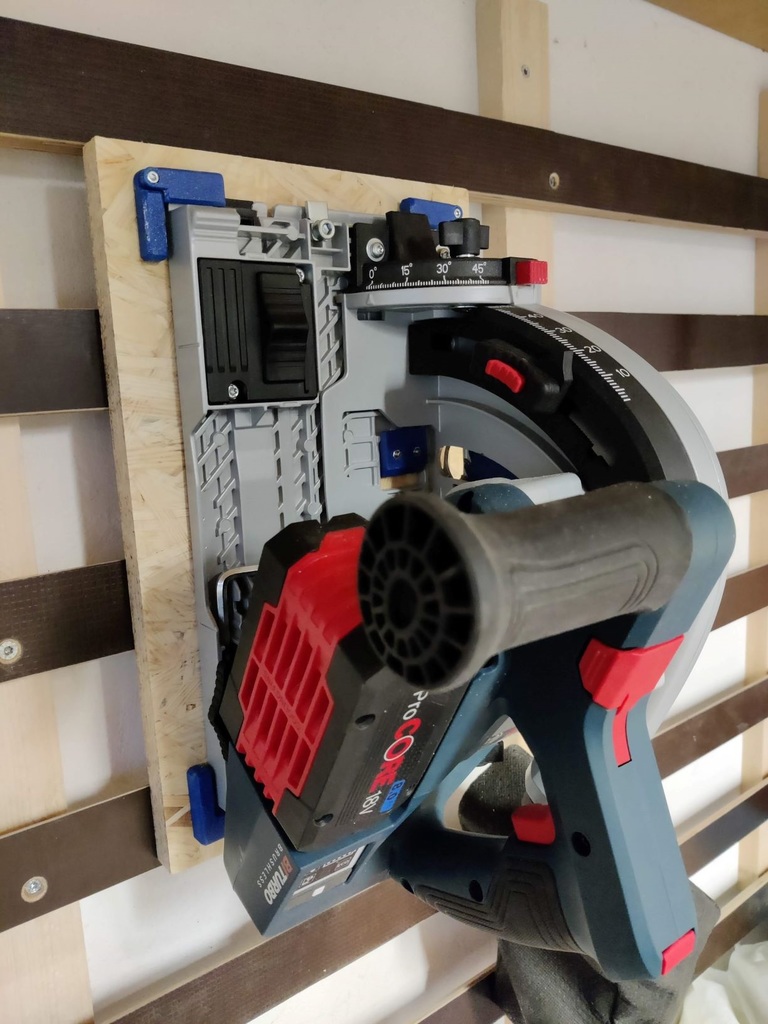
###What you need to build this thing: - 12x screw 4,1x25mm - 2x M3 washer - 4x M3 nut - 2x M3x10 hexagon bolt - 2x M3x30 hexagon bolt (depends on your mounting plate) - mounting plate (min. 330x200mm; I used an OSB plate with 18mm thickness) - approx. 100mm cleat for backside of your mounting plate, depending on your french cleat wall ###Print: - in principal you only need part 1 to hold the plunge saw in place - the other parts are suitable for alignment when remove the saw from the wall and reattach it as well as for more safetyness - I printed all parts with 100% infill - only used supports for nice finish of the bolt heads and nuts pockets, respectively. Possibly you don't need it. ###Assembly: - add the nuts in the pockets of holder 1 and 3.1; if they fit too tight, use a M3 bolt - print the prepared *.pdfs for alignement of drilling holes - cut along the markings - align the halves and tape them - position the paper on your mounting plate (use the center lines if you like) - drill the holes (I used 5mm drill bit for 4,1x25 screws and 3,5mm drill bit for the M3x30 hexagon bolt to get a loose fit) -- drill stand is recommended -- - attach holders 2L, 2R and 3.1 with the 4,1x25 screws from the back of the mounting plate - attach holder 1 with the M3x30 bolts from the back of the mounting plate - be sure to countersink the heads of the fasteners so that they are flush with the back of the mounting plate. - assemble holder 3.2L and 3.2R to the 3.1 holders using the M3x10 bolt. Insert the M3 washer between the two parts for a smooth opening of the hinges. - add your cleat on the backside Have fun!
With this file you will be able to print Bosch Professional 'GKT 18V-52 GC' plunge saw french cleat mount with your 3D printer. Click on the button and save the file on your computer to work, edit or customize your design. You can also find more 3D designs for printers on Bosch Professional 'GKT 18V-52 GC' plunge saw french cleat mount.