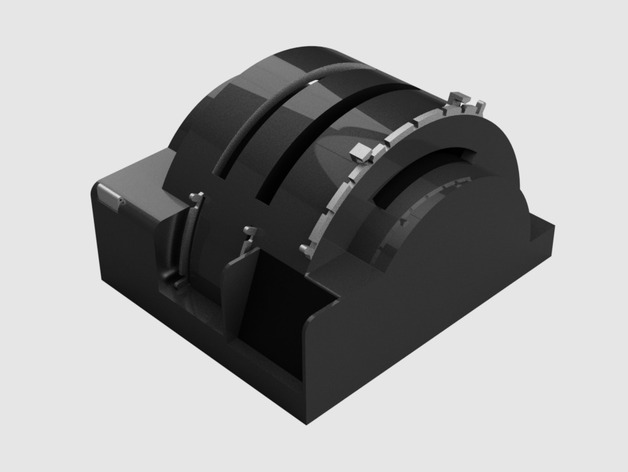
Boeing 737NG Throttle Quadrant
thingiverse
This is my Boeing 737 throttle quadrant for a flight simulator setup. The dimensions are supposed to be pretty accurate. The lever portion of the quadrant can be found over at thingiverse: http://www.thingiverse.com/thing:725595. I haven't got around to putting the other levers up yet. You can find more info in the Instructions bit, or head on over to cockpitonabudget.wordpress.com. That site is still a work in progress though - be gentle, okay? Instructions I originally planned on 3D printing this out, but then my printer gave up on me :(. Instead I took the CAD design and broke it down into roughly thirty individual 2D panels that I cut out of MDF using a jigsaw. Once they were all cut out, I just glued them all back together. If you'd like to make these panels for yourself, let me know in the comments or something - I can send 'em your way. For flaps and other parts I had to make from scratch, I ended up cutting them out of aluminium bar using a hacksaw and then bending it into shape by hand. To move the flaps lever properly, you'll need a small box with a spring inside that's holding it down - otherwise it'd just stay there all wobbly. There are pictures of my final product right here if you'd like to see. The actual levers themselves were cut out of 6mm MDF into three flat pieces, then the centre was hollowed out for the microswitches and a handle was made for the throttle itself. Here's what you'll need to make this: * About five microswitches (one each for reversers and park brake) * Six potentiometers (the levers on the side that are supposed to be in various positions) * One red LED light (park brake) * Two toggle switches (stabilizer trim) * Some bolts and screws * Five push buttons (take-off/go-around, alt mode off, horn cutout switch etc) * A spring for flaps If you're going the whole DIY route like I did - hand-cutting most of it out with a saw, and using your own glue and so on - here's what you'll need: * A drill (cordless is best - it takes about 5 minutes to cut through MDF with one) * Various bits for your drill * Lots and lots of different sizes of MDF board * A ton of PVA glue * Some saws (preferably a bandsaw) to get those panels all the right shapes and sizes * A sanding machine (or use some elbow grease to do it yourself) * A bit of putty (to make the joints between everything smooth) * Some really thick metal strips or bar for things like flaps speed brake levers etc * Special super-strong glue just for the thicker bits that require more glue power * Some special tools - an actual 3D printer is going to save you a whole bunch of headaches if you get one. It'll still take about half an hour to set it up, and another few hours to design, prepare everything before you start laying down filaments, and so on. Here's the trick that nobody mentions in any guide anywhere: make sure your levers handles etc are all installed in the quadrant before glueing everything together. That's going to make a ton less of a hassle out of putting this thing altogether - otherwise you're just gonna be struggling for hours getting stuck into those bits you put it all over MDF and then need to drill through, pull through your cable, so on, to attach the rest of the control parts in afterwards. I've got all my step by step guide available over at cockpitonabudget.wordpress.com. Still got a lot to finish up there but I'll see what happens with that soon - be kind though, still getting everything down properly!
With this file you will be able to print Boeing 737NG Throttle Quadrant with your 3D printer. Click on the button and save the file on your computer to work, edit or customize your design. You can also find more 3D designs for printers on Boeing 737NG Throttle Quadrant.
