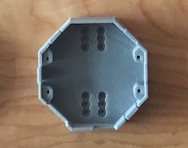
Board Holder
myminifactory
This is an instructional guide on how to assemble and use the Ultracortex Mark 3, a brain-computer interface (BCI) headset developed by OpenBCI. Here's a step-by-step summary of the process: **Assembly** 1. Assemble all electrode units and twist them into their respective Ultracortex frame nodes. 2. Reconnect wires to OpenBCI board and connect ear clip electrodes (Reference & Ground). 3. Connect touch-proof adapter cables to SRB1 and bottom BIAS pin, then attach ear clip electrodes. **Adjusting the Headset** 1. Fasten the BOARD_COVER. 2. Put the Ultracortex Mark 3 onto your head and tighten electrode units until they're snugly against your scalp. 3. Use the OCTATOOL to twist the electrode units if necessary. **Improving Comfort** 1. Assemble a few Electrode Units without a "spikey" electrode or any cabling. 2. Insert spring-loaded standoffs along the midline of the headset and at other locations to redistribute weight and relieve pressure. **Using the Ultracortex** 1. Place the UltraCortex on your head so that the back center node is roughly the same distance above your inion as the front center node is above the bridge of your nose. 2. Check out the Getting Started w/ OpenBCI tutorial to get up-and-running with the OpenBCI Processing GUI. **Feedback** 1. Submit issues or email OpenBCI at contact@openbci.com if you have questions, comments, or suggestions regarding the printing and/or assembly of the Ultracortex. 2. Share photos of yourself wearing the Ultracortex on Twitter (@OpenBCI & @Ultracortex).
With this file you will be able to print Board Holder with your 3D printer. Click on the button and save the file on your computer to work, edit or customize your design. You can also find more 3D designs for printers on Board Holder.
