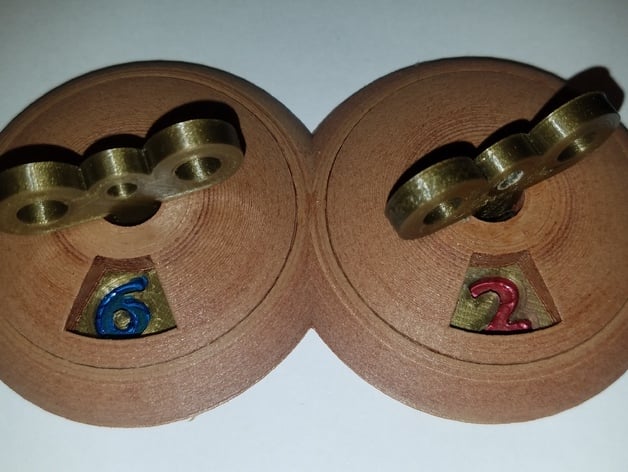
Board Game Counter
thingiverse
I thoroughly enjoy playing the boardgame Elder Signs, which involves completing tasks in rooms of a museum to gain Elder Signs and prevent awakening a Boss Monster. While doing so, players risk losing Sanity and Stamina, their health in the game. When you lose Sanity or Stamina, remove the corresponding tokens from your player's card. The problem is that these tokens are tiny and hard to handle. I've created this counter to remedy some of the issues I have with this otherwise wonderful game. I designed it in a style that matches the game, using a set of counters that need to be printed separately. Each counter requires 1 Base, 2 Caps, 2 Keys, and 2 Spinners. I printed the Bases and Caps in Hatchbox Wood PLA, while the Keys and Spinners were made with Hatchbox Bronze PLA. Inspiration for this counter came from two sources: a design on Thingiverse (http://www.thingiverse.com/thing:1090368) and another one (http://www.thingiverse.com/thing:547881). Print Settings: * Printer: MP Select Mini * Rafts: No * Supports: No * Resolution: 0.1 * Infill: 30% * Notes: My bed is only 120mm by 120mm, so the Base was rotated 45 degrees to fit. Post-Printing: After printing, clean all strings, bumps, and imperfections with files, knives, sandpaper, etc. Test fit all pieces before assembly. I was lucky that my Caps snapped into my Base with a little pressure, but some of my Keys were loose in their Spinners while others were tight. Sand the inner surface of the Base to help with smoother rotation of the spinner. Place the Caps on the Base and stain (if desired). Putting the Caps on the Base will help minimize the stain from getting on the surfaces that we will be gluing. Paint the numbers, with blue for Sanity and red for Stamina. These colors also appear on the character's card with blue on the left and red on the right. Next, glue the Key into the Spinner, making sure it is through the Cap first. Ensure the bottom of the Key sits flush to the bottom of the Spinner and does not protrude. Avoid gluing the Key or Spinner to the Cap; instead, let the Key rotate freely through the Cap. Lastly, carefully apply glue to the inner lip of the Base. Place the Spinner/Key/Cap assembly onto the Base, trying to make sure the Window of the Cap is facing forward. Be careful not to glue the Spinner to the Base; the Key should still rotate freely through the Cap.
With this file you will be able to print Board Game Counter with your 3D printer. Click on the button and save the file on your computer to work, edit or customize your design. You can also find more 3D designs for printers on Board Game Counter.
