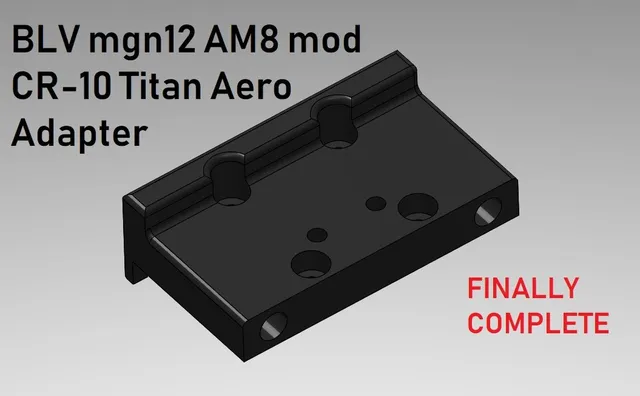
BLV MGN12 AM8 Titan Aero Creality adapter
prusaprinters
*This was primarily designed to fit this Titan Aero mount or my remix to the brilliant BLV mgn12 AM8 mod.* Travel limits are about X = -9 Y = -22 for Volcano, X= -6, Y= -27 for v6. Update (12/4/2019): I've been using this mount for a while now and my printer has been performing exceptionally well. I can never leave well enough alone though, so I've thought of some changes to add. The biggest gripe I have with my adapter and its associated mounts is that they attach by only two screws. The leads to some flexibility in the mount when you push on it vertically. While thisprobably doesn't lead to any print defects, I would like things to be as rigid as possible! I will likely edit the designs of the adapter and extruder mount to add a 3rd mounting hole. Triangles are better than lines, after all. ;) Look out for an updated design in the coming weeks. I'll have to figure out whether I want to make an all-in-one solution with belt attachment welded to the adapter and a point on top to attach to, or whether to loop behind and underneath the 2020 extrusion and grab in down there. Who knows! :D Update (8/30/2019): I never really liked the giant and bulky fan duct on the original mount, so I have since upgraded to thing:3192682 for extra performance! Update (6/27/2019): Added v3 of X endstop for RAMPS/Makerbot style endstops. Added additional length to clear the mgn12 rail. May reduce travel distance by a mm or so.. Update (6/13/2019): At long last, this should be finally 100%. I removed all endstop triggers, as they are not necessary! Everything is nice and cleaned up and ready to go. I am using the v5 optimized heatset version, and it is working great! I also added some aesthetically... something models. They are based on the standard adapter (not optimized) and may not be as functional. Have fun! Update (6/8/2019): I've finally gotten around to designing a new X endstop mount. I only have about 2mm between the nozzle and bed when x=0. I designed a mount to fix on top of the X motor mount, and moved the switch inward a bit. This should give me some of the travel back, not that it wastotally necessary. I've designed it such that you will need to replace the last M5x10 button head screw on the X motor mount with an M5x12 socket head cap screw. I'm printing it now. Also, at some point I need to remove the x endstop triggers on ALL models. It is unnecessary, as it just reduces home offsets even more. The adapter triggers fine with stock X endstop mounts. Update (5/24/2019): I installed v4 of the optimized version. It probably does not require a trigger block at all. I added a single M5 washer between the extruder carriage and mgn carriage adapter, and it triggers fine. It looks to be about 2mm off the build plate, so the home offsets are X= -2 and Y= -22. It's all working!! Print Settings Printer: Markforged Mark Two Rafts: Doesn't Matter Supports: Yes Resolution: 0.1mm Infill: 20%+ Filament: Markforged Onyx, continuous fiberglass reinforcement Black Notes: Printing on a Markforged Mark Two since I have access to one. 0.1mm layer height with partial continuous fiberglass filament reinforcement because reasons. But really, print at 0.1mm or 0.2mm and use decently high infill and supports. I recommend printing it in the orientation you would install it, with a brim and supports. How I Designed This SolidWorks I just received a Titan Aero (clone) extruder and couldn't find a mount I really liked. Well, none for the BLV MGN AM8, anyways. I found one for the CR-10 that suited my needs (Titan Aero and Volcano), but wouldn't fit, so I made an adapter. I pulled the .step file into SolidWorks and went to town. There are nut holes on the back to add 5mm nyloc nuts to attach the carriage. I'm not sure how long of screws will be needed, but they will be M5, and probably around 40mm+ long to reach the nuts. I wasn't able to find information on the stock CR-10/TEVO Tornado x-carriage hardware. This will be updated when I get everything printed out and test mounted. I added areas underneath with M3 nuts to affix the belt holder into. Designed the x endstop with Fusion 360. Refer to the listed "remixed from" section for additional information. Custom Section BOM You will need either: 2x M5 Nyloc (or standard) nutsor 2x M5 heatset inserts, with OD of 6.3mm 2x M5x40mm low profile screws Either the stock belt attachment or a printed remix like this. I have been using the 16T version from this remix. Titan Aero carriage. Either the original one I made this for, my own remix of that carriage, or even possibly this guy? I found some phillips head screws at Home Depot. These work great. https://www.homedepot.com/p/Everbilt-M5-0-8-x-40-mm-Stainless-Steel-Flat-Head-Phillips-Metric-Machine-Screw-843928/204841932 I forget what length of screws I used, but you will need M3 screws to mount carriage adapter to mgn12 carriage, as per BLV mgn mod BOM. Category: 3D Printer Parts
With this file you will be able to print BLV MGN12 AM8 Titan Aero Creality adapter with your 3D printer. Click on the button and save the file on your computer to work, edit or customize your design. You can also find more 3D designs for printers on BLV MGN12 AM8 Titan Aero Creality adapter.