BLV Front Panel divided to fit a 200mm x200mm Print Area
thingiverse
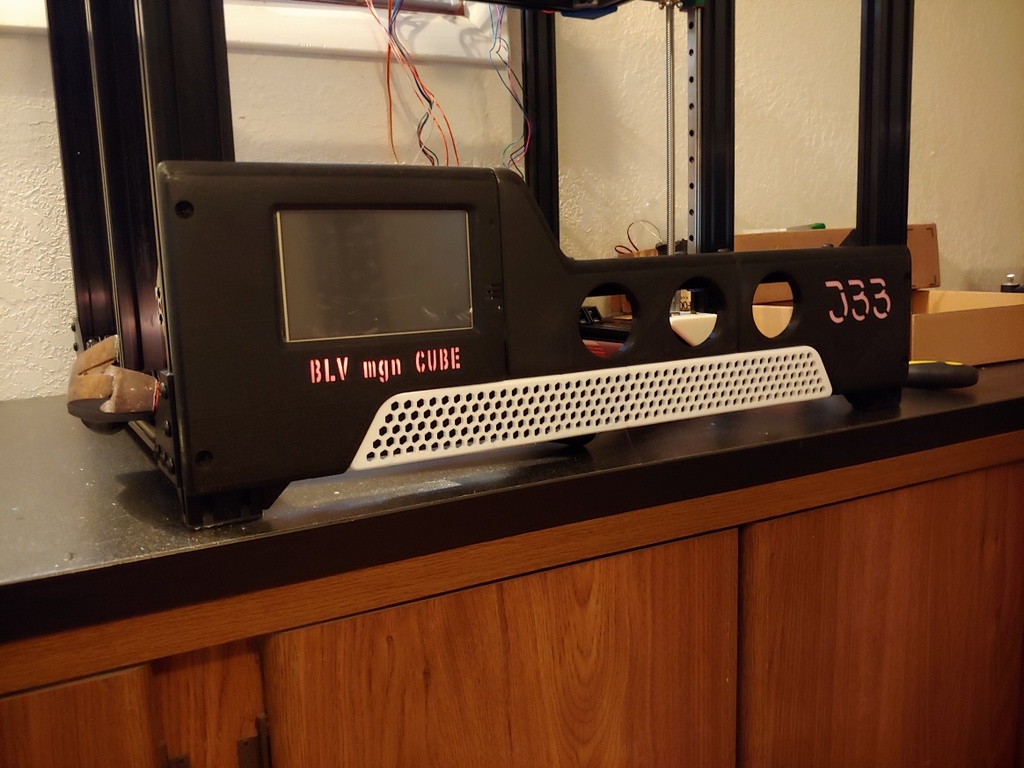
I adjusted the panel seam to space them evenly, ensuring a perfect fit within my build area. I relocated the Screen to the left and the LEDs in sync with it, keeping the seam perfectly centered between them. This adjustment resulted in the Panel intersecting with a 45-degree corner, so I elevated the screen, creating a blank space underneath that I filled with the printer's name. For my personal right panel, I added my initials, leaving an empty spot for those who prefer it. I included the original file and created a blank placeholder for modification purposes. Additionally, I will provide the step file for users to customize as they see fit. The attached picture showcases my initial assembly to verify that everything was in order before proceeding. A flashlight behind the lettering illuminated them beautifully, leading me to consider installing an LED strip behind them at a later time. I hope this solution proves helpful to those with smaller print areas, enabling them to achieve similar results with ease and precision.
With this file you will be able to print BLV Front Panel divided to fit a 200mm x200mm Print Area with your 3D printer. Click on the button and save the file on your computer to work, edit or customize your design. You can also find more 3D designs for printers on BLV Front Panel divided to fit a 200mm x200mm Print Area.