BlueSpark mounting bracket
prusaprinters
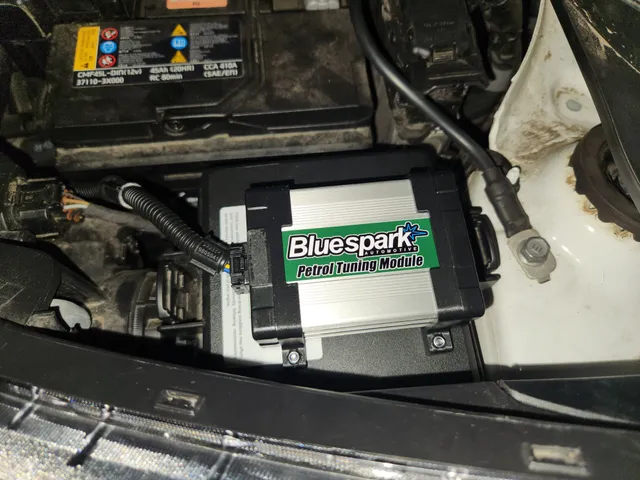
Simple mounting bracket for BlueSpark Tuning module, to keep it secure and bolted in place. Instructions below for fitting for a Kia Picanto GT, where I've mounted on the top of plastic fuse box cover, however can use the bracket to act as a guide for other positions, cars etc. Required parts2x Bracket1x Hole Template4x M3 x 12mm Cap Head Screw4x M3 nylock nutsPrinting notesMaterialsBrackets - ASA, Nylon, etc due to being located under a warm bonnet. Hole Template - AnythingPerimeters - 4Supports - off (brackets designed to be printed as orientated)Infill - 20%Fitting instructions Use hole template to drill holes in fuse cover. Note orientation of text, otherwise mounting will be at 90 degrees, and cables may not reach.Place template hard against spare fuse storage on inside to get a good position.Use the guide to position the holes so screws won't cover text of the fuse guide.Drill holes using 3mm bit. Fitting of bracketsUndo the adjustment end of the tuning module using torx bit.Slide on the brackets with cut areas facing each other. (Cut back area on top is to allow full exposure of BlueSpark logo)Secure the adjustment end back in place. Mounting of tuning moduleUse M3 screw to pre-locate nylocks into bracketsOrientate with cable clip to Front of fuse box.Mount tuning module through pre-drilled holes, using M3x12mm Cap heads.Clip fuse box back into car, clip in cables, enjoy the extra horsepower!
With this file you will be able to print BlueSpark mounting bracket with your 3D printer. Click on the button and save the file on your computer to work, edit or customize your design. You can also find more 3D designs for printers on BlueSpark mounting bracket.
