Blooming Flower remix
prusaprinters
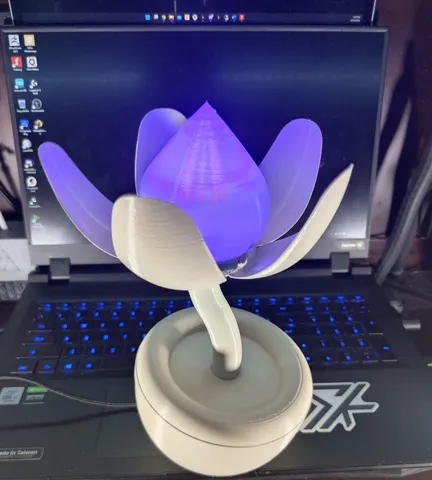
Blooming Flower remix based on the original model by Jason Suterhttps://makezine.com/projects/3d-print-this-blooming-flower-night-light/In this project a servo is used to pull on a copper wire that causes the petal on the flower to close while the LEDs in the bulb change colors.This was remixed to use the parts included in the Alien3D.us UFO subscription boxes.Parts needed:1 – ESP8266 Microcontroller1 – NeoPixel 8 Led ring1 – 22 gauge copper wire1 – SG90 micro servo30 – M3 screws (15 minumum there are several places where some CA glue or 3DGloop would work as well)Several wires to connect the parts together.The changes include removing the encoder button, changing from an Arduino Nano to an ESP8266, and changing the NeoPixel ring used. I also provided a 3d printable small rod to use in place of the threaded rod they use in the petals. In the original project they used a steel wire for the petal movement, we recommend a solid core wire. A 22 Gauge wire worked best for me. The only part that needs supports is the receptable lower, and it only really needs supports in the side dome, the outside you can get away with no supports. it might look a little messy but it is on the bottom and not seen.You can follow their original video for most of the assembly, the only change from the video is the LED mounting and the electronics, please see the included picture to see how you can mount the NeoPixel 8 led ring. You use 2 of the clips to hold it in place. And also the wiring diagram in the pictures to see how I connected all the wires. I stripped the last end of the copper wire and was able to place it into the furthest opening in the servo arm, you will need to play a bit with the length of the wire to make sure the flower fully opens and closes. My suggestion is to hold the flower upside down and close all the petals, run the esp8266 and turn it off when the servo has reached its max and it about to turn back. Then attach the wire, this should ensure that the petals are fully closed when the servo is at max. The In pin on the neopixel ring is connected to pin D2 on the esp8266The data pin on the servo is connected to pin D4.The + and - should be connected to the 5v and GND on the esp8266 When it comes to programming the ESP8266 the only library you will need to import is the Adafruit NeoPixel. Once you open the included .ino file in the Arduino Editor app, you will click on sketch, include library, manage library. Then do a search for Adafruit NeoPixel and install (mine says update because I had installed in before) After that make sure you select the correct board, and port. i cant specify what port you will see depending on what is plugged into your pc.Then click the upload button and the Arduino should be programmed.
With this file you will be able to print Blooming Flower remix with your 3D printer. Click on the button and save the file on your computer to work, edit or customize your design. You can also find more 3D designs for printers on Blooming Flower remix.