BIQU BX upgrades by CippyO
prusaprinters
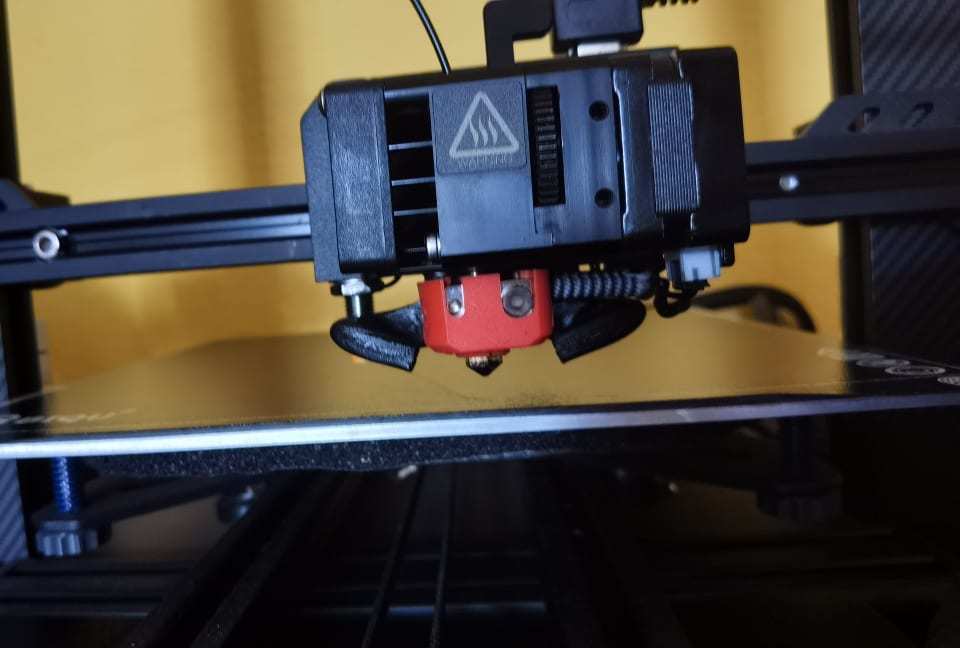
<p>I have made a bunch of printable mods for the BX. Every part is rotated to the best printing orientation.</p> <p>Tiltable, rotatable screen mount</p> <p>No support needed. Remove the sacrificial layer with a lexan body reamer/drill, or a step drill.</p> <p>You will need 4 m3 screws for the hinges: 2 m3 by 20mm and 2 m3 by 35-40mm, and at least one m3 washer per screw. You might have to raise the printer in order to be able to set the screen completely vertical. There are printable legs that can raise the printer with about 1-2 cm. It was necessary to lower the screen to avoid collision with the X gantry, especially when printing from usb. You will need 2 spacers(3x6x2mm) in order to provide a leveled mount for the screen mount. Also you'll need 4 m2.5 by 6mm screw to mount the screen. I have not tested the Raspberry compatibility, but i assume if you stretch the spacer and use a very long m2.5 screw it can work.</p> <p>Files:</p> <p>4040 mount.stl</p> <p>arm.stl</p> <p>screen_mount.stl</p> <p>screen.stl</p> <p>3x6x2spacer.stl</p> <p>X Endcaps</p> <p>I really like the design of the X from the BX logo, and don't like the stock endcaps that they included with the printer for the 4040 extrusions. The Thin one goes into the front left side of the printer, and to the rear, the Thick one goes to the right side, and fits into the screen mount that i designed. I found it to be a precise fit, but but if it is too loose or tight for you, try to adjust the flow rate during the print of the pins.</p> <p>Files:</p> <p>X endcap thin.stl</p> <p>X endcap thick.stl</p> <p>Light Bar</p> <p>I used the supplied spare T nuts and 2 m4 by 8mm screw to mount the led bar to the back of the X carriage 2020 extrusion. It can mount 10 pc of 5mm white LED and if you can wire them in series, they can run fine from the 24v psu. I have routed my leds parallel with the hotend cooling fan, so they are on only when the hotend is hot. Alternatively you can route it directly from the power supply with a toggle switch directly. Or you can use a led strip, or COB led or whatever you prefer.</p> <p>File:</p> <p>light.stl</p> <p>Electronics top cover</p> <p>It is a 2 pc print since the end part is bigger than the buildplate of the BX. It allows better airflow for the electronics cooling 5020 fan, and also provides an air outlet. This way if you reduce the voltage of the 5020 blower fan with a buck converter, it will be quiet, yet still can provide sufficient cooling for the electronics. I have routed the screen's cable to come out through the right panel's opening, providing some more flexibility.</p> <p>Files:</p> <p>right panel.stl</p> <p>left panel.stl</p> <p>Part cooling fan(Duckling)</p> <p>After a lot of testing and about a dozen previous variants, i ended up with this design, as it can provide better cooling performance than the stock duct in all direction, yet does not ruin front visibility during printing. Since this design does not include the back plate behind the fan, it allows a slightly better airflow, but if you plan to use stock screws, you'll need to print a 2.5x4.5x2mm spacer and place it at the head of the screw that goes to the top left corner of the fan. The shroud mounts to the bottom right corner of the fan with the stock screw. I found it sufficient to mount it only via the one screw, but the shroud's design include a little tab on the left side that you can glue to the fan with something that is easy to remove. Also a small piece of tape can be applied at the meeting edges to seal them from leakage, and also help with mounting it.</p> <p>The Duckling does need support!! 2 small pillars are needed where the duct turns inwards. Also i recommend to insert support to the insides of the duct, but only to the horizontal parts! don't put support to the tubes because you won't be able to remove it afterwards. If you have trouble with printing the part, use lower layer heights, and slow your print down. If the duct does not align parallel with the fan, it is advised to file the meeting corner next to the screw. In theory the duct can fit with the stock heatblock orientation, but i'd advise to rotate it 90 degrees towards the front of the printer, for better clearance.</p> <p>Files:</p> <p>duckling.stl</p> <p>2.5x4.5x2spacer.stl</p> <p>Printing:</p> <p>Most part does not need support, i used a sacrificial layer for the holes where it made things simpler.</p> <p>In the future i'm planning a guide for the flexible buildplate, so you don't have to align it with hand, every time you remove it. Also i'll update this thing with more pictures, and details if needed. If you have any question, suggestion don't hesitate to contact me.</p> <h3>Print Settings</h3> <p><strong>Printer:</strong></p> <p>Biqu BX</p> <p><strong>Rafts:</strong></p> <p>No</p> <p><strong>Supports:</strong></p> <p>Yes</p> <p><strong>Resolution:</strong></p> <p>100-200</p> <p><strong>Infill:</strong></p> <p>15-25</p> <p><strong>Filament:</strong> any PETG or PLA</p> Category: 3D Printer Parts
With this file you will be able to print BIQU BX upgrades by CippyO with your 3D printer. Click on the button and save the file on your computer to work, edit or customize your design. You can also find more 3D designs for printers on BIQU BX upgrades by CippyO.
