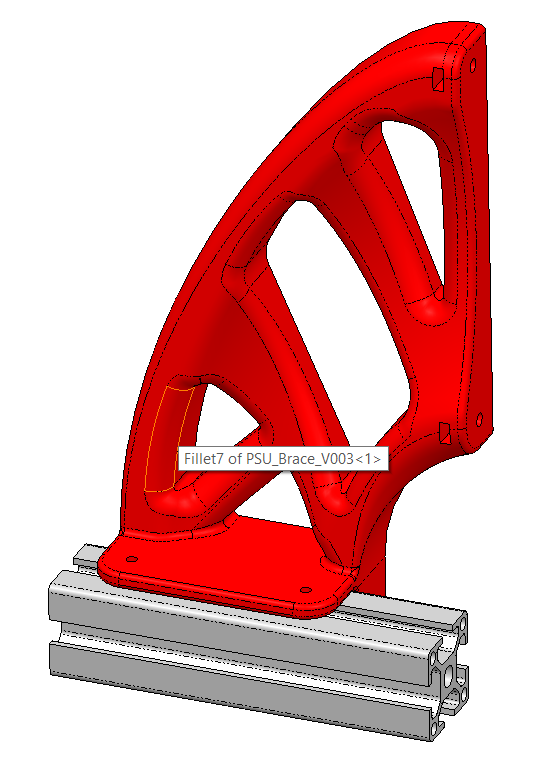
Bionic PSU Brace for Prusa I3 MK3 / MK3s
thingiverse
Anyone who builds an enclosure should take out the PSU from the printer and set it aside. Prusa offers a brace model that is meant to stiffen up the frame when you remove the PSU. I didn't like this design very much, as it only uses the mounting points of the original PSU, so I made my own. I happen to be experimenting with topology optimization software right now, and so I ran several loops and approximated what the topology optimization showed. The screenshot is from an earlier version where I used three mounting points, but then I realized that the middle one is indeed pretty useless. Print 1x brace, 2x Clampnut You will need some additional hardware: 2x M4 hex nuts, 2x M4x15 bolts (preferably with a flat head). Use the original PSU mounting hardware for the top holes. Also, you'll need 2x M3 hex nuts to insert into the clamp nuts, and M3x20 bolts (I used leftovers from my Prusa build). Washers underneath the bolts are recommended, to distribute the pressure better to the printed material. If you use a thicker washer, you may need M3x25.
With this file you will be able to print Bionic PSU Brace for Prusa I3 MK3 / MK3s with your 3D printer. Click on the button and save the file on your computer to work, edit or customize your design. You can also find more 3D designs for printers on Bionic PSU Brace for Prusa I3 MK3 / MK3s.
