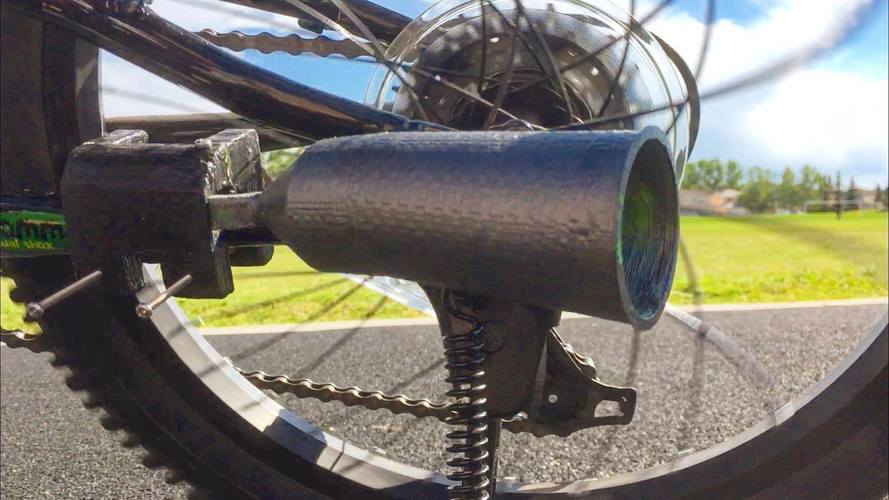
Bike Motorcycle Sound Maker
pinshape
EDIT: this is a prototype. I will be making a flexible part for the bike soon. The clip doesn't clip on well and requires glue from a hot glue gun to grip. Description Turn your bike into a motorcycle! This little gadget amplifies the pitter-platter of a single card against the spokes to a loud motorcycle roar. Print one out and be the coolest kid (or adult) on the block! Check it out in action: https://youtu.be/levY7dzZ-DY (turn up the sound!) Note: the "amplifier" is optional and the only part needed to print to make the sound is the "bike clip". I apologize for the large protruding screws in the video - I couldn't find smaller screws at the time. Make sure you look at the blueprint (it's in mm) for the width and the length of the part that clips onto the bike to ensure that the part fits your bike. The clip (without modifications) fits a bar with a maximum height of 2.19 cm and a width of 18 cm. (It fits three bikes I have, so you shouldn't have to change much around.) BOM (bill of materials) 1X Bike_Clip.stl 1X amplifier-horn.stl (optional) 2X Screws with 3 mm diameter (depending on how much your plastic shrinks. The holes are 4mm in diameter) and approximately 4 cm in length 2X nuts for the screws 1X screw with 3 mm diameter (and same size precaution as above) and approximately 1.4 cm in length 1X playing card or sheet of similar width and durability (cut to a dimension of 5 cm by the distance from the clip to the spokes) Tips for 3D Printing Bike clip It would be best to use ABS for this part - since ABS is flexible, it will be easier to clip the part on. For ABS, make sure you print it a little bigger than you want it to be because ABS shrinks a lot (I gave it +0.3mm). For PLA printing, make sure your part won't have to bend too much to fit the bike. Amplifier/Horn (optional) Make it a solid part because most of the object is only 1.6 mm in width. No supports. Make sure to slow down the print at near the end or set a minimum layer time to ensure a smooth finish. Build Notes: The playing card should be cut out to a width of 5 cm to fit into the card slot of the bike clip. Screw the small screw into the hole near the card slot and note the distance on the card. Then, poke a hole into the area on the playing card so that the screw can go all the way through. The length of the card should be set so that it touches the spokes but not to the other side (play around with the length, adding more cards and cutting slots into the card for cool sound effects). To attach the horn to the clip, super-glue the long side to the left side of the triangle in the bike clip. The two screws on the bottom of the bike clip should go all the way through and secured at the other end with a nut. My build: I printed out the parts in green ABS at a speed of 30 mm/s on a DIY Prusa i3 rework. I noticed my X AND Y axis motors were vibrating a lot and caused oscillations in the print (I tried changing the voltage/amperage - please help if you have suggestions). Fixed up some warps and cracks with air-dry clay (this is a really useful technique to smooth out prints without sanding or using acetone). Painted the parts with two layers of acrylic paint - black for the bike clip and metallic silver for the amplifier. Noticed my design flaw so I had to force the amplifier into its position (changed it on the final STL). Screwed the other parts on and let it roar!! Had fun :D Design inspired by Turbospoke. This is a work in progress, so if you have any suggestions or questions about the design, leave them below and I'll add to the instructions and/or change the design accordingly! If anyone needs the original file Inventor files or needs a screw size change, I'd be happy to give it out!
With this file you will be able to print Bike Motorcycle Sound Maker with your 3D printer. Click on the button and save the file on your computer to work, edit or customize your design. You can also find more 3D designs for printers on Bike Motorcycle Sound Maker.
