Big Einsy Case for Bear Upgrade
prusaprinters
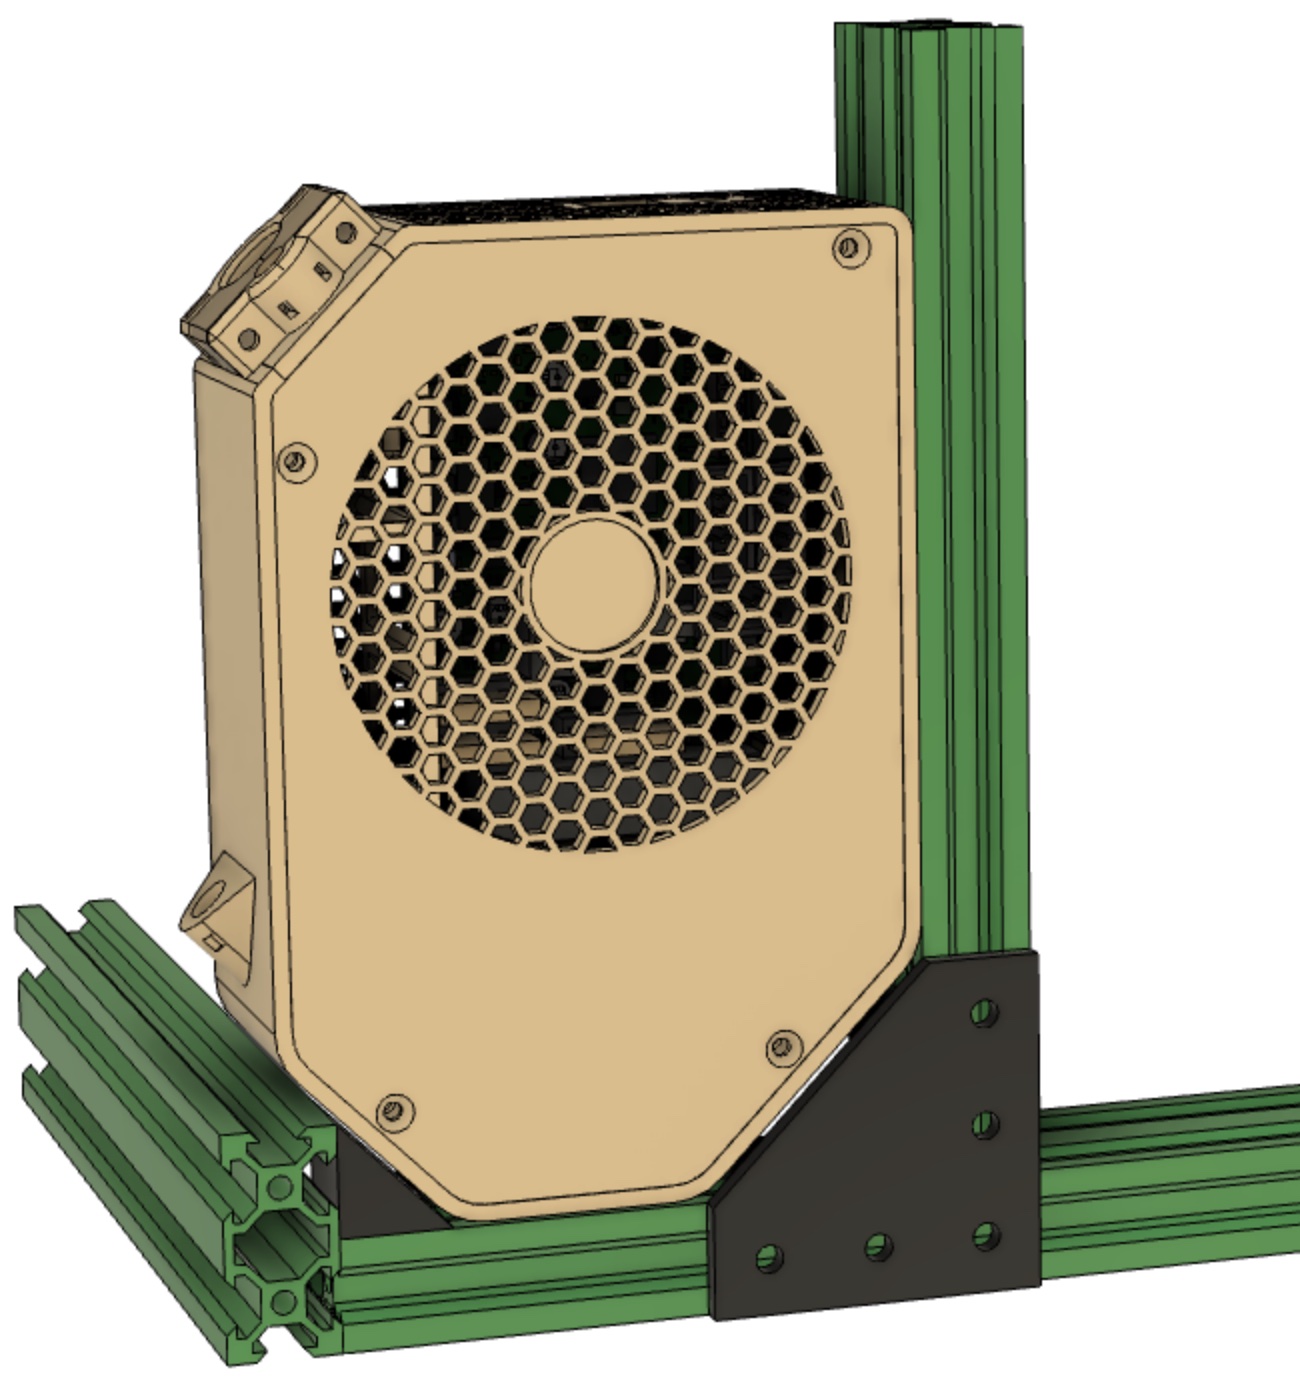
<p><strong>Notable changes</strong></p><ul><li>Geometry added to mate with the Bear Upgrade V-Slot Extrusions<ul><li>Use either drop-in or standard T-Nuts</li><li>Use either M5-10 socket head or M5-8 flat head screws</li><li>Temporary M3-12 screw added to aid in sliding T-Nut alignment.</li></ul></li><li>Case is 3mm wider to accommodate M5 socket head screws</li><li>Vent pattern inspired by Prusament filament spools.</li><li>Extruder cable clamp diameter reduced to 13mm with tie wrap securing.</li><li>The square and hex nut cavities were resized for better retention.</li></ul><p><strong>Printing</strong></p><ul><li>Layer height: 0.3mm Draft</li><li>Supports: “Support on build plate only” with painted support blocking. See .3mf file for details.</li><li>Filament: Prusament PETG</li></ul><p><strong>Mounting to Bear Upgrade Frame</strong></p><ul><li>Required Hardware<ul><li>6 M3 square nuts</li><li>4 M3 hex nuts</li><li>4 M3-10 screws</li><li>2 M3-25 screws</li><li>4 M3-10 flat head screws</li><li>3 M5-10 socket head or M5-8 flat head screws</li><li>3 M5 T-Nuts, drop-in or sliding</li></ul></li><li>Clean out all holes with a 3mm or 5mm drill bit. Pay particular attention to the four cover mounts. The 3mm hole extends fully through the mounts to aid in clearing debris.</li><li>Insert six square nuts, four in cover mounts, two in the clamp.</li><li>Insert four hex nuts into the back by drawing them through with a M3-12 or larger screw.</li><li>Remove the vertical extrusions's top plate and insert a sliding T-Nut if available.</li><li>Insert an M5 screw in the single V-Slot hole nearest the back. Partially thread a drop-in T-Nut and secure the case to the frame. Using a drop-in T-Nut precludes the need to remove gussets.</li><li>Slide the two sliding T-Nuts to the top of the extrusion. Insert a temporary M3 screw hole as shown. Then, let gravity slide a T-Nut into position and secure. Repeat for second _T-Nut.</li><li>Install the Einsy board with four M3-10 screws.</li></ul><p><strong>Wiring</strong></p><p>I found the following order worked well for me.</p><ul><li>Remove the three fuses</li><li>LCD ribbon cables</li><li>Power Panic</li><li>PSU cables</li><li>Heat Bed Power</li><li>Hot End Heater</li><li>Extruder Motor</li><li>Z Axis Motors (2)</li><li>Y Axis Motor</li><li>X Axis Motor</li><li>Left Hot End Fan</li><li>Front Hot End Fan</li><li>Filament Sensor (lower row of pins)</li><li>Heat Bed Thermistor</li><li>Hot End Thermistor</li><li>Super Pinda</li><li>Install fuses</li></ul>
With this file you will be able to print Big Einsy Case for Bear Upgrade with your 3D printer. Click on the button and save the file on your computer to work, edit or customize your design. You can also find more 3D designs for printers on Big Einsy Case for Bear Upgrade.