Bicycle U-Lock Mounting System
prusaprinters
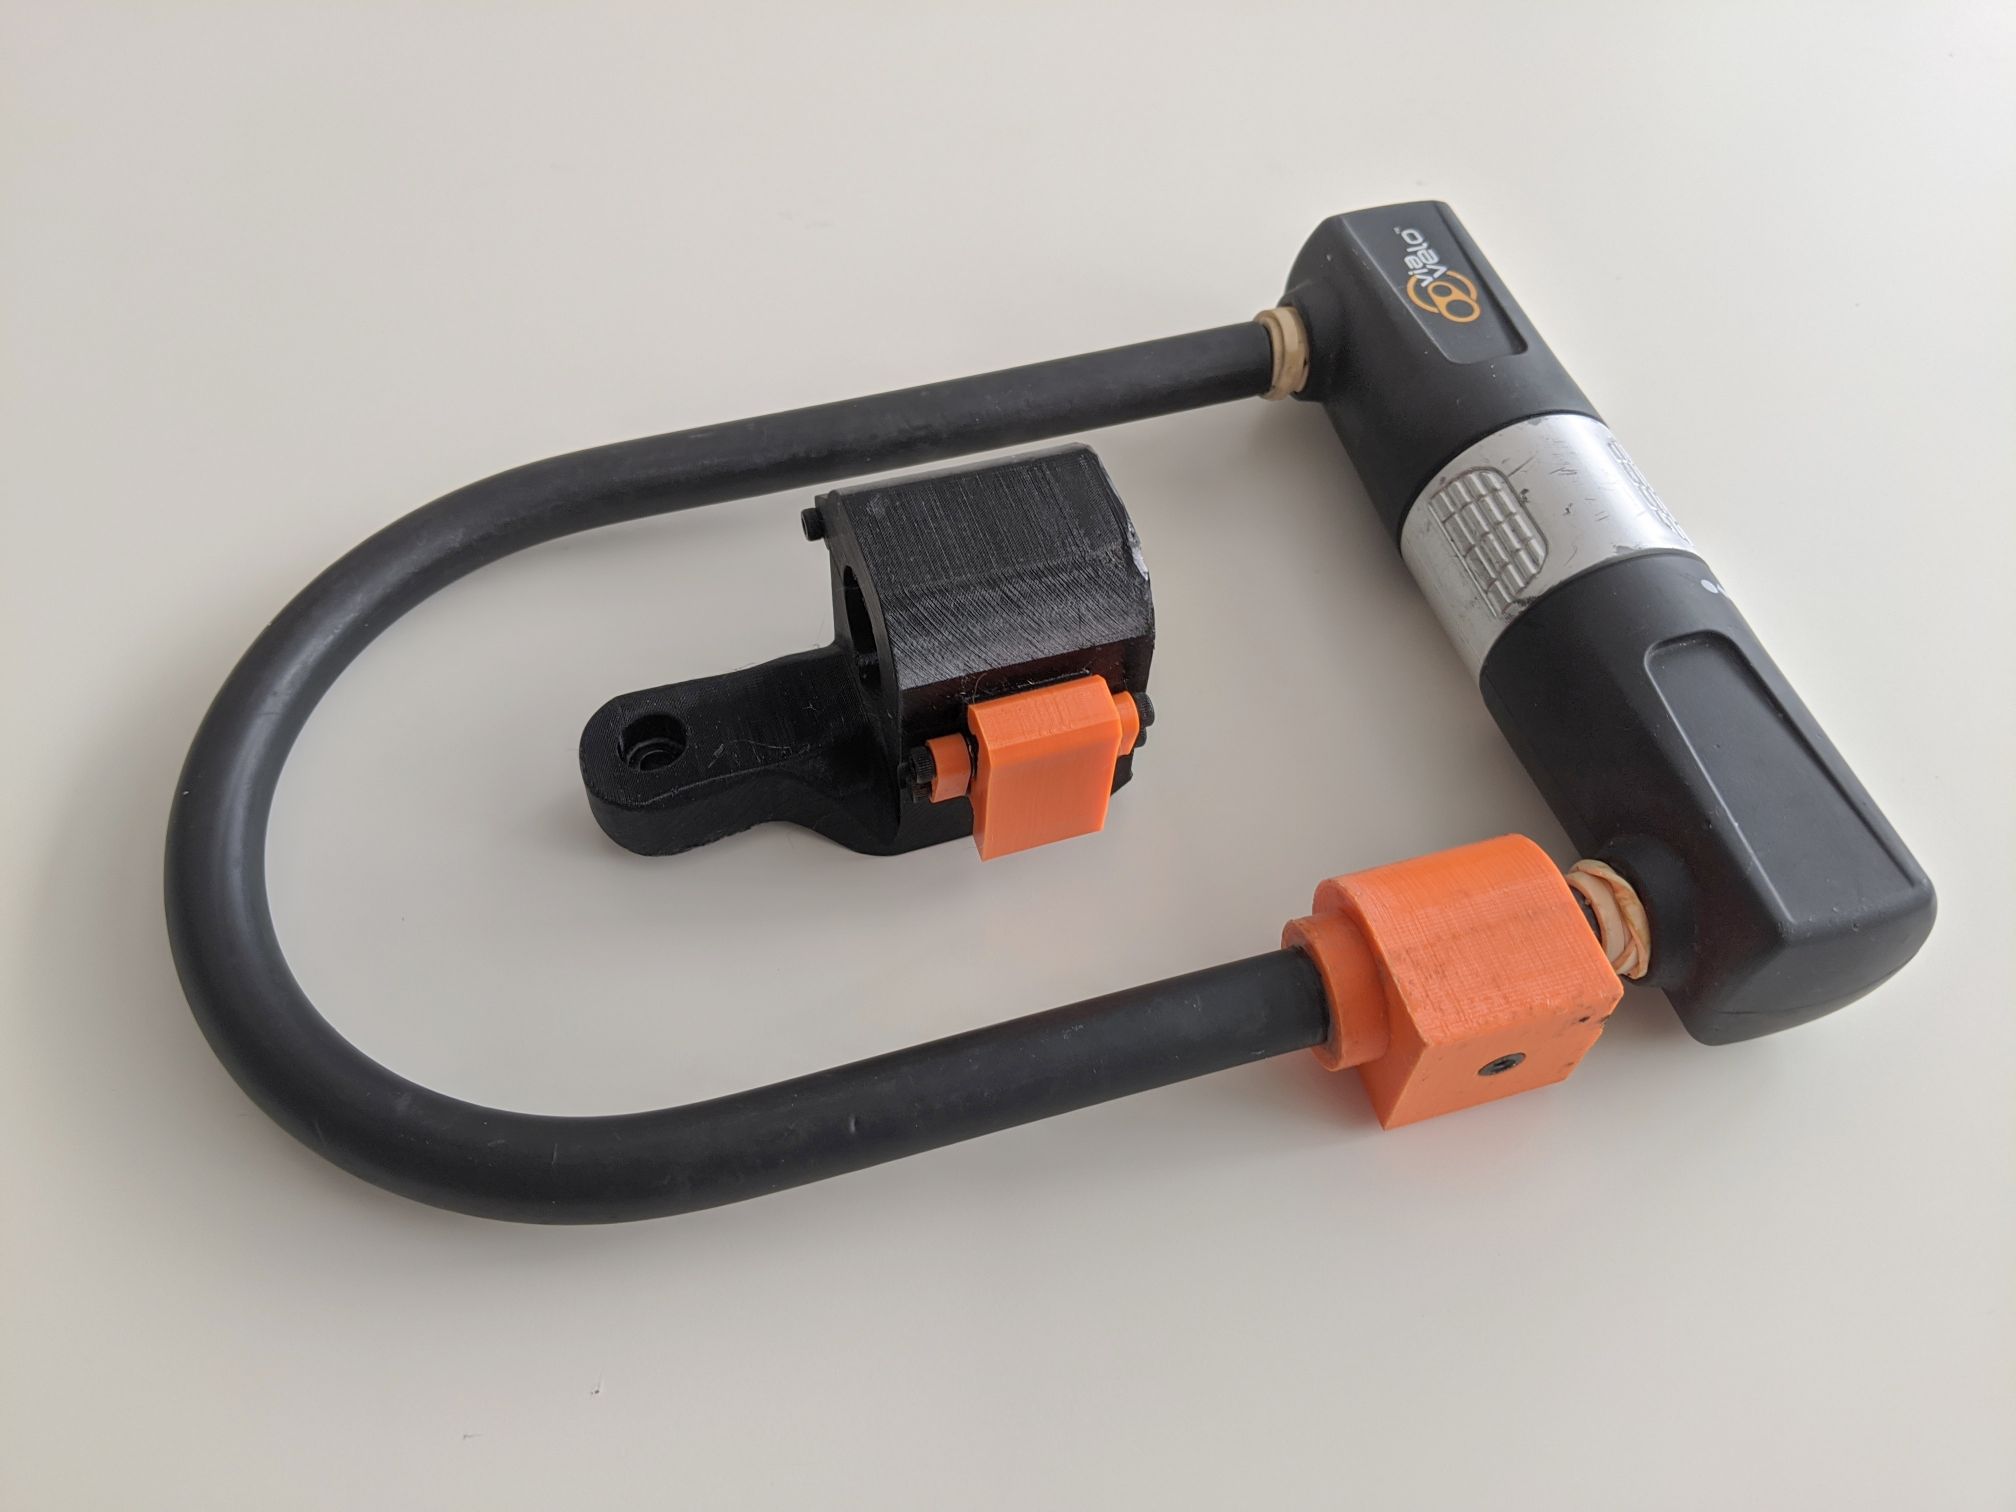
<p>A ruggedized system that allows one to store a bicycle U-lock in the frame of a bicycle using the bicycle's bottle cage. This system consists of two components. The first is an adapter that is secured to the shank of a U-lock with a set screw and/or adhesive. This adapter fits U-locks with a 12 mm shank. The second component is the mount itself that is fixed to the bike using the bike's bottle cage mounting points (M5 screws, 64 mm on-center). The mount securely holds the U-lock using a toggle-action latching system.</p> <p>I've provided the STL files for each component as well as the 3MF build plate files I used to print the components.</p> <p>I went through three revisions of this design. This revision held up to several months of my daily commute. While probably not suitable for rough trails, I've found it held up very well to packed gravel, curbs, and potholes through the rain and sunshine. I did find that cold weather (near and sub-zero temperatures) does embrittle the components somewhat. I've made changes to this revision to help combat that issue.</p> <h3>Print instructions</h3><h3>Required Non-Printed Components </h3> <ul> <li>4x M3 x 15mm socket head cap screws (SHCS)</li> <li>2x M3 x 20mm SHCS</li> <li>8x M3 Nuts</li> <li>6x M3 Washers</li> <li>1x M4 x 8mm SHCP</li> <li>1x M4 nut</li> </ul> <h3> Printing Instructions </h3><p>I highly recommend printing all components with PETG, as the system experiences pretty significant vibration and shock loading during riding. PLA is likely to be far too brittle for this application, although I have not tested PLA components.</p> <p>I've included both the STL files (files named PartXX) for each component, as well as the 3MF files (files named BuildPlateXX) containing the as-printed parts as well as the PrusaSlicer settings I found worked best. My recommendations for each component are as follows.</p> <p>Linkage components: Print with 4 perimeters and 100% infill.</p> <p>Lock Adapter: 3 perimeters and 50% infill</p> <p>Upper and Lower Receivers: Both receivers should be printed with 3 perimeters and 50% infill. Additionally, I found that printing both components at a 45-degree angle strengthens the components, especially the bolt holes (see the image in the gallery above). I found that earlier versions broke across the layer lines when I printed horizontally while printing vertically places requires a lot of difficult-to-remove support material. Printing at a 45-degree angle was a good compromise between strength and ease of post-processing. The 3MF build plates provided are already positioned at this angle.</p> <h3> Assembly and Installation </h3><h4> Lock Adapter </h4><p>There are two options to install the lock adapter. First, an M4 x 8mm SHCS can be used as a set screw. An M4 nut must be placed in the recess in the bore prior to installation on the lock (see the image in the gallery). I found that a set screw alone did not work too well and the lock tended to rotate in the adapter while riding, as the shackle of most locks is hardened. What I found worked better was using epoxy to glue the adapter to the lock in conjunction with the set screw. This is why the bore of the lock adapter is fluted; to help retain adhesive and provide a better bond. While this is a more permanent option, I have found it works a lot better, so long as you don't want to take the lock adapter off the U-lock.</p> <h4> Mount Assembly </h4><p>Connect the upper and lower receivers using the M3 x 20mm SHCS and nuts, placing a washer on the outside of the parts. Tighten until snug, but make sure the components can still move.</p> <p>Install the latch components using the M3 x 15mm SHCS and nuts, placing a washer between the components to ensure that plastic-to-plastic contact is avoided. Again, tighten until snug, but ensure the components can still move. I found that a needle-nosed pair of pliers worked well to hold the nuts while tightening the SHCS with a hex key.</p> <p>Given the vibration this system experiences, I used Locktite to ensure the screws did not loosen during riding.</p> <p>I used the screws supplied with my bike to install the mounting system. I recommend placing something between the mount assembly and bike to prevent scratching. I used drawer liner material, but wide elastic bands should also work. Placing a small amount of the same material in the bottom of the lock adapter socket also helps stop the lock from vibrating and provides a solid, satisfying toggle action when engaging the latch.</p>
With this file you will be able to print Bicycle U-Lock Mounting System with your 3D printer. Click on the button and save the file on your computer to work, edit or customize your design. You can also find more 3D designs for printers on Bicycle U-Lock Mounting System.
